This post may contain affiliate links. Full disclosure policy
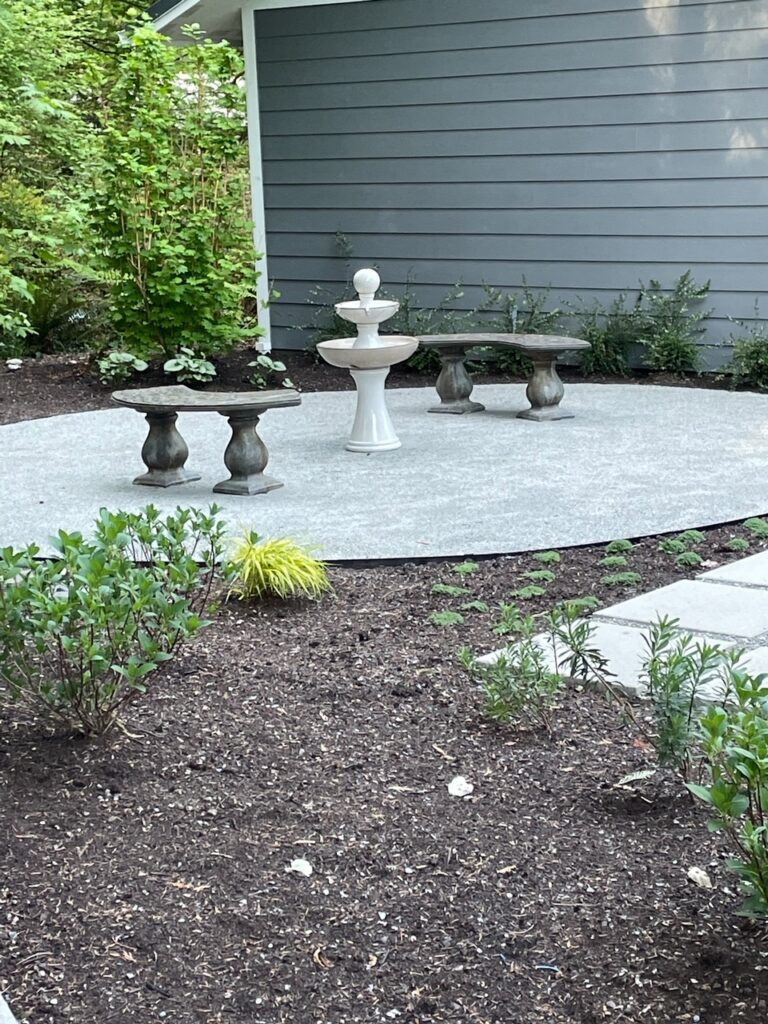
The last remodeling project for our new home is finally finished, and I couldn’t be more pleased with the results. Read on for a description, plus before and after photos of our new garden!
The Before – Trust Me, It Wasn’t Pretty
If you’ve been following my blog for a while, you know that we bought a 1970s rancher in the summer of 2021. Within days of moving in, we started a series of remodeling projects that transformed a house that wasn’t really our style into a real home.
If you missed them before, you may want to check out my earlier posts about….
- The start of our remodeling journey with lots of before photos of the house.
- The story of how two teeny bedrooms became my spacious and functional sewing and writing studio.
- A post on turning our kitchen from “meh” to a “mah-velous” space I love to cook in.
- And, especially, Part One of the Garage to Primary Suite Conversion
Because while turning our old garage into a comfortable, spacious primary suite, we added a set of French sliding doors to bring light into an otherwise dark space and add architectural interest.
Those doors definitely did the trick!
However, there was a downside. Looking through the doors gave us a really great view of a side yard I had named “the cursed earth,” home to rocks, dirt, weeds, and a wood pile.
It wasn’t a big deal when the side yard abutted the windowless wall of the old garage. But nobody wants to wake up on a sunny morning, look out the window, and see the cursed earth.
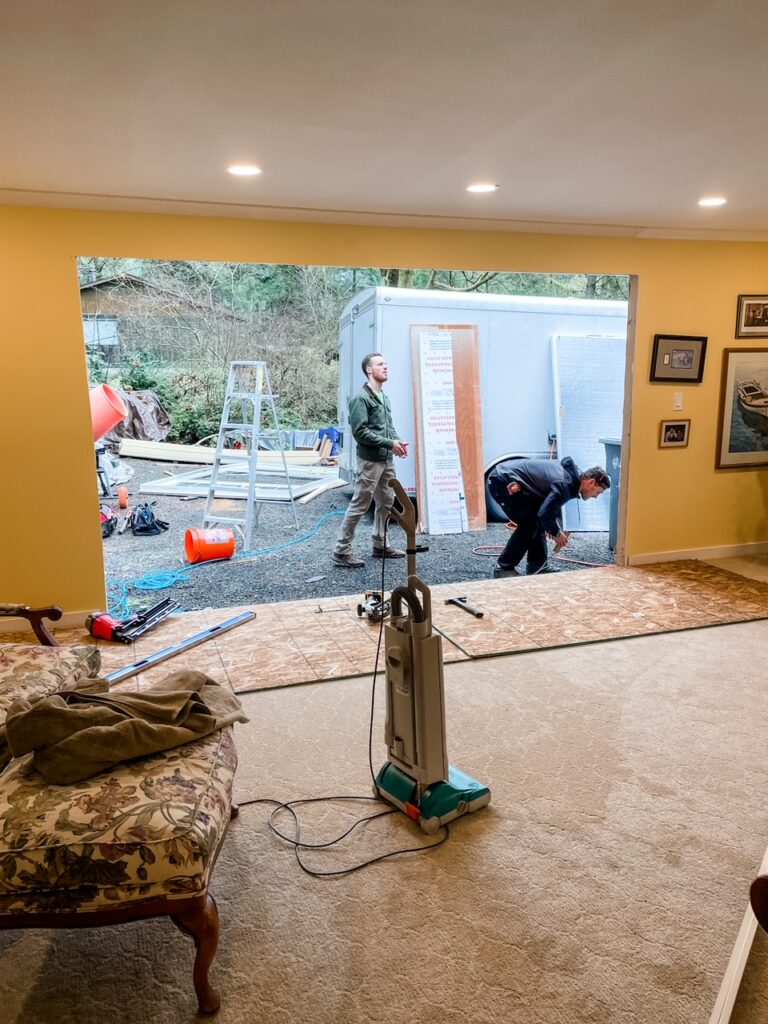
I don’t have a lot of photos of the before because, honestly, there was nothing photogenic about it. But here’s a shot looking through the hole where the doors were eventually installed that’ll give you a good idea of what we were dealing with.
Not exactly a “garden spot,” am I right?
But nearly two years after we started our remodeling journey, that situation has been rectified.
Garden Before And After – The Deck And The Garden Gate
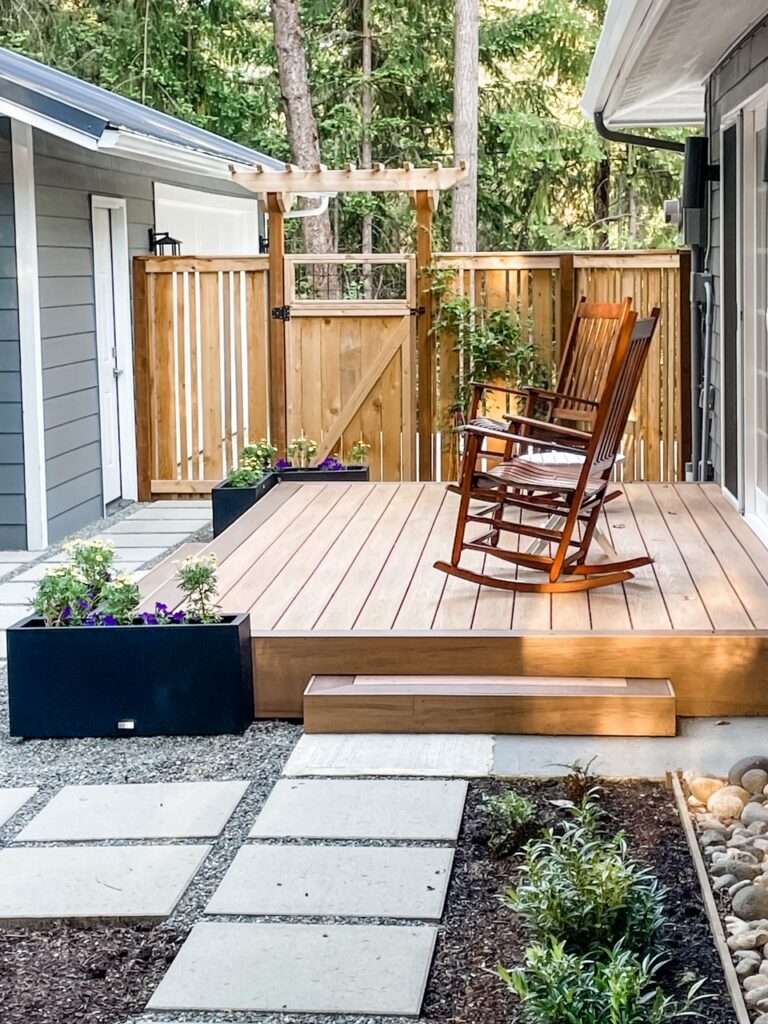
The first thing step in the transformation from “cursed earth” to a peaceful garden was building the deck. This gave us a nice spot to place a couple of rocking chairs. And the floor of our bedroom was a few inches higher than ground level, providing a step down into what would be the new garden.
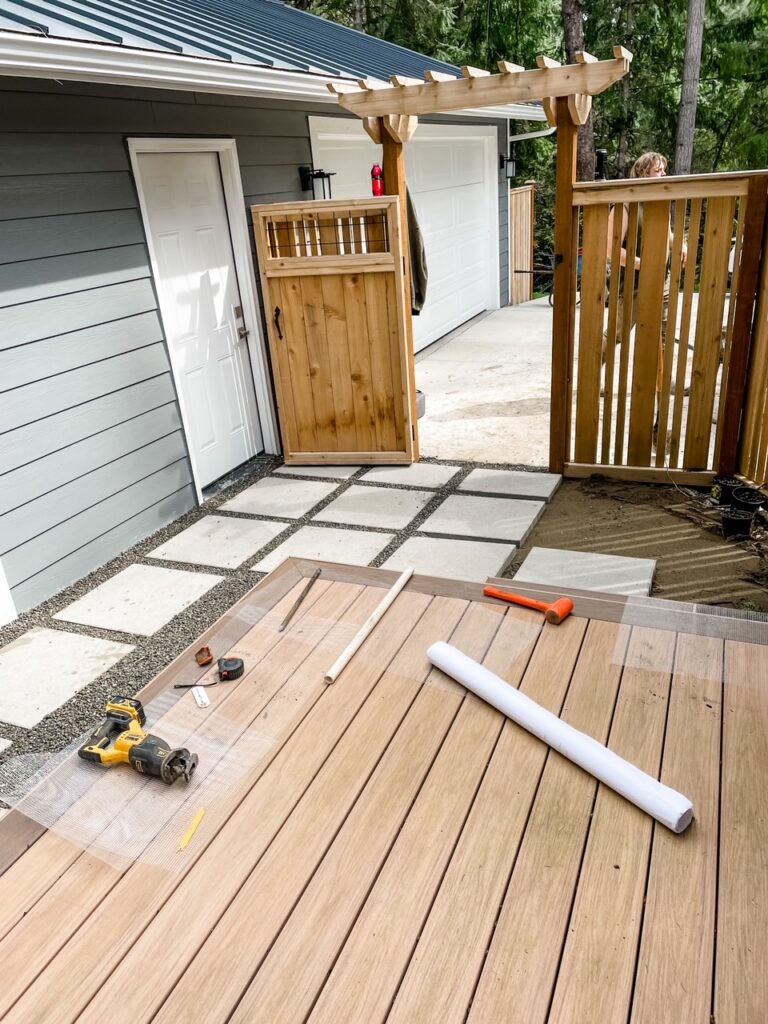
A wall of the detached garage we built to replace the one which was now our bedroom helped define the garden space, giving it a cozier feel. And since we didn’t want a view of the driveway while sipping coffee in our rockers, we installed some fencing and a gate between the new garage and the house.
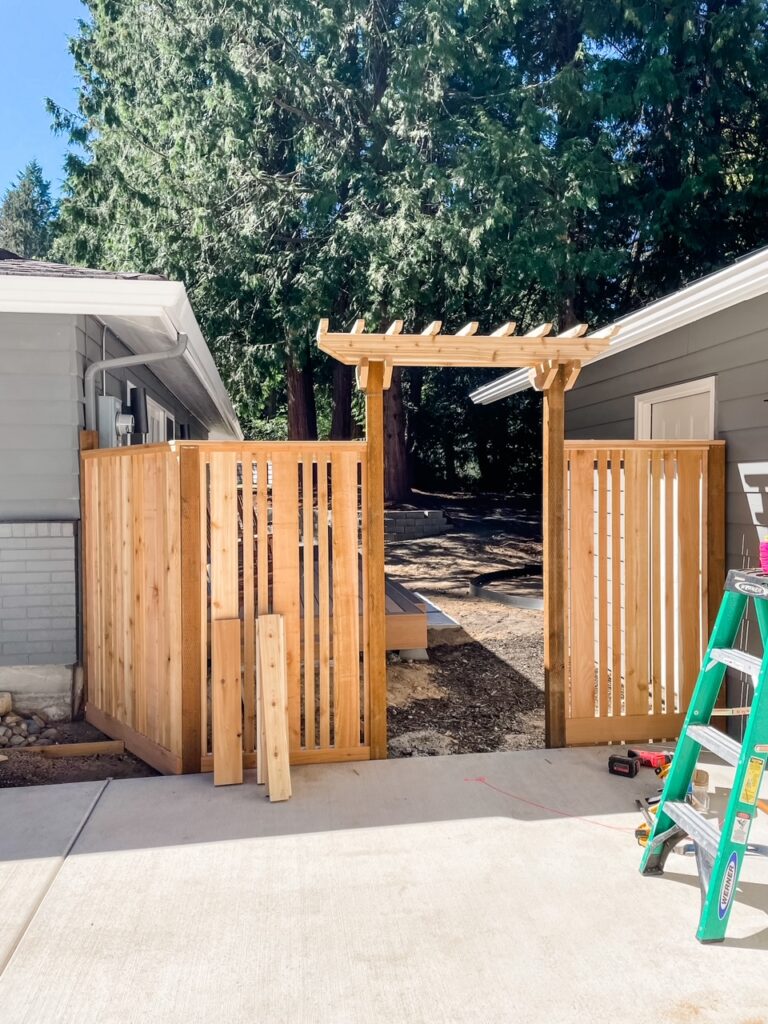
That phase of our garden project was completed last summer while our contractor was still around. The deck and the gate turned out so well and added a lot. After that, we were stalled for almost a year, waiting for an opening in the landscape crew’s schedule.
Garden Before And After – The Hardscape
While we were waiting, we worked with a local garden designer to create a master plan for all our outdoor spaces.
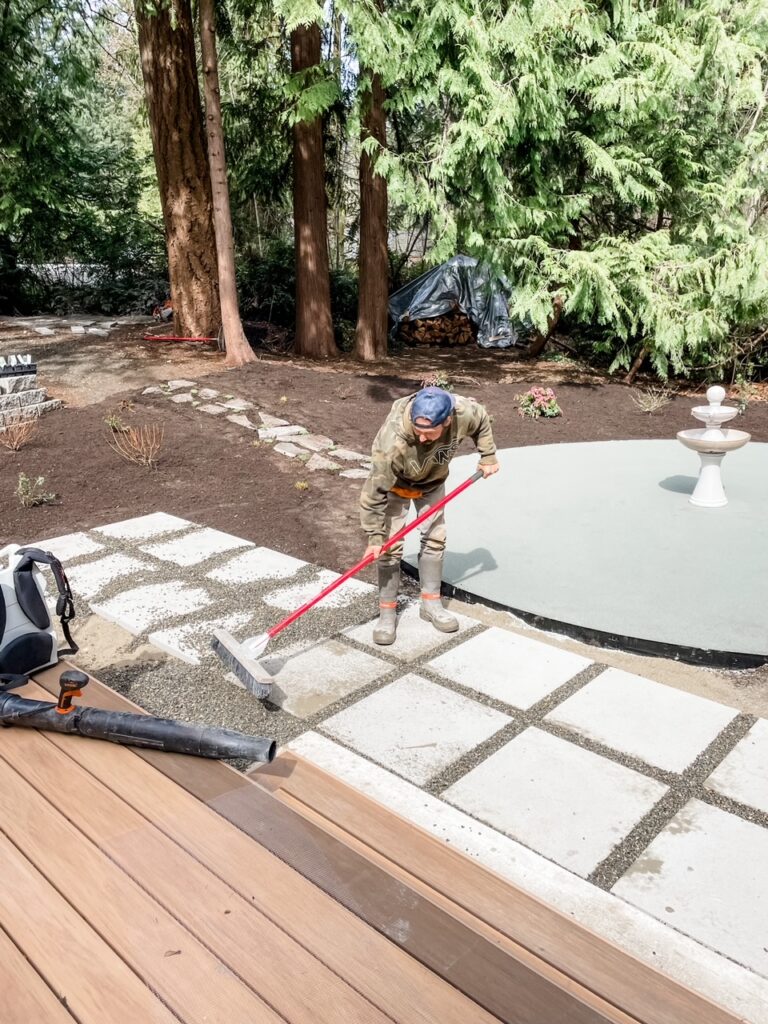
Our designer, Shannon Grina, is a horticulturist who doesn’t normally design hardscape. But since we wanted to carry through with the existing theme of paver and pea gravel that had been used in other areas of the yard, she was willing to give it a try. I think she did an amazing job.
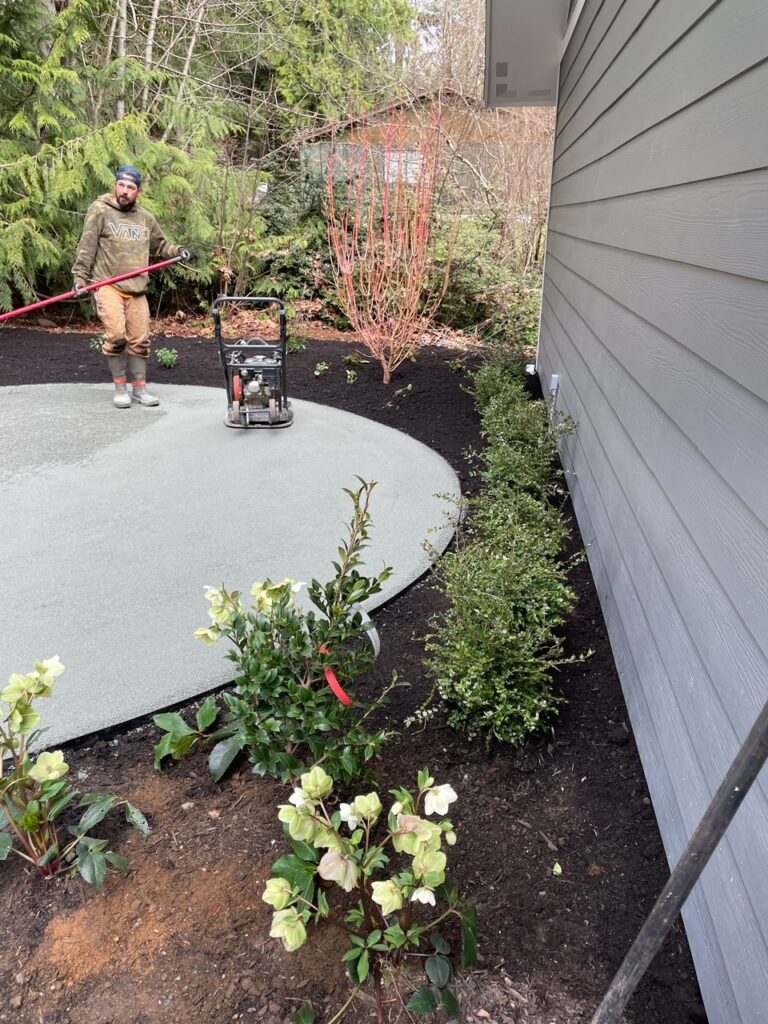
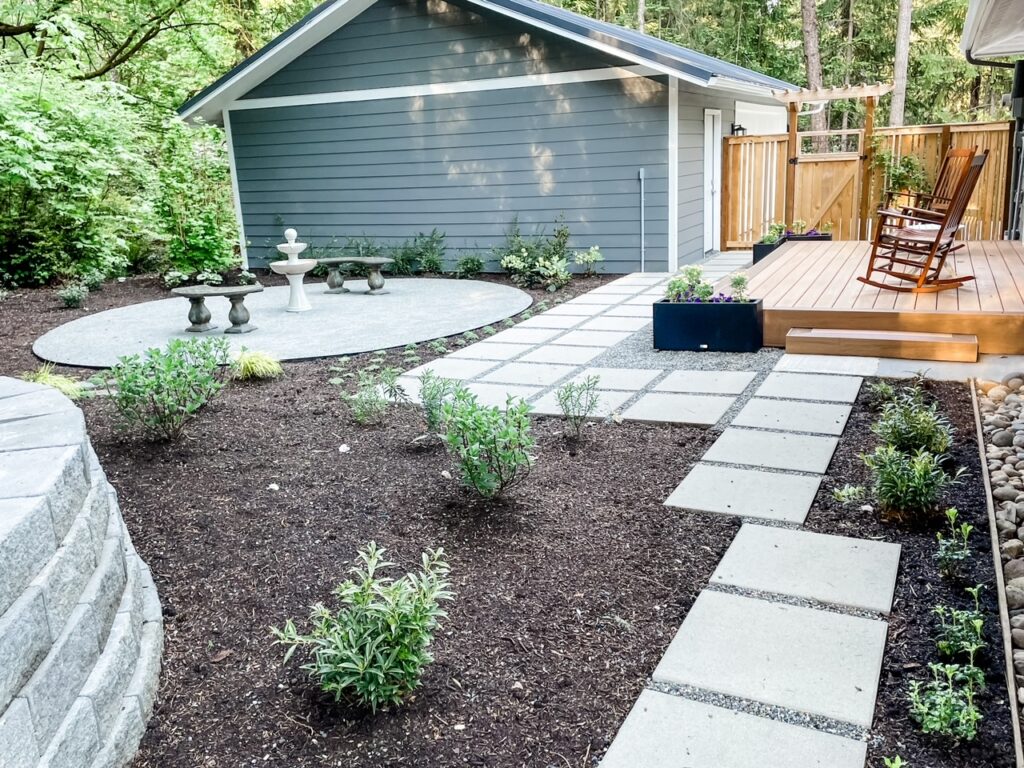
When I explained that I wanted a garden that fit in with the Pacific Northwest vernacular but also had a bit of a cozy cottage feel, Shannon suggested we put in a circular pad of crushed stone and sand where we could put a fountain and a couple of benches.
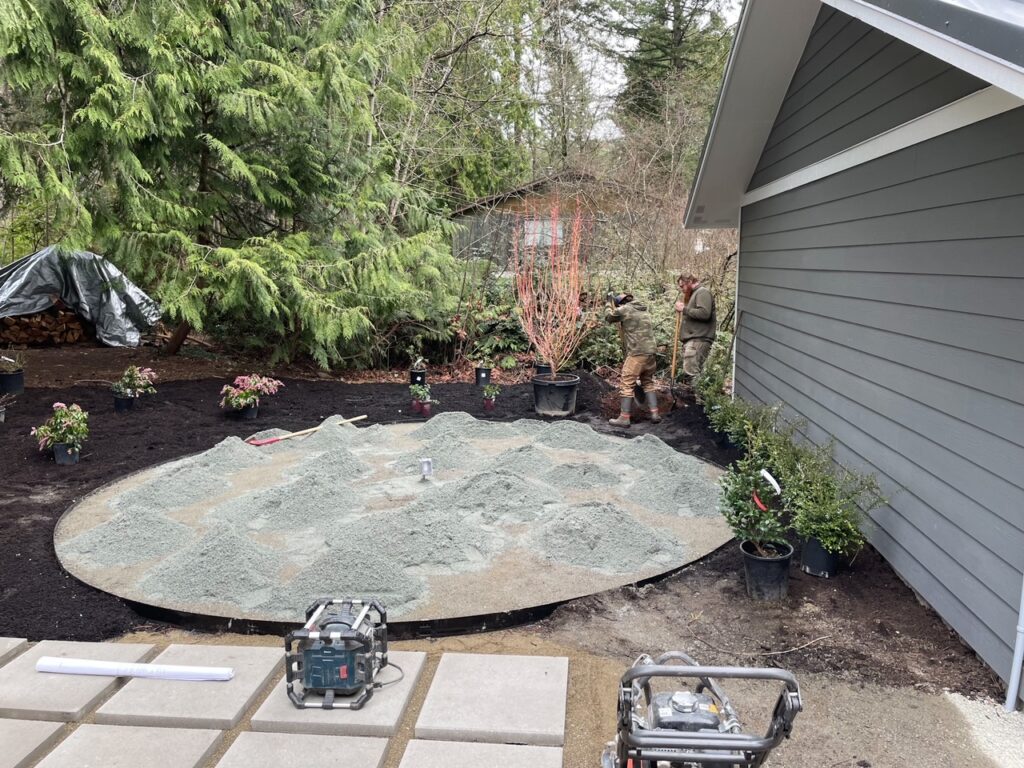
That was a big change! Our garden was starting to take shape. But it wasn’t until the pavers and pea gravel were installed that I could see how great everything was going to look when we were done.
Garden Before And After – Planting Time!
With the hardscape finished, it was time to start planting!
We stuck with plants we knew would do well in the Pacific Northwest. This included wax myrtle, evergreen huckleberry, red-tipped box leaf honeysuckles, as well as hostas and lots of ferns. It’s obviously going to take a couple of years for them to grow and fill in, providing more of a screen between our house and the neighbor’s place.
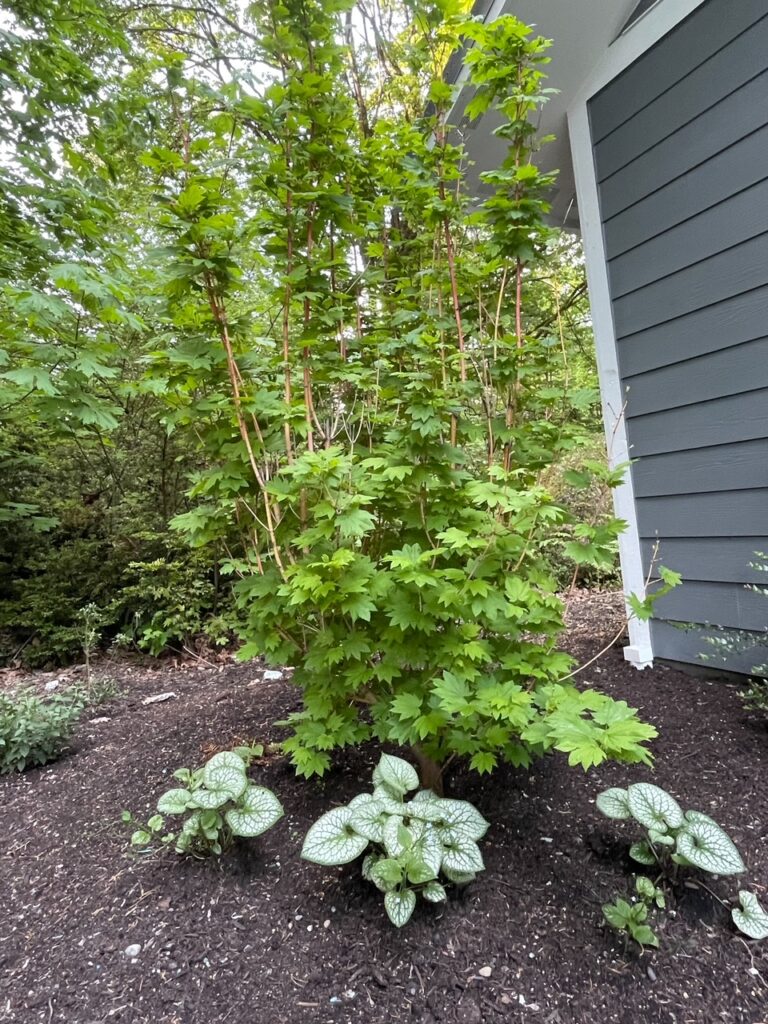
However, we did invest in one larger Pacific Fire Vine Maple tree that’s shady and pretty. It should get bigger, but not too big.
I did want some color in the garden. That will come from azaleas, hydrangeas, fuchsias, camellias and bleeding hearts, which will flower in season.
The clematis, which is already doing a great job climbing toward the top of the garden gate, will be pretty when it blooms. The plants in the foreground in the photo below, which I was unfamiliar with before, are Helleborus Ice and Roses roses. They’re a lovely pale green right now, but I believe they’ll turn pink in time.
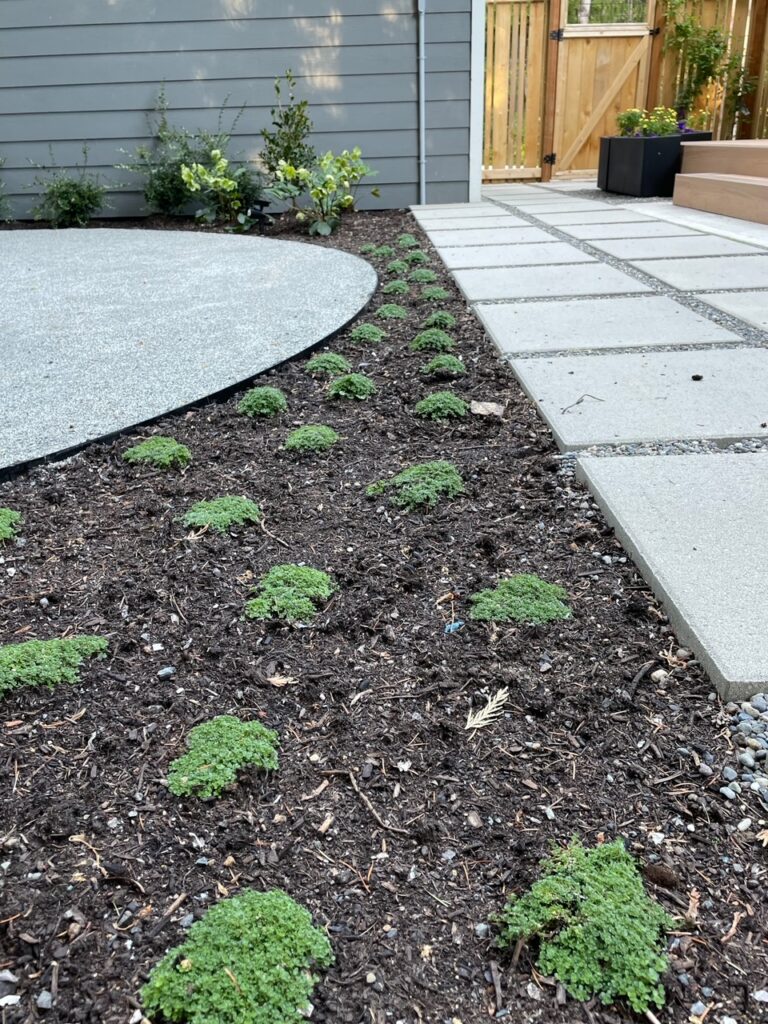
One of my favorite features is the thyme we planted between the stepping stones that lead to another section of the yard. I liked the thyme so much that we ordered an additional two flats to plant in the space between the circle and the pavers near the deck.
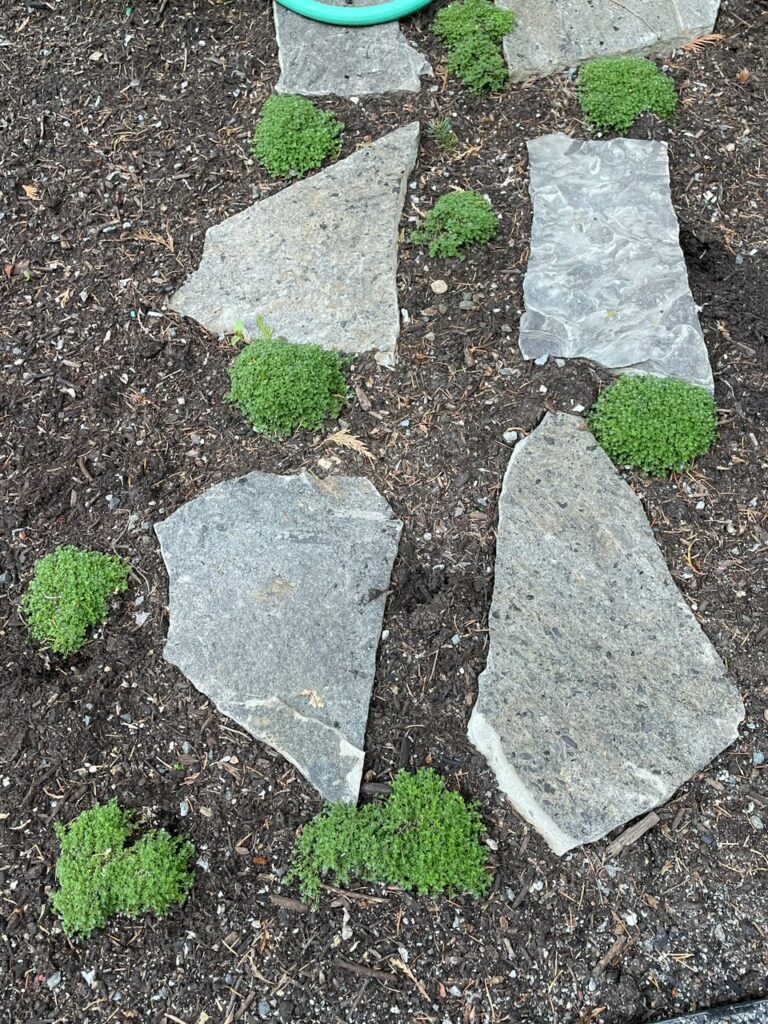
When they fill in, they’ll become a gorgeous, thick carpet of green. It’ll take some time, but they’ve already doubled in size. By this time next year, I bet we’ll be in business!
Garden Before And After – Final Touches
With the planting finished, we only needed a few finishing touches.
First up was the fountain. I bought it from Wayfair months ago and was so excited to move it from the garage and see it set up at last!
We purchased two curved benches, one with a bas-relief frog and lily pad design, and the other with cherry blossoms and bumblebees, from our local landscape supply store. They’re made by Cast Artifacts and can be purchased directly.
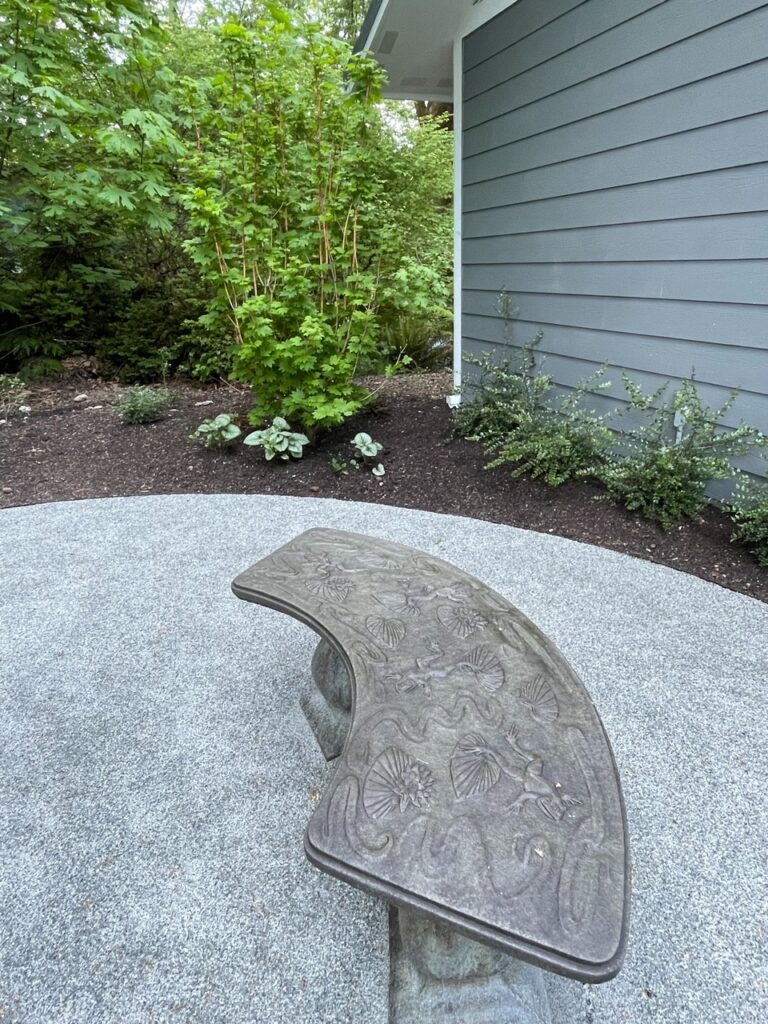
Though I initially balked at the price, a little research helped me realize that they were actually a very good deal for benches of this quality. Good benches can be pricey!
The last touch was a set of box planters that would be set at the corners of the deck. This would give a spot to plant some showy and colorful annuals and clearly define the edge of the deck. We didn’t want anybody falling off!
However, the concrete planters my landscaper initially suggested just weren’t in the budget. So I thought they would have to wait until next year. Then I stumbled on these terrific, affordable, Canadian-made box planters.
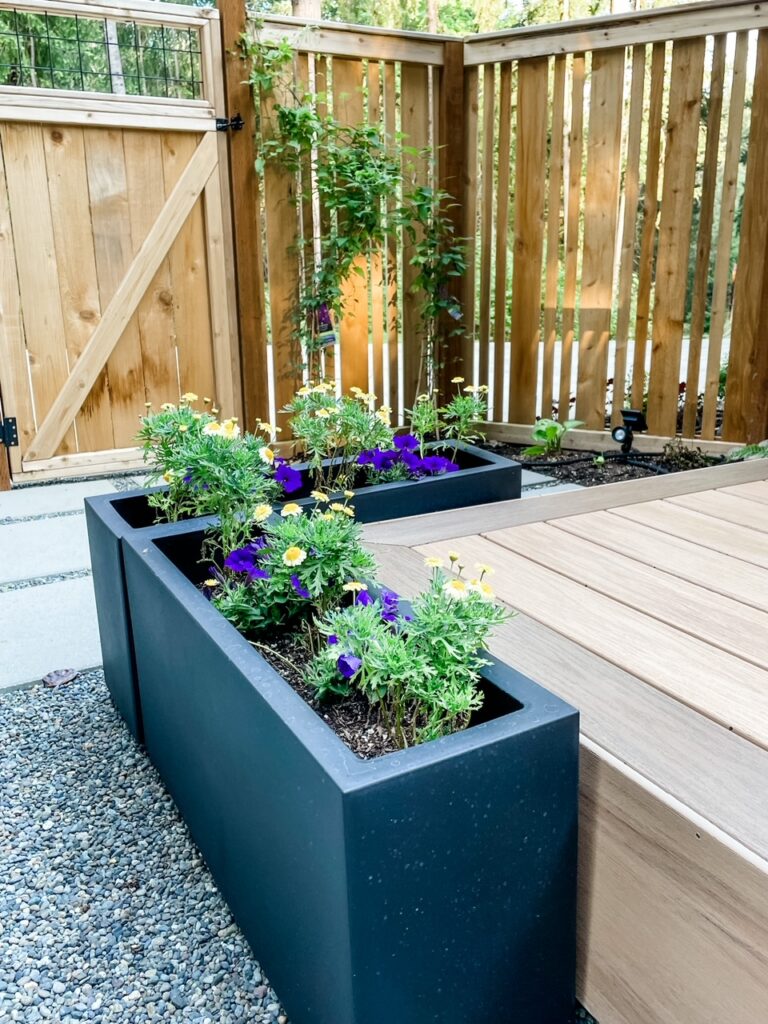
Though they look like concrete, they’re actually made of sturdy polypropylene, so they’re crack and fade-resistant. They’ve also got a false bottom with drain holes and plugs. I’m really, really pleased with these planters. The quality is terrific, and the price is right.
From “Cursed Earth” To Peaceful Garden
Our new garden turned out even better than I had hoped! Yes, it will take a year or two for the plants to fill in and reach their full beauty. But I’m already enjoying our sweet, pretty, and oh-so-peaceful garden.
It’s the perfect place to read a book, savor a morning cup of coffee, or just enjoy a good think and the song of birds. I hope you enjoyed seeing the transformation. Maybe it will inspire some of your garden dreams?


