This post may contain affiliate links. Full disclosure policy
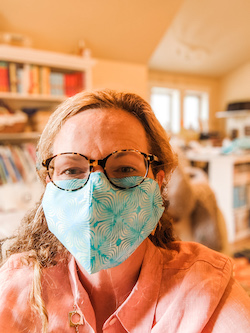
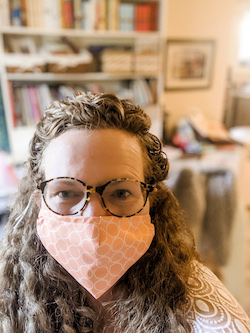
Why, yes. I do coordinate my masks to go with my outfits. Doesn’t everyone?
Like it or not, my friends, masks are now a fashion accessory. You only have to look through the advertisements on your social media feed to know it’s true. And now that I’ve learned how to make masks in a mere 11 minutes, I am totally on top of the trend.
These easy DIY face masks are comfortable, breathable, and adjustable so they fit perfectly. Also, they stitch up so quickly that I can make a mask to go with every outfit in my closet.
But it wasn’t always that way…
Back in the Old Days, Or, Five Months Ago
Back in March, I dove headfirst into mask making. With the help of my husband and Mom, I made masks for every employee in our neighborhood market, as well as for family, friends, and neighbors. We stitched about 50 in total.
The pattern came from my local hospital. Those pleated masks took me a minimum of half an hour to make. They were pretty heavy for everyday use and the tie-on style was a pain to put on and take off.
As mask-wearing has become a daily part of life, I’ve realized that I need a lot of them. I need a mask for my purse, one for each car, and one for the house. I also need a few to lose. It turns out that masks are kind of like socks in the dryer. Every week, about half of them seem to disappear into thin air! And since masks are going to be part of my wardrobe for the foreseeable future, I’d like them to look good with whatever I may be wearing.
I wanted a mask that would be lightweight, breathable, relatively comfortable, and easy to put on and take off. I also needed a mask that I could stitch up quickly – preferably in fifteen minutes or less. But did such a thing exist?
Believe It or Not, It Does!
After some research, I came upon a mask from PrettyHandyGirl.com. It fulfilled all my requirements and then some. Made from plain quilters cotton (which I already have in every color known to man), this mask is about as comfortable and breathable as a mask can be. And thanks to the nifty adjustable sides, it fits without gaps and doesn’t hurt my ears.
Best of all, I can stitch one of these easy, DIY face masks up in just 11 minutes. No kidding, I timed myself to make sure. I can cut out and stitch one entire mask in just 11 minutes. Hallelujah!
If I was making multiple masks at once in an assembly line, I’m confident that I could shave off another couple of minutes off my production time. But being able to make three masks in the time it used to take me to sew one is a big, big improvement.
Supplies Needed for Your Easy DIY Face Masks
Of course, you’ll need a sewing machine and basic sewing skills for these DIY face masks. You’ll also need an ironing board and iron (Oliso is my favorite iron!) along with some fairly basic sewing supplies. Pins, scissors or rotary cutter, cutting mat, and a fabric marker.
You’ll also need some 100% cotton fabric. I used printed fabric for the outside of my mask and some white muslin for the liner. Muslin is inexpensive and the lightweight varieties are very breathable, perfect for mask liners.
You could use elastic for the ear loops if you’d like. However, I decided to use parachute cord secured with wooden craft beads. It’s durable and you can adjust the size easily. You can add a filter or nose piece if you want, but I chose not to.
A Great Pattern Makes All the Difference!
The pattern that PrettyHandyGirl.com developed is really terrific. The original post included medium and large adult-sized mask. She’s now added extra large and small adult sizes, as well as a pattern for children. You can find those patterns and instructions here.
I really can’t improve on PrettyHandyGirl.com‘s pattern. You can absolutely use her instructions too. However, I wrote my own directions below, which I think might be a little easier for beginning sewists. I also added a few Pro Tips and my own photos, in case that might be of help to you.
I’m also very visual, so I find photographs really help me make sense of things.
So, let’ get started!
Cutting and Marking Your Easy DIY Face Masks
Cut two pieces of parachute cord, each 16 inches. I found this length works better than the 12 inches that Pretty Handy Girl’s pattern called for. (Pro Tip: put a little plain white glue on the end of each cord, to prevent fraying. This makes it easier to put the cord through the beads later.)
Fold the printed cotton fabric in half, with the right sides together. Lay the longest side of the pattern along the fold and cut around the pattern. Repeat with the muslin fabric, using the liner pattern. (PRO TIP: Use a rotary cutter to save time in cutting. You don’t need a ruler, just cut along the edge of the paper.)
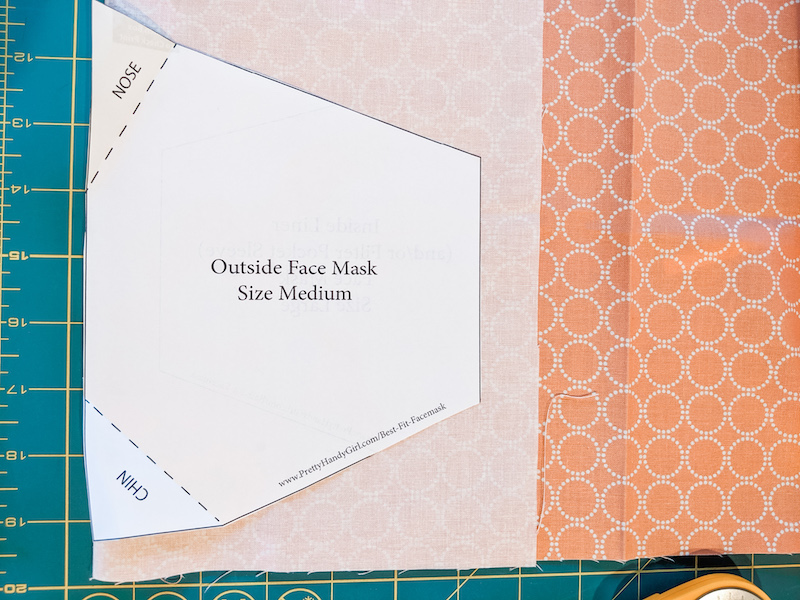
Fold back the dotted line corners for chin and nose darts. Draw a line along the fold, using your favorite fabric marking tool. (Mine is by Sewline – 3 colors of chalk in one pencil!) Repeat the marking process on the muslin liner.
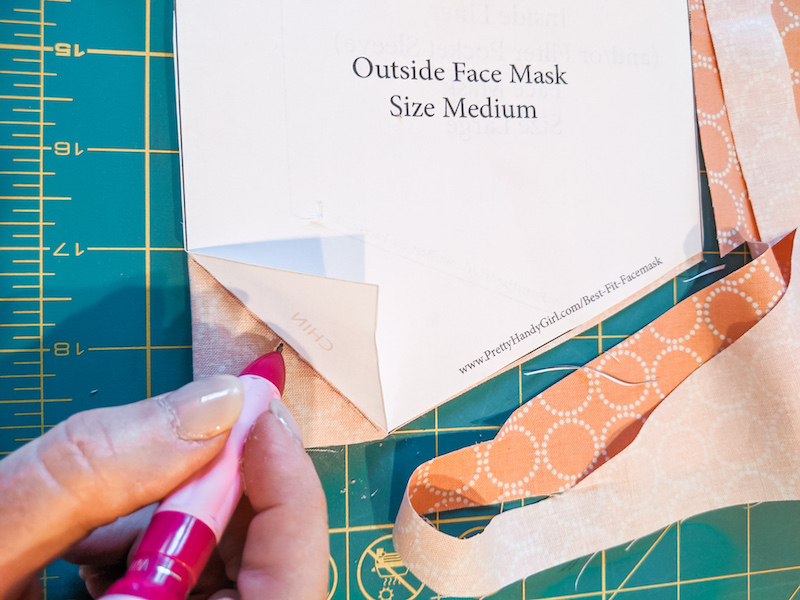
Good work! You’re ready to start sewing!
Ironing and Sewing Your DIY Face Masks
With the right sides of the fabric together, stitch along both the lines you marked earlier, making darts for the nose and chin. Cut off the excess fabric, about ¼ inch away from the stitches. Repeat process with the liner.
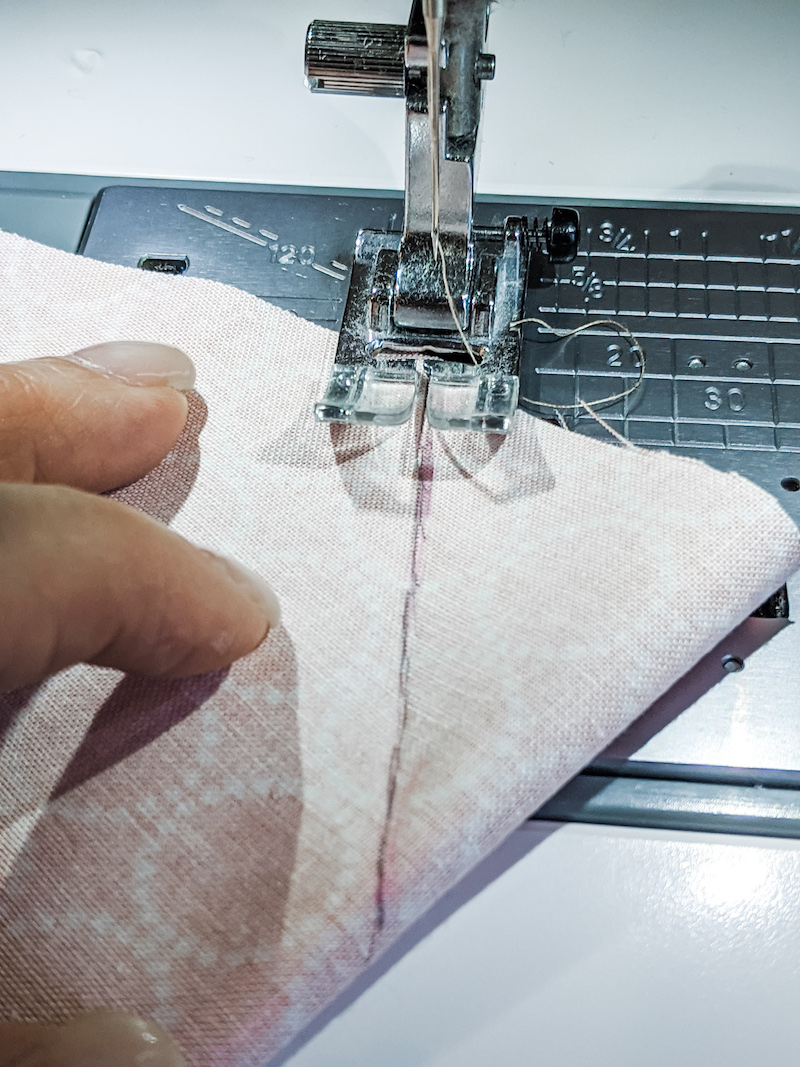
Position the liner evenly inside the mask with the stitched sides facing each other. Fold and press the outer fabric down approximately ½ an inch on the long sides of the mask, just a little over the edge of the liner. Make another ½ inch fold and press again. Stitch along each of the folded.edges
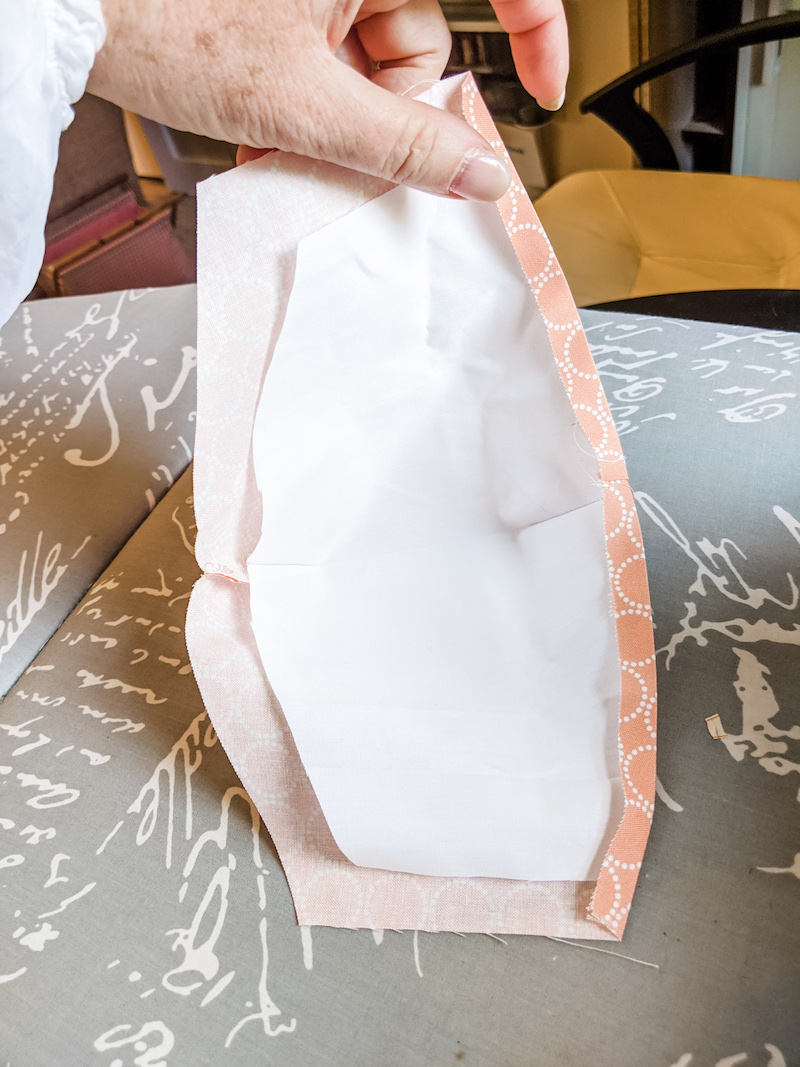
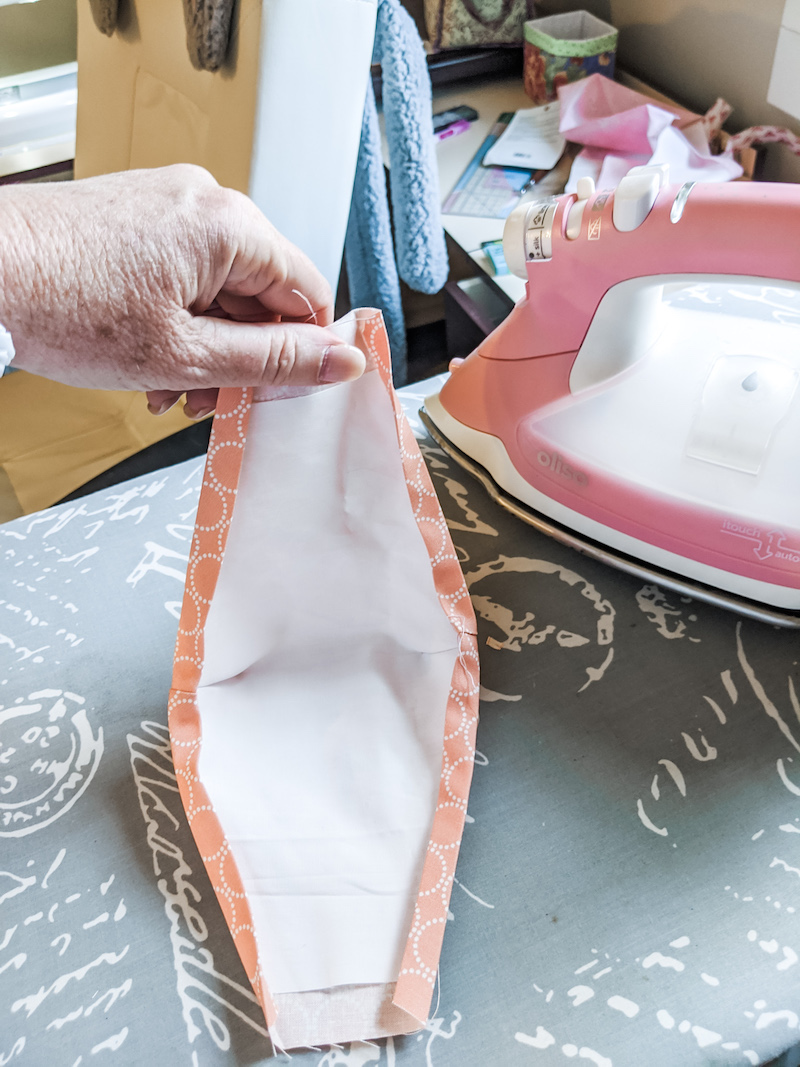
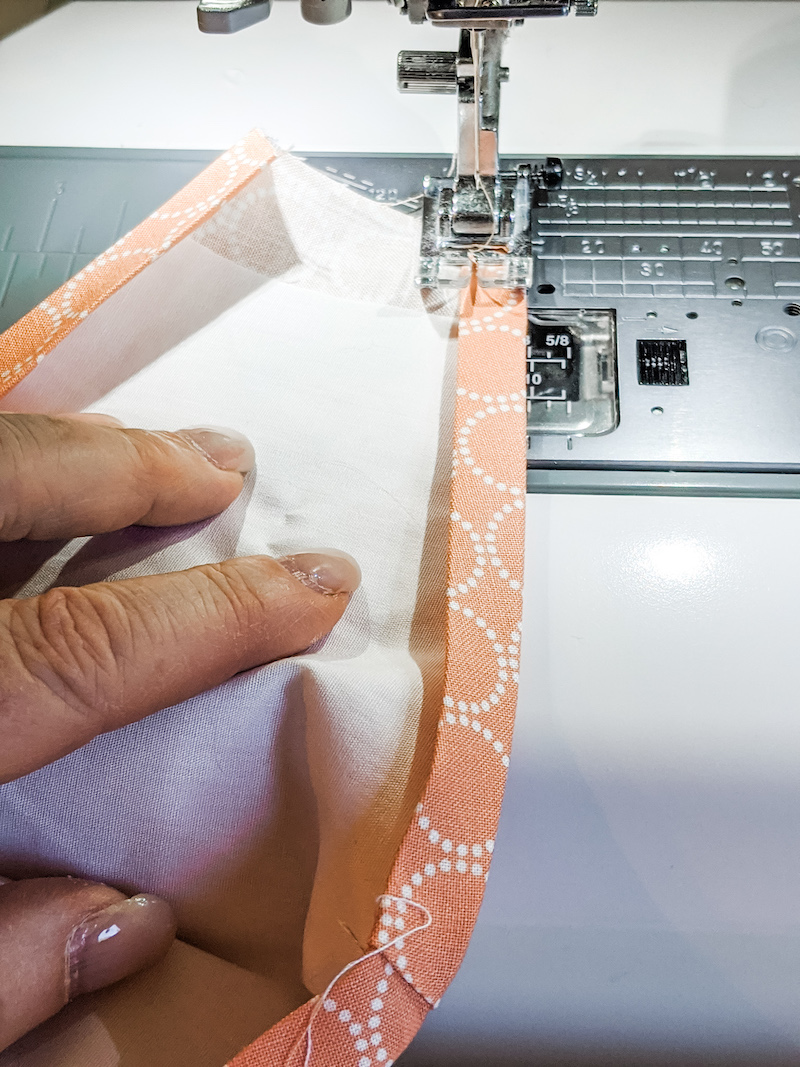
On each short side, fold and press the outer fabric down approximately ¾ inch. (Pro Tip: Make both folds a scant ¾ inch, just a little under ¾.) Make another ¾ inch fold and press again to create a pocket.
Position the parachute cord inside the pocket. Stitch along each fold. (Be careful not to sew on the cord! You want it to slide easily in the pocket so you can adjust the size of your mask.)
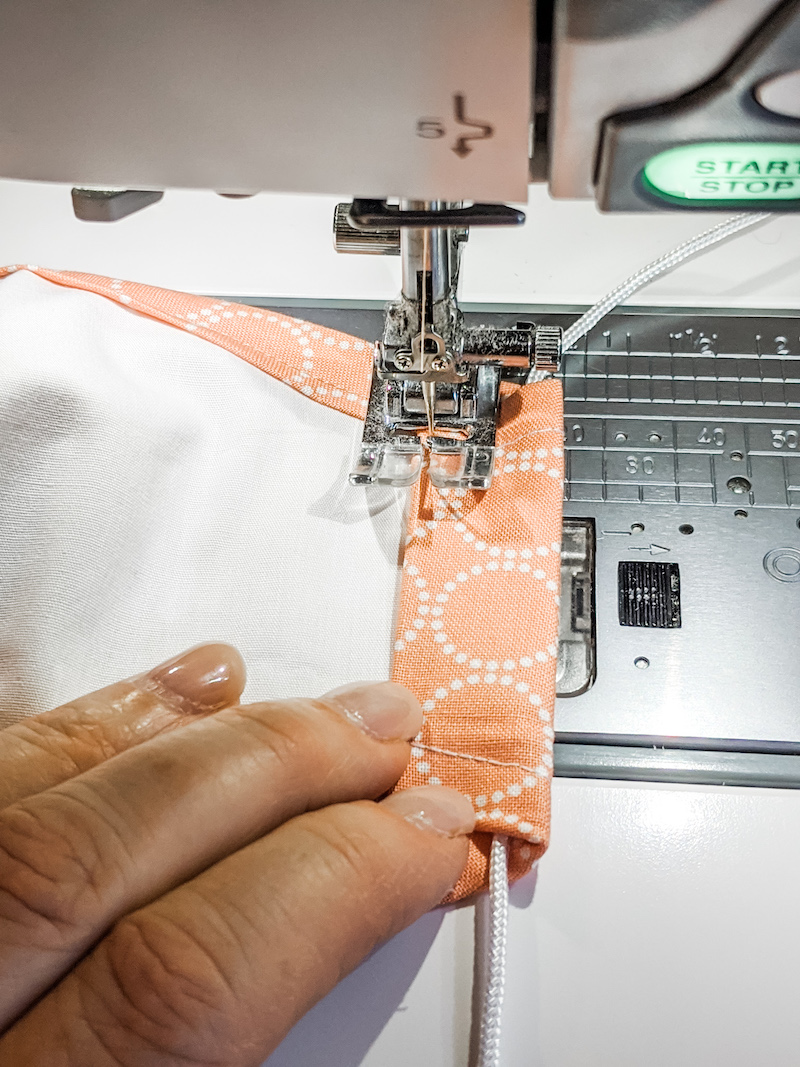
Slip the ends of the parachute cord through the craft beads. Adjust the beads so the cords are at a comfortable length. Tie a knot behind the bead to secure the cord.
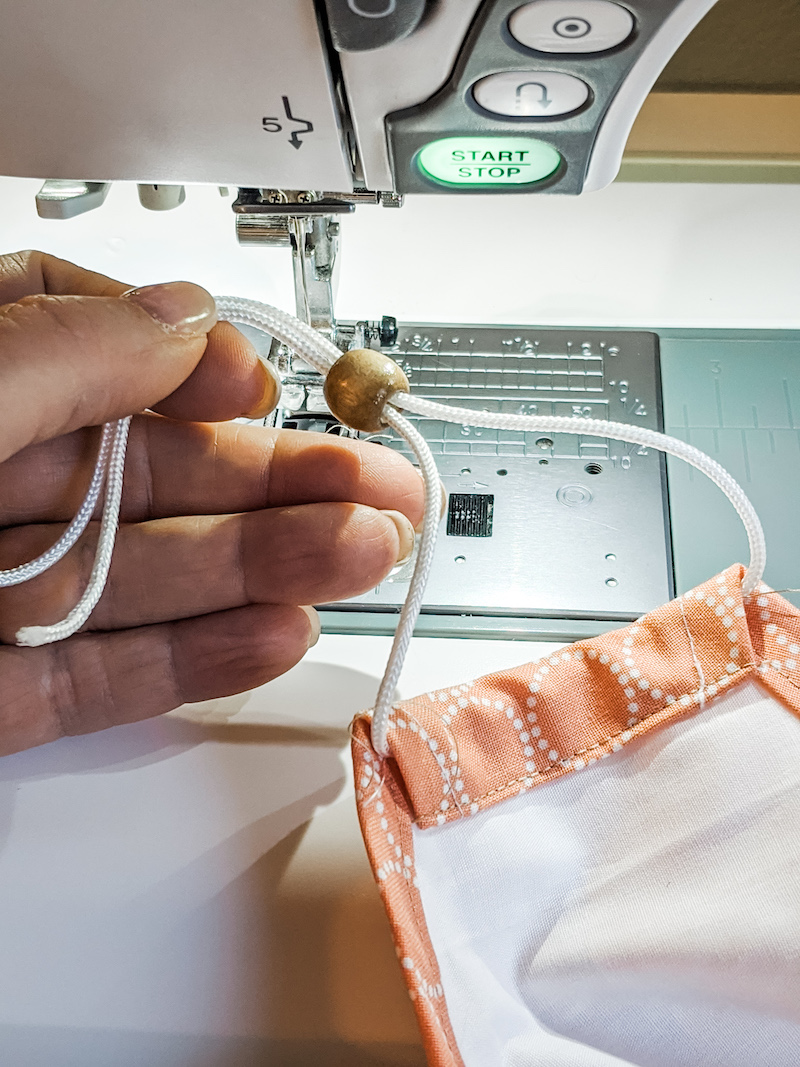
That’s it! You did it.
Safe, Quick, and Cute!
Friends, this is one of those crafts that I really wish we didn’t need. However, masks are simply part of life right now. If we have to wear them, they might as well be cute, right? And quick to make!
Why not stitch up a wardrobe of quick easy DIY Face Masks for yourself, your family, or your friends this week? Staying safe was never more fashionable!


