This post may contain affiliate links. Full disclosure policy

June is not a time I would generally think about making a blanket. But with Father’s Day coming up, I was thinking about homemade gifts for Dads and settled on a DIY Stadium Blanket and Cushion.
I think that any Dad, sports fan or not, would love to get a DIY Stadium Blanket and Cushion. Way, way more than socks. Or, heaven forbid, a tie. Giving Dad a tie for Father’s Day is like giving Mom a vacuum cleaner for Mother’s Day. It’s always a mistake. Always.
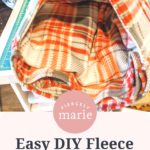
DIY Stadium Blanket and Cushion
Made of warm, durable, lightweight fleece, my DIY stadium blanket and cushion are perfect to take along to the Big Game. The stadium blanket actually folds up and gets tucked into a built-in pocket to create the cushion, so they’re super versatile. But they’re also great to toss in the back of the car as an emergency. They’d also be ideal for travel.
It’ll probably be a while before I’m back on an airplane, but I’m thinking of making one for myself to help make flying a little less miserable. This stadium blanket and cushion can make a too-hard seat more comfortable, keep you warm in a too-cold cabin, or serve as a handy pillow when you want to grab a nap. Hmm…come to think of it, I might need to make a few more of these for Christmas. They’d be great gifts for just about anybody – dads, grads, special friends, or yourself. For another fund DIY sewing project, check out my DIY Jar Openers!

A DIY So Easy, Anyone can Do it!
Also, they’re incredibly easy to make. If you’ve got even basic sewing skills and access to a sewing machine, you should be able to stitch up this stadium blanket in about an hour. They’re also inexpensive to make. Apart from the thread, scissors, and pins – which anyone who sews probably has on hand – the only thing you’ll need to make your stadium blanket and cushion is 2 yards of fleece. I found a big selection of anti-pill fleece at JoAnn’s. The designs included something for just about everyone – sports fans, pet lovers, coffee lovers, gardeners, glampers, outdoorsmen, even superheroes (or heroines). Of course, they’ve got solids and good old plaids too, which is what I chose. It was on sale for just $3.99 a yard! Score!
Yes, I was able to make an attractive and truly useful gift in an hour and for just eight dollars. How often does that happen? (Answer: not often enough.). I don’t know how long that $3.99 fleece sale will be on, but I’ve noticed that it JoAnn’s fleece does go on sale fairly often, so keep an eye out. They also offer frequent discount coupons so keep that in mind too.
Even if you have to pay more than four dollars a yard for the fleece, this DIY stadium blanket and cushion is still an easy to make, inexpensive gift that any Dad, Grad, or friend would love to receive. Read on to find out how to make yours!
What You Need
The tools here are pretty basic. If you sew at all, chances are good that you already have everything you need on hand, including…
- Sewing machine
- Scissors or rotary cutter and cutting mat
- Tape measure, ruler, etc.
- Pins (the long, sturdy kind. You’ll be pinning through layers of thick fabric.)
- The only materials required are…
- 2 yards of fleece fabric
- Coordinating thread
But before you get started….This project really is incredibly easy to make, simple enough for even a beginning sewist. But I tend to be very thorough when I write instructions, so don’t be intimidated by the length of this post. Just take it step by step and you’ll be fine. If you know how to run a sewing machine, you can do this!
Cutting Your Stadium Blanket and Cushion
- First, trim all the selvedge edges off your two-yard piece of fleece. (Selvedges are the tightly woven strips that run along the lengthwise grain of the fabric.)
- Next, cut off a 17-inch wide strip of fabric. (Be sure to cut your strip off the short side of the fleece, which is probably about 60 inches, from one edge to the other. In sewing and quilting, this is called cutting WOF, or Width of Fabric.). Now, cut two 17 inch squares from the strip.

Sewing the Cushion
- Take your 17-inch squares to the sewing machine. Lay one square on top of the other, making sure the edges match. Pin the edges together. (When sewing, we normally stitch pieces with the right side of the fabric facing each other. Fleece is generally the same on both sides, so that’s not an issue here.
- Mark the center of one of the sides with a pin. We’ll call that the top edge of the cushion. Using a half inch seam, start sewing along the top edge, about 2 inches away from the pin. (We’re doing that because we want to leave an opening in the cushion.).
- Sew to the first corner of the top edge, then stitch all the way around the next three sides. When you get to the other corner on the top edge, stop stitching when you are about 2 inches away from the pin you used to mark the center.
- Cut your threads. Trim away excess fabric from each of the corners, making sure not to cut the seams. Reach inside the opening you left on the top edge and turn the cushion inside out. Push your finger into the corners so they look nice and even.
- After turning, stitch along the top edge of the cushion, one-quarter inch from the edge of the fabric.
Good job! You made the pocket for your cushion! Set it aside for now and let’s sew the blanket.
Sewing the Blanket
Next, you’re going to sew around all four sides of the blanket. The process may be different, depending on what kind of machine you have.
- If you have a serger, you should cut the corners of the blanket to create curves, then serge the edges, being careful not to cut off any more fabric than is absolutely necessary.

- If you’re using a regular sewing machine, just make a half-inch fold along the edge of the fleece. (You can pin it if you want, but it’s really not necessary.) Stitch down the fold along the two long sides of the blanket, then repeat the process on the two short sides.
- Fleece doesn’t ravel, so you don’t have to stitch over the raw edge. But if seeing that raw edge will bother you, you can fold the edge again to hide it, then stitch. If you do go for a double-fold, you might want to use a walking foot to make sewing easier.
- A plain straight stitch is fine here. But if your machine has some decorative stitches, this would be a good chance to use them.
Attaching the Pocket to the Blanket
- Find the center of the short edge of your stadium blanket and mark it with a pin. This is the top edge of your blanket.

- Take the pocket you sewed earlier and lay it on top edge of the blanket, about a half-inch down from the edge. Match the center of the pocket with the top edge center of the blanket.
- Pin the pocket to the blanket on three sides – left, right and bottom. Sew the pocket to the blanket, using a quarter-inch seam. (Do NOT pin or sew the top edge. It must remain open.) Trim threads.
Hooray! Your stadium blanket and cushion is finished! All you have to do now if fold it up to make the cushion.
Folding Your Cushion
Lay your stadium blanket down with the pocket facing the floor. Fold the blanket twice lengthwise, so it’s approximately the same width as the pocket. Then fold three more times, into a square. Pull the pocket over the folded up blanket.
Voila! You’ve got a comfy stadium cushion that can be unfolded any time you need a cozy blanket.
More importantly, you’ve made a useful gift for someone you love. Good job!


