This post may contain affiliate links. Full disclosure policy
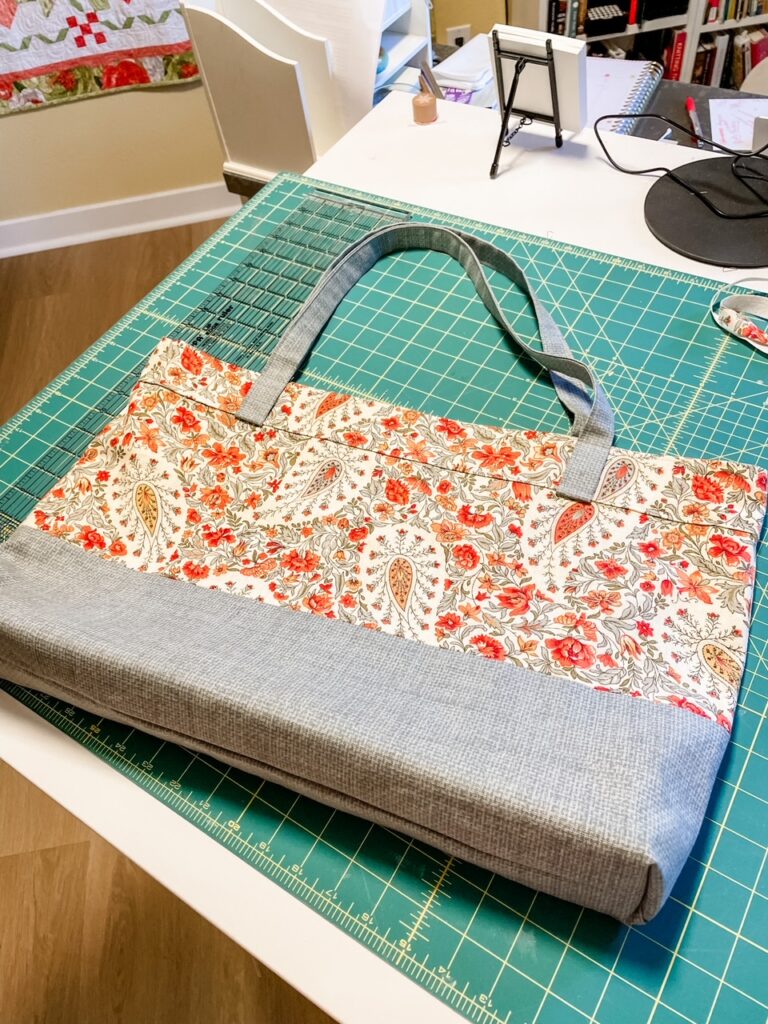
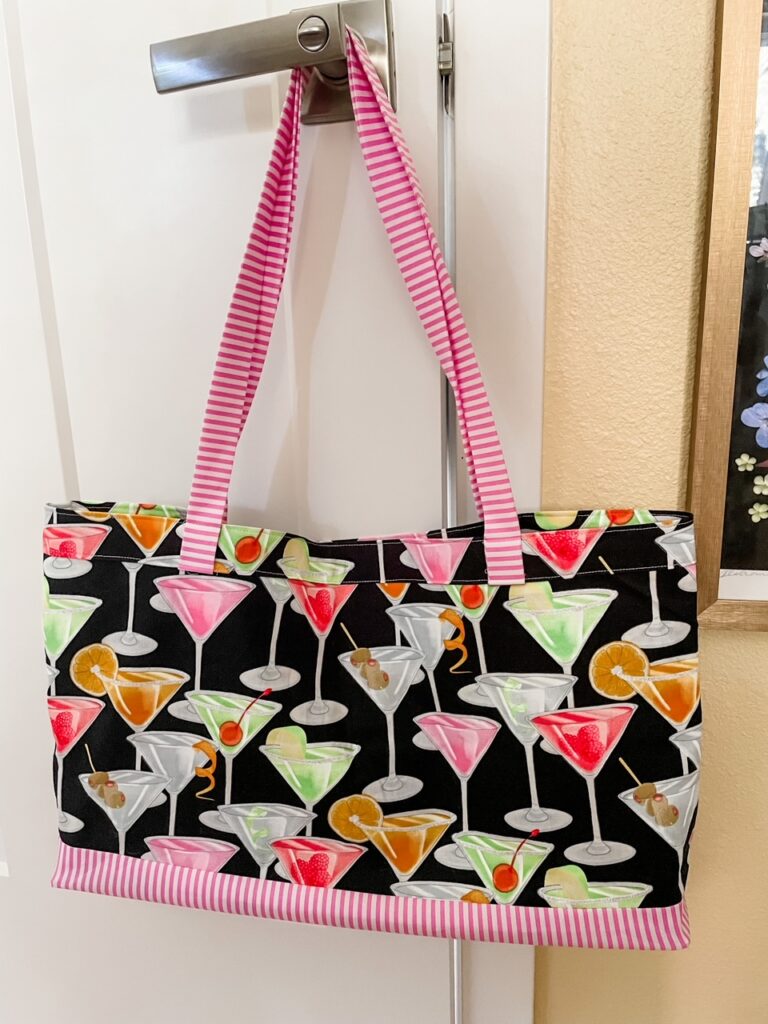
This generously-sized tote comes in handy at the beach, the pool, the market, and so many other spots. And believe it or not, this adorable DIY beach tote stitches up in one hour or less!
The Search For A One Hour DIY Beach Tote
Last week, my sister told me about some one-hour bags she and some friends have been making. It sounded like a fun, fast project that would put my fabric stash to good use and possibly make good Christmas gifts.
Yes, I’m already thinking about Christmas gifts. July is the halfway mark to the holidays. Since I like to make most of the presents myself, this is the time of year when I start making the gifts I’ll be giving in December.
An online search pulled up a few different tutorials for one-hour bags. But none of them really jazzed me. Even if it only takes an hour, there’s no point in making a tote I wouldn’t be happy to carry myself. However, after coming across a one-hour bag tutorial at Lazy Girl Designs, I thought I might be able to use her self-lining technique to create a one hour bag that I would be delighted to carry myself or to give as a gift.
After a little trial and error, that’s exactly what happened. Now that I know to sew a sturdy, useful, stylish, totally adorable beach tote in an hour or less, I am obsessed!
What I Love About This One Hour DIY Beach Tote
It’s fun and fast to sew!
The first couple of bags I made took longer than an hour because I was designing as I went and taking pictures of the process. But once I worked out the technique, I really and truly was able to make it in under an hour.
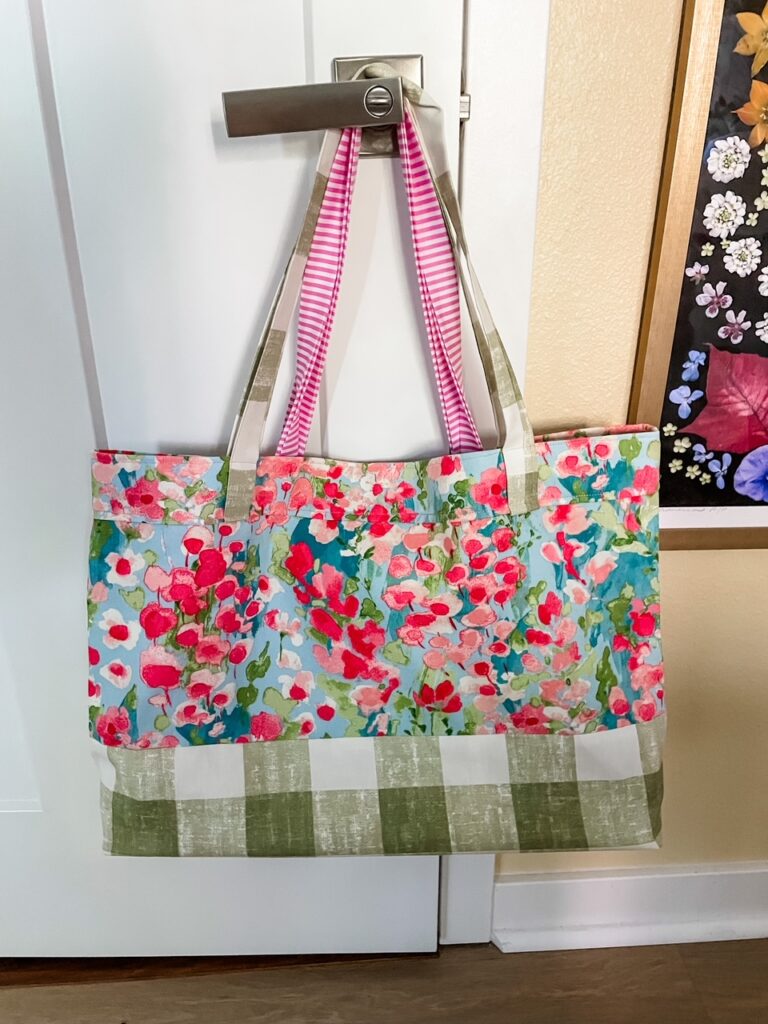
I sewed the paisley bag with the gray contrast in just 49 minutes! It’s such a fun, satisfying project to make. Everybody on my Christmas list is going to get one of these bags.
It doesn’t take a lot of fabric.
A lot of the tutorials for one-hour bags I saw online only called for one yard of fabric. Mine takes a yard and a quarter, but I think the look of the finished product is totally worth it.
It’s so darned cute!
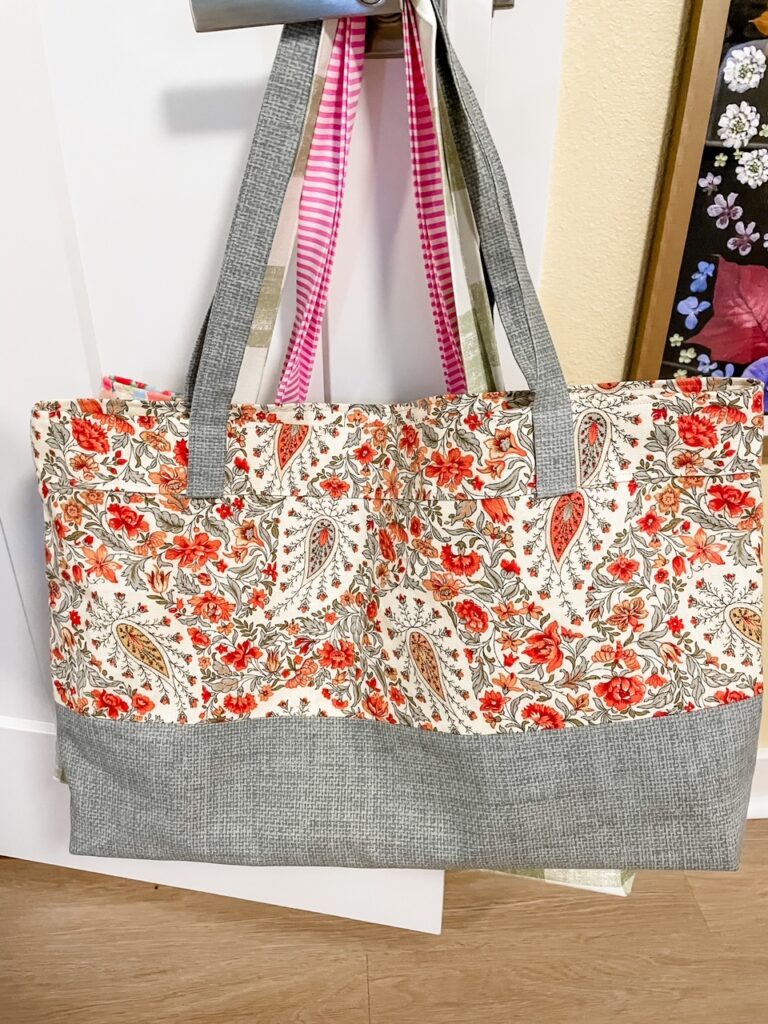
Using a contrasting fabric for the bag’s bottom and handles kicks the style factor of this one hour DIY beach tote up several notches. It added a lot to the look and let me get creative with my color choices. The simple-to-sew boxed bottom helps the bag hold its shape and look sharp.
It’s a great way to use up your fabric stash.
Most quilters and sewers I know reached SABLE (Stash Accumulated Beyond Life Expectancy) years ago. Making a quick, cute, one-hour beach tote is a terrific way to make use of that fabric you’ve been collecting.
It’s useful and practical.
Measuring about 16 x 20, the one hour DIY beach tote has room to carry all your stuff. If you plan to carry heavier items, like books or groceries, the optional corrugated plastic bottom makes it extra sturdy.
A Few Tips Before We Sew The One Hour DIY Beach Tote
I’m using some of my quilting stash, especially some of the cute novelty fabrics, to make the totes. But I’m also making bags from lightweight cotton canvas.
I found a good selection of pretty canvas fabrics at my local Michael’s for just 7.99 a yard, which is a pretty darned good deal! Because the canvas is a bit thicker than regular cotton fabric, it makes a sturdier bag.
However, canvas is a little tougher to sew through when you’re dealing with multiple layers. If you’re using canvas and your machine has a walking foot, you probably want to use it. It’ll just make everything easier.
Something else I found at Michael’s was sheets of corrugated plastic that I put into the bottom of the bag. That part is optional, but it helps the bag keep its shape and is nice if you’re carrying heavier items.
It truly is possible to make this beach tote in an hour or less. However, if your sewing skills are at the beginner level, it might take a little longer, especially on your first try. Also, that one hour time frame? It doesn’t include time spent ripping out mistakes.
Reading the instruction carefully and refer to the photos to make sure you understand the process before you begin, will help reduce mistakes and ripping. Starting with a full bobbin saves time too. Once that’s done, you’ll be all set to sew your One Hour DIY Beach Tote!
I’ve included more detailed instructions with photos you can refer to here in the post. But you’ll also find a more simplified version without photos in the “recipe” section below, which will be easier to print out.
Once you’ve reviewed the instructions, you’ll be ready to sew!
Materials For One Hour DIY Beach Tote
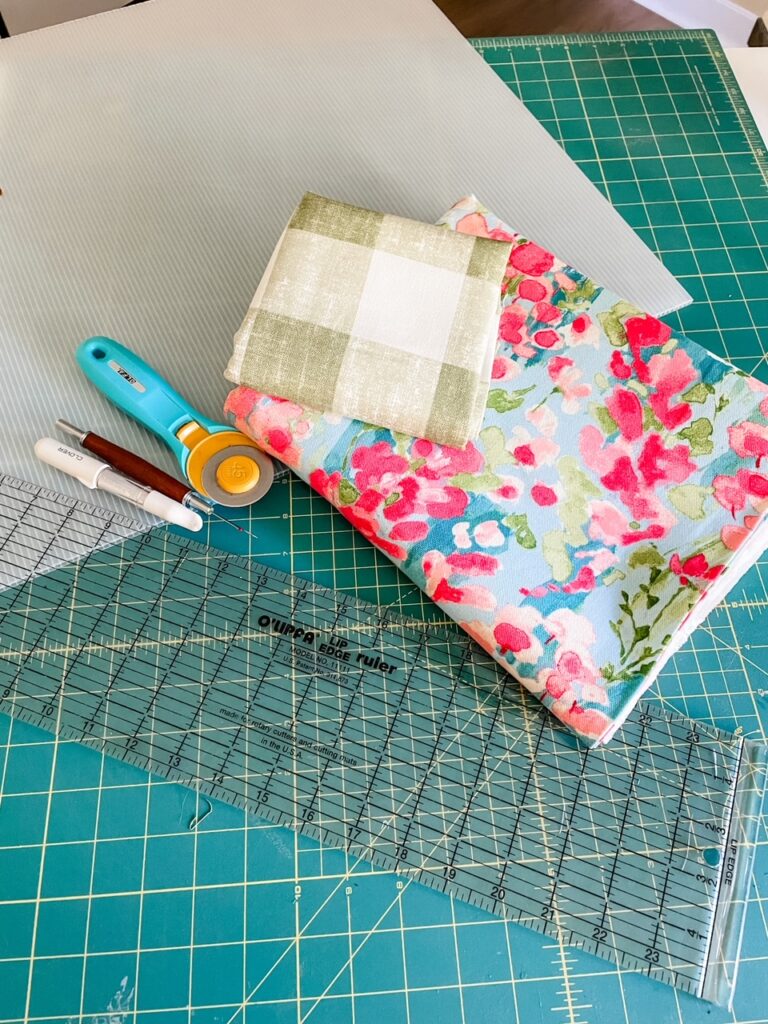
- Fabric – Quilter’s cotton or lightweight cotton canvas, 40 to 44 inches
- ¾ yard focus fabric for bag body
- ½ yard contrast fabric for handles and bottom
- Rotary Cutter
- Cutting Mat
- Ruler
- Tailor’s chalk or fabric marking pen
- Iron and ironing board
- Pins
- Sewing machine (walking foot suggested if using cotton canvas)
- Thread
- Corrugated plastic sheet (optional but gives the bag a sturdy base and nice shape)
Sewing Instructions For One Hour DIY Beach Tote
All seams are half an inch unless otherwise indicated.
Cutting the Fabric and Optional Plastic Bottom
Trim selvages off all the fabric.
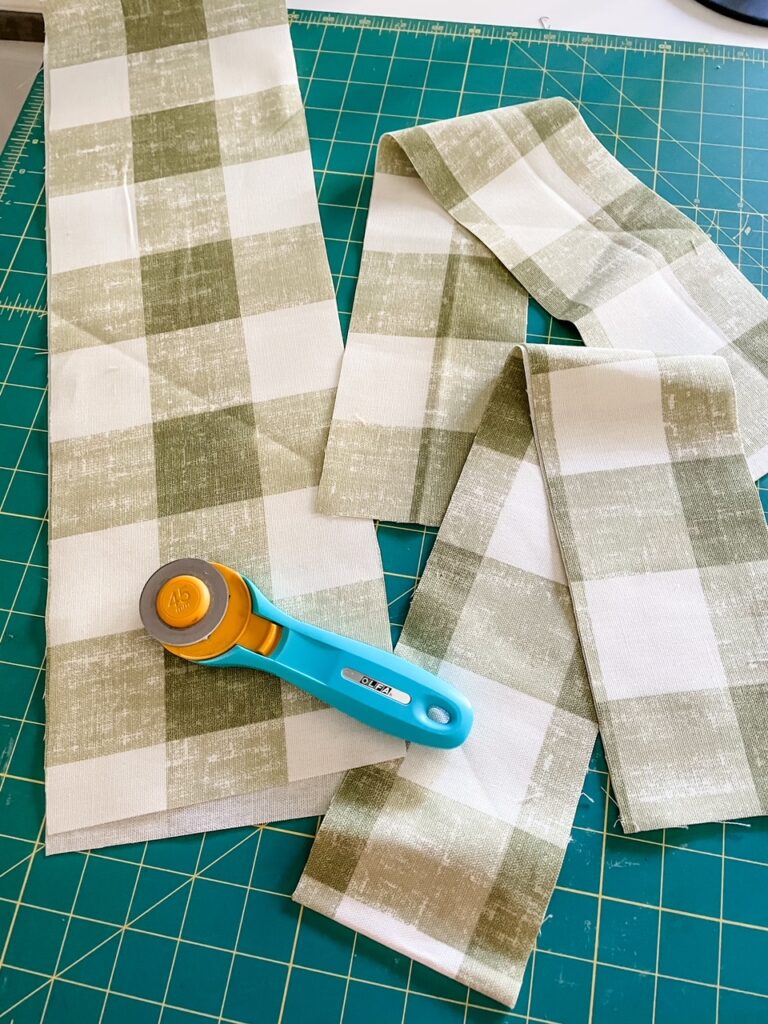
From contrast fabric, cut two 4-inch by WOF (width of fabric) strips for handles, and trim to 30 inches. Cut one 7-inch by WOF strip for the bag bottom. If necessary, square up and trim the focus fabric. It should be approximately 27 inches long but don’t worry if it’s not exact.
If using, cut the corrugated plastic into a 3-inch by 19-inch strip.
Making the Handles
With the wrong sides of the fabric facing, fold each 4-inch strip in half lengthwise. Iron with steam, creating a crease down the center of each strip.
Open the pressed strips with the right side of the fabric face down on the ironing board. Fold one side to the center crease of each strip and press. Repeat with the other side of each strip, so the fabric meets at the center crease.
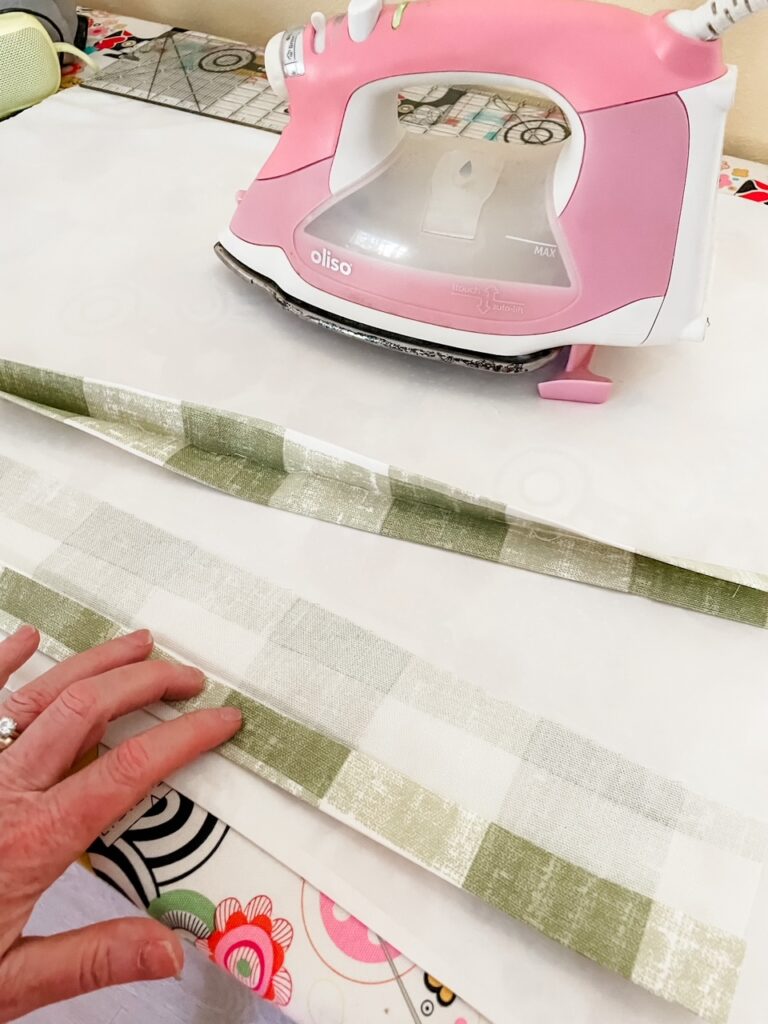
Close and fold along the original center crease once again. Iron through all the layers, creating two 1-inch wide handles, each with four layers of fabric.
Top stitch along the long, open side of each handle, about 1/8 of an inch from the edge. Set handles aside.
Sewing the Bag Body
With the right sides of the fabric together, pin the long side of the 7-inch contrast strip to the body fabric. Sew, using a half-inch seam. (Note: if you are using directional fabrics, remember that the 7-inch strip will be on the bottom of the bag. Make certain that both fabrics are facing in the right direction before you sew.)
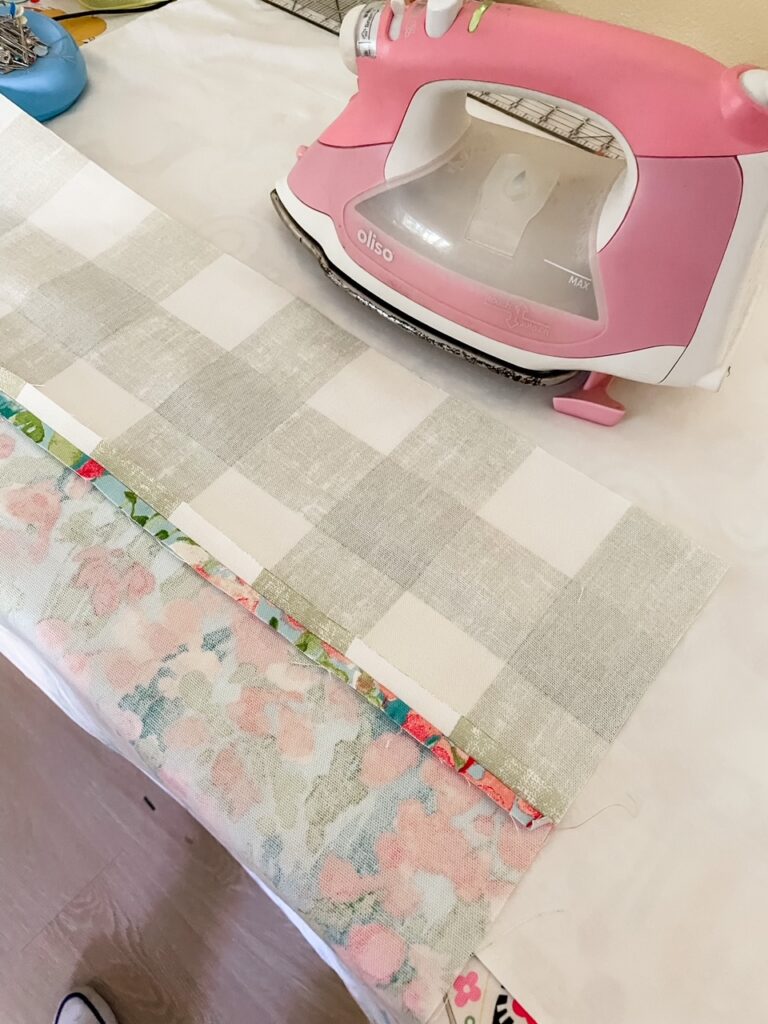
Press the seam open. If either fabric strip is longer than the other, trim off excess fabric so the edge is even.
With right sides together, fold the stitched fabric in half lengthwise into a rectangle, approximately 22 by 33 inches and press. Pin the edges. Starting with the bottom contrast fabric, sew around the three open edges, leaving an opening of 5-6 inches at the top.
Reach into the opening and turn the bag so the right sides are facing out. Use your fingers or a stylus to push out the corners and edges.
Fold the opening under half an inch and press. Stitch or zig-zag the edges of the opening to keep the fabric from raveling, but do NOT sew the opening closed. 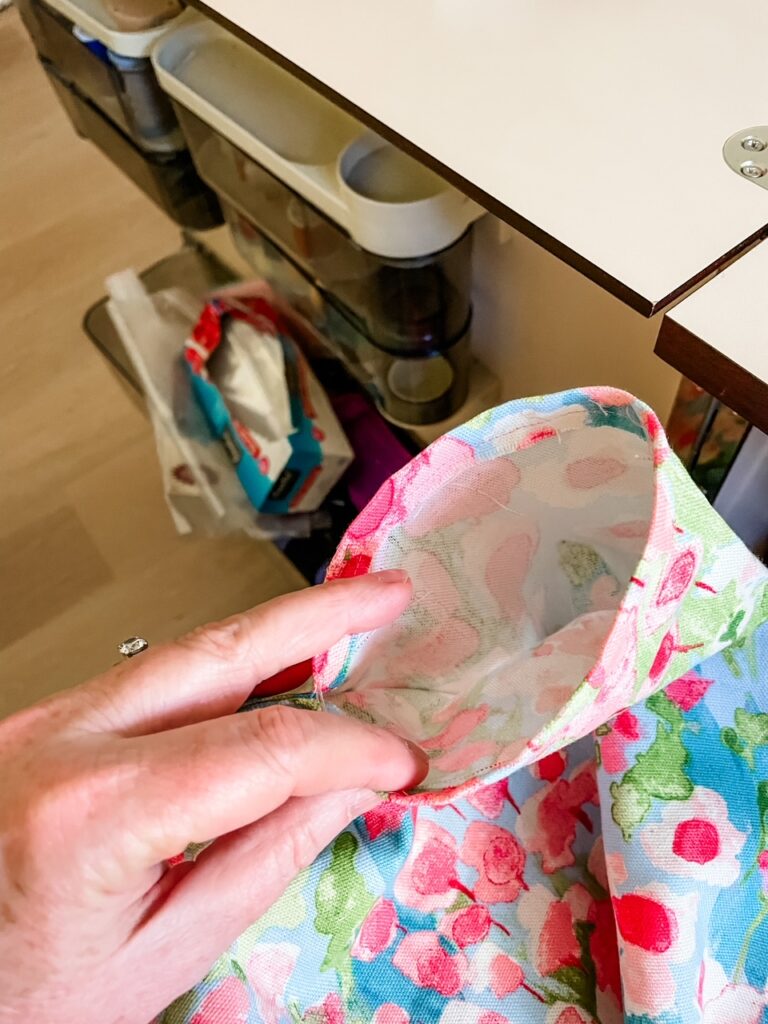
Push the top half of the fabric down through the opening, toward the bottom half, creating a lining or your bag. Nest the corners together at the bottom, align the upper and lower seams as closely as possible, and make sure that the top edge of the bag is even.
The body of your bag is done! It should measure about 16 x 20. (Don’t worry if it’s not exact.) Now is a good moment to give it a quick press.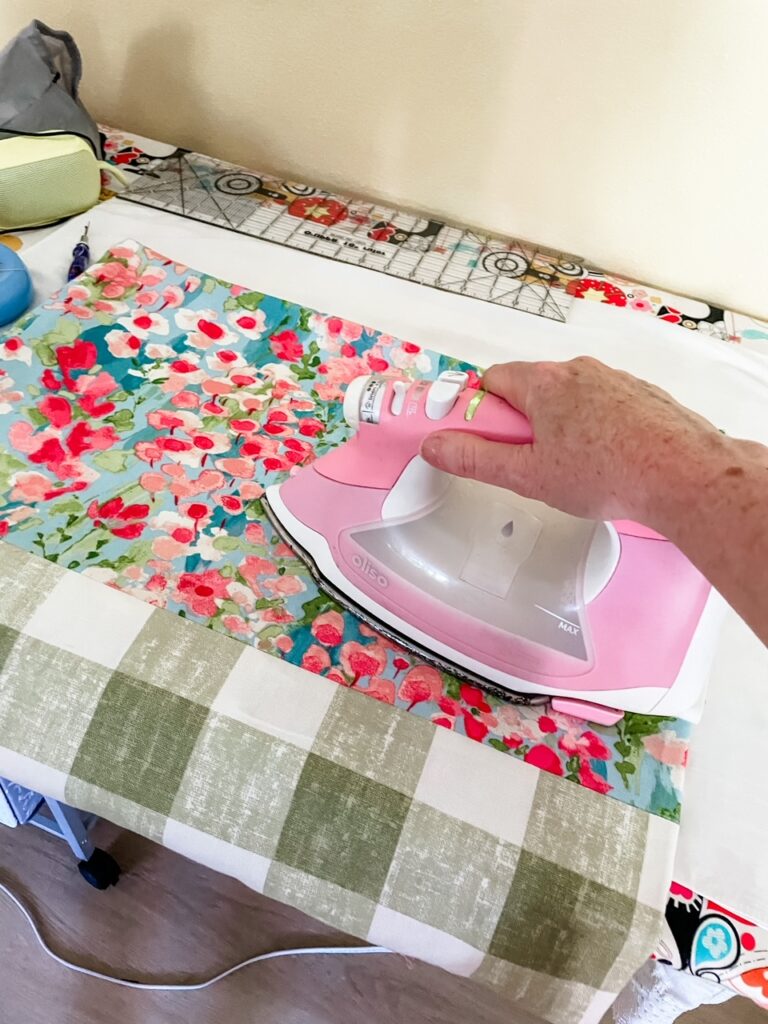
Stitching the Boxed Bottom
Creating a boxed bottom gives the bag a finished look and is easier than you might think!
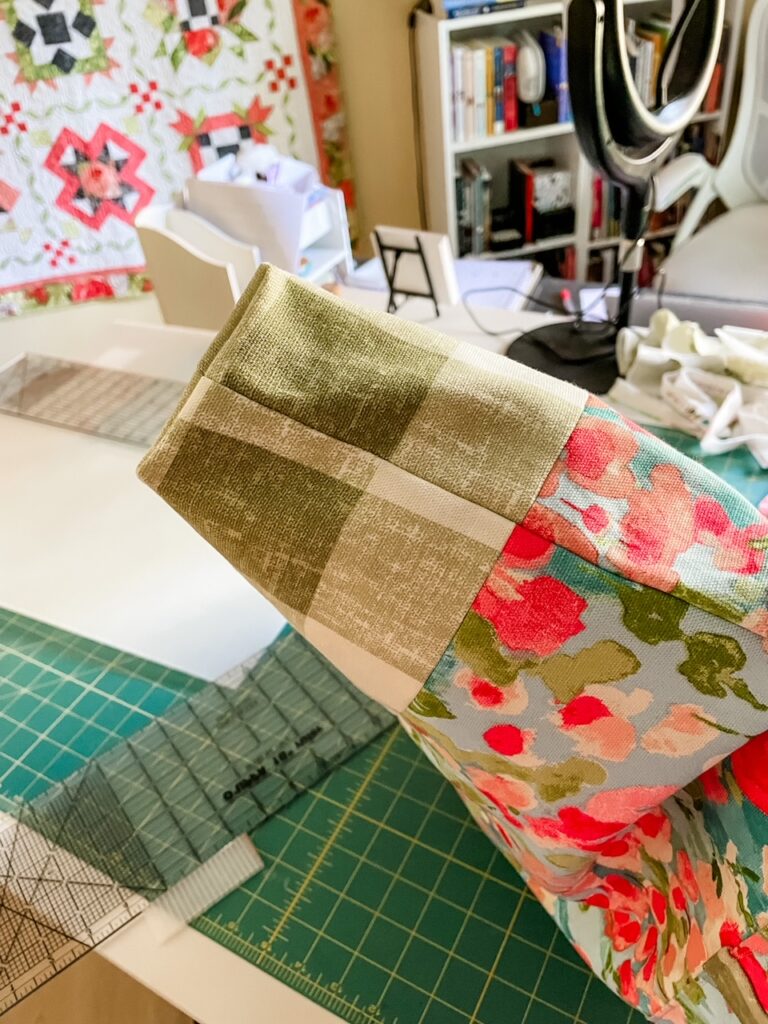
Turn the bag inside out with the bottom facing up, the lower seam centered, and the two bottom corners aligned evenly. (Refer to photos)
Measure up one and half inches from the tip of each corner up the center seam and make a mark. Place the ruler across that point in the center, and draw a stitching line, three inches from one side to the other. Pin fabric. Repeat at the other corner. (If you’re not going to put in the corrugated plastic bottom in your bag, you can use hand stitching or top stitching to sew the opening together if you wish.)
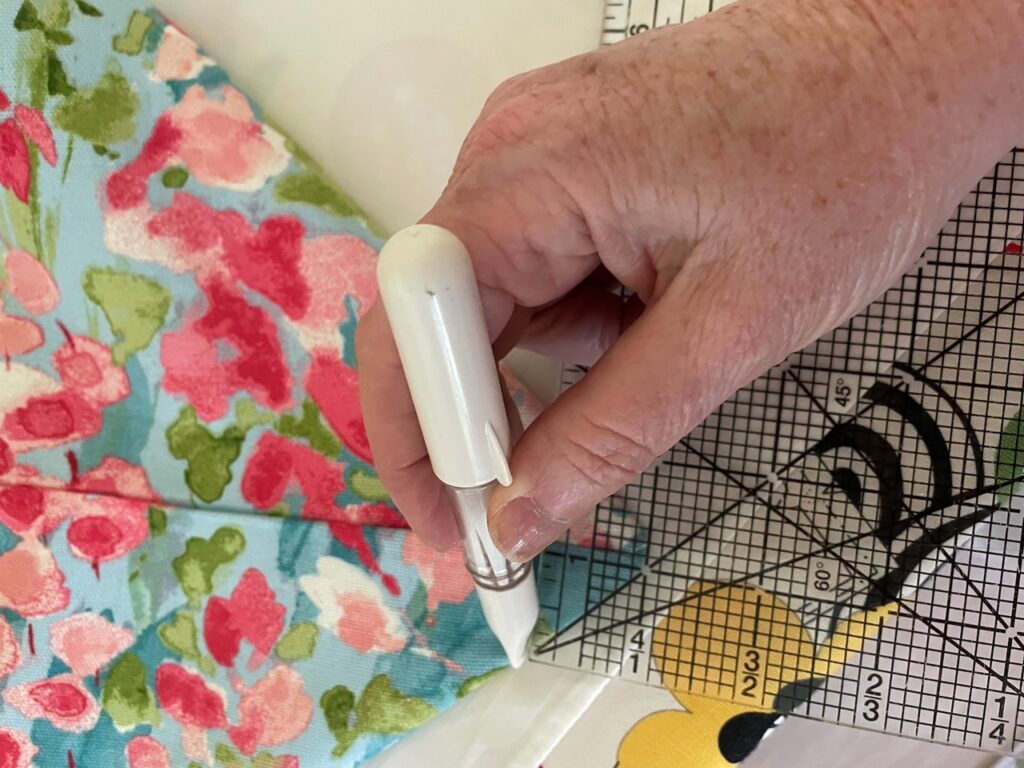
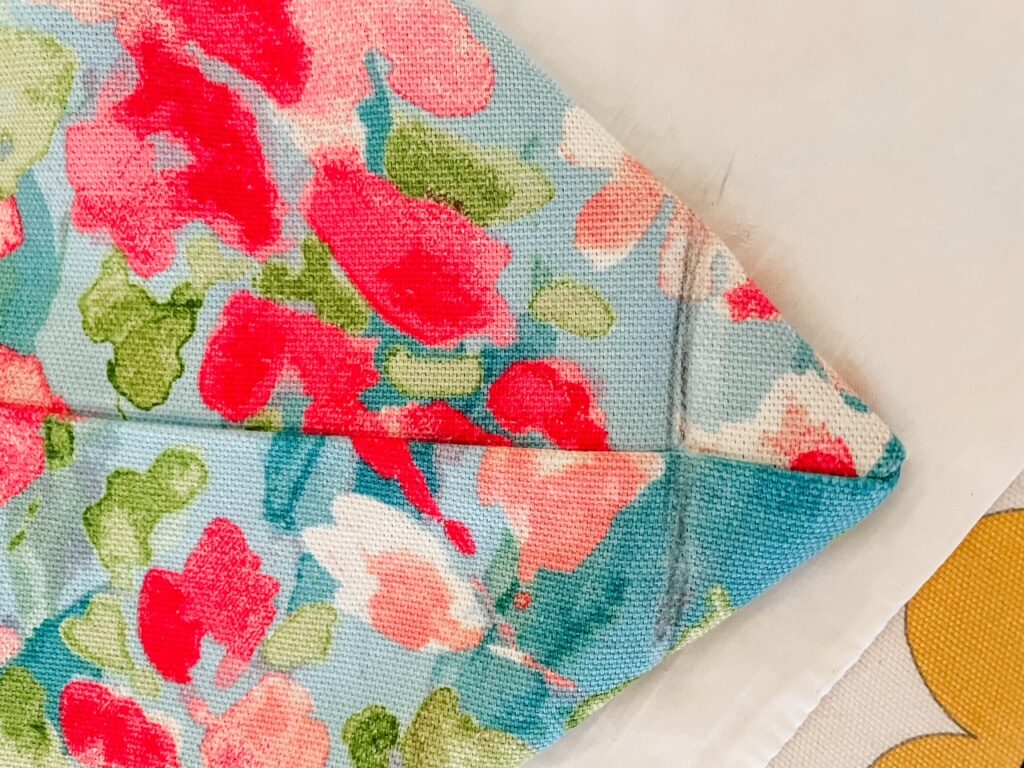
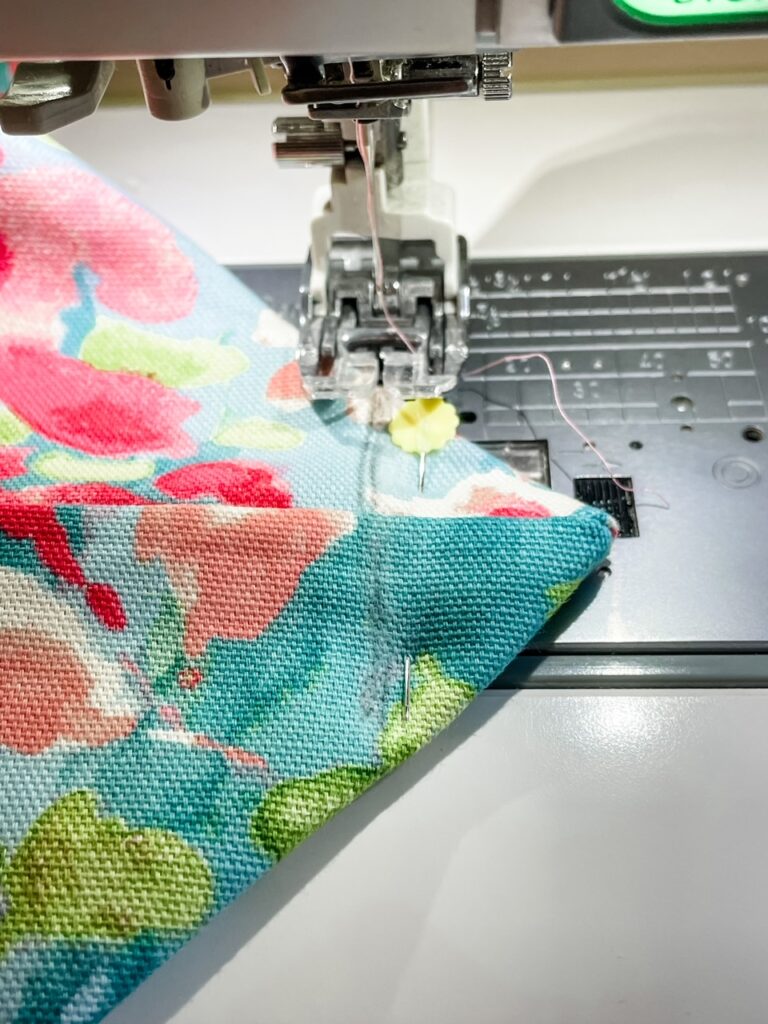
Stitch along the marked line, being sure to backstitch on both ends. Turn the bag right side out, with the contrasting bottom showing, and push out the corners to create a boxed bottom.
Sewing the Cuff and Attaching Handles
Fold the top of the bag down two inches and iron with steam, creating a cuff. Unfold the cuff and make a small mark on the upper part, 5 inches from the outside edge. Repeat on each edge and side, making 4 marks total.
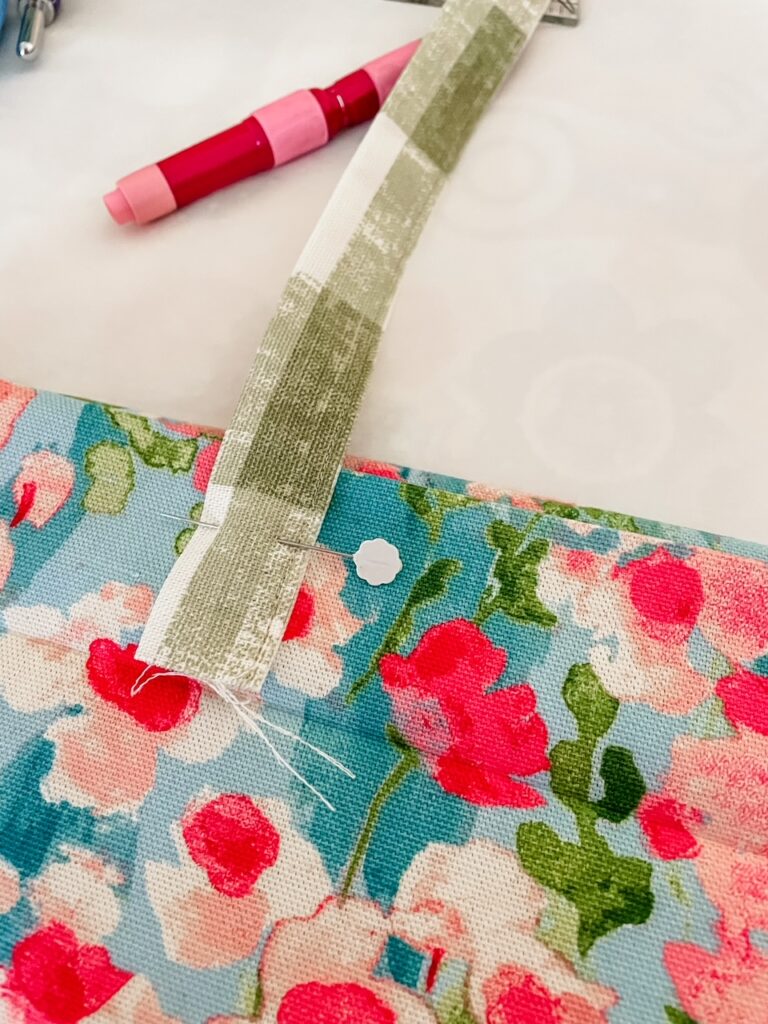
Center the end of a handle on the first mark, with the end butting up to the crease. Pin handle to the cuff. Repeat on the other side, making sure the handle isn’t twisted. Flip the bag over. Center and pin the remaining handle. (The handle loops should extend above the top of the bag.)
Secure the handle ends by stitching across the handle a quarter inch in from the crease, and once again a quarter inch from the top of the bag. Only stitch across the handles, not onto the cuff.
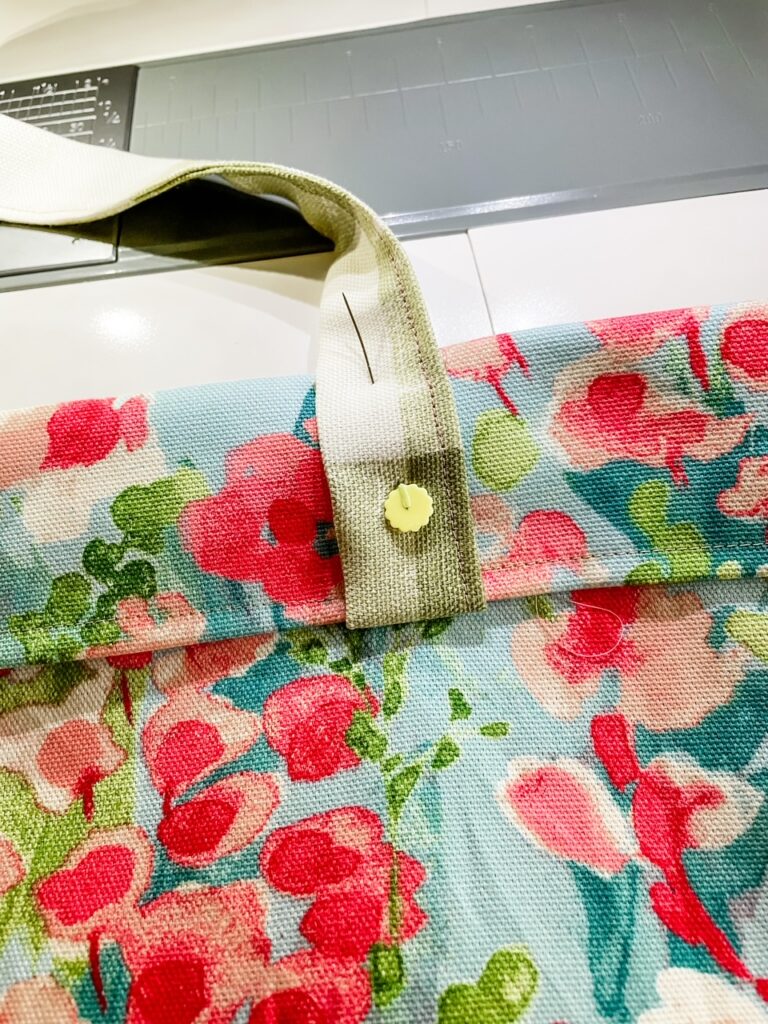
Fold the cuff down, so the handle loops are resting on the body of the bag. Fold the handles back up over the cuff, so the loops are now extending above the top edge, and pin them into place.
Top Stitching and Finishing
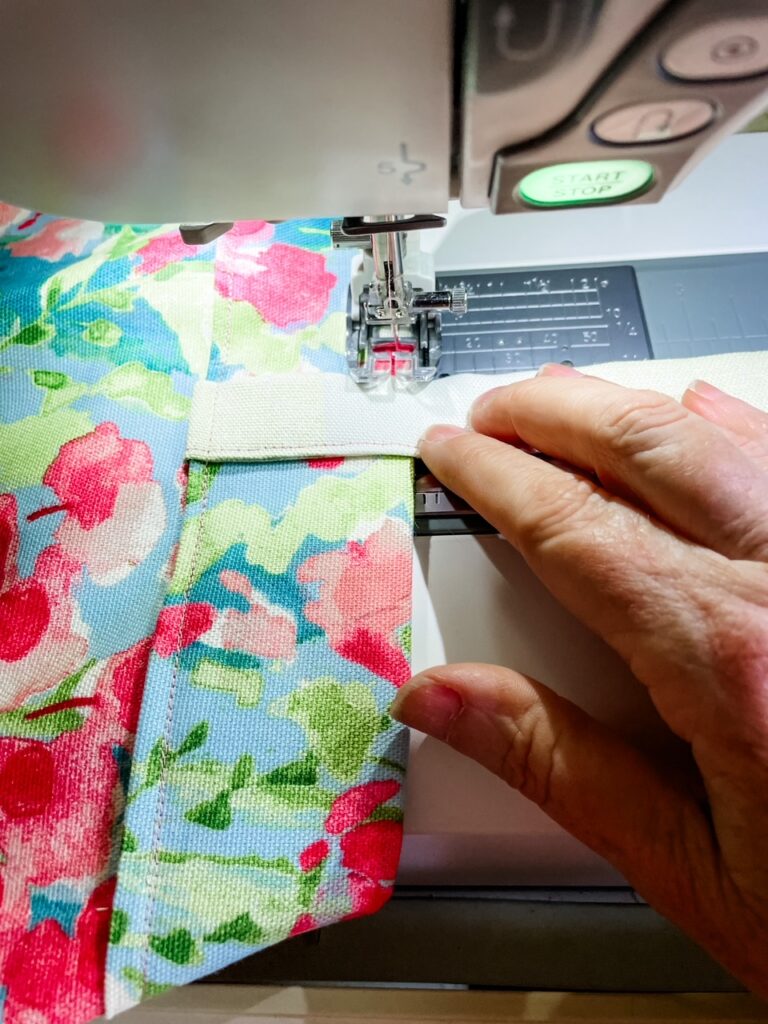
Beginning at the seamed side of the bag, top stitch the cuff and handles to the body, ¼ inch from the bottom edge of the cuff and again ¼ inch from the top of the bag. (If you’re using canvas instead of quilter’s cotton, a walking foot may be helpful.)
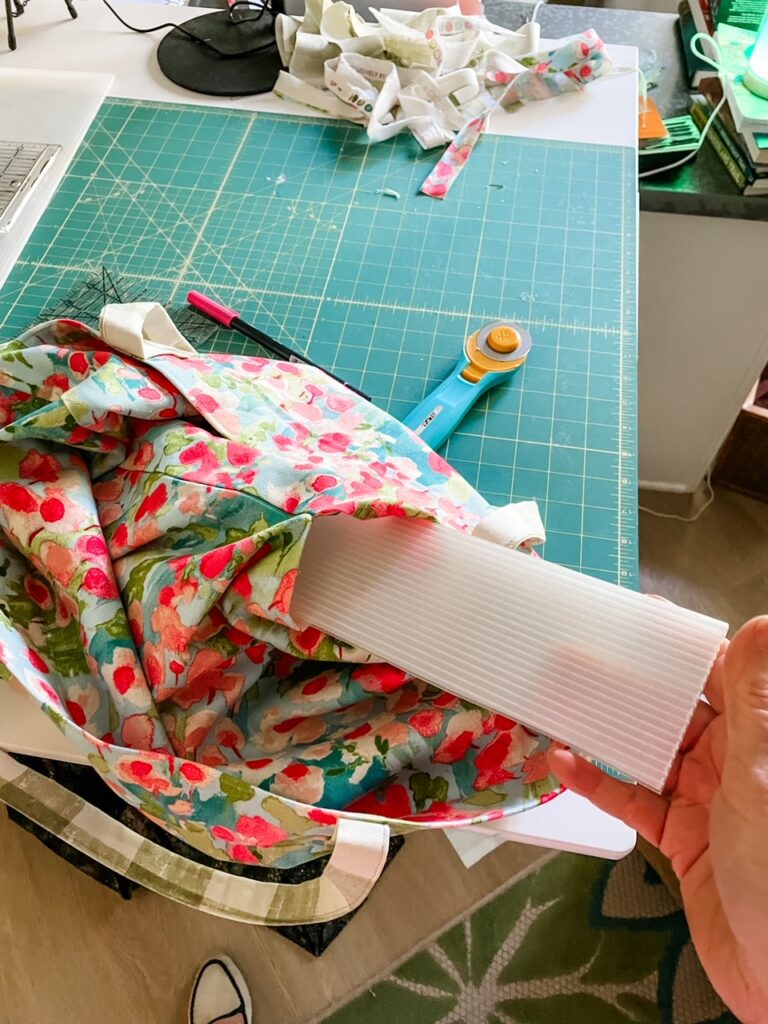
If using, slide the strip of corrugated plastic into the opening at the inside bottom of the bag. Center the plastic so that it sits evenly and butts up to each of the boxed ends. If desired, needle and thread to hand-stitch the opening closed. (If you plan to wash the tote, you may wish to leave the opening unstitched so you can remove the plastic strip before putting into the washer and dryer.)

One Hour DIY Beach Tote
Ingredients
- Fabric – Quilter’s cotton or lightweight cotton canvas, 42 to 45 inches
- ¾ yard focus fabric for bag body
- ½ yard contrast fabric for handles and bottom
- Rotary Cutter
- Cutting Mat
- Ruler
- Tailor’s chalk or fabric marking pen
- Iron and ironing board
- Pins
- Sewing machine (walking foot suggested if using cotton canvas)
- Thread
- Corrugated plastic sheet (optional but gives the bag a sturdy base and nice shape)
Instructions
All seams are half inch unless otherwise indicated.
Step One: Cutting the Fabric and Optional Plastic Bottom
Trim selvages off fabrics. From contrast fabric, cut two 4-inch by WOF (width of fabric) strips for handles, and trim to 30 inches. Cut one 7-inch by WOF strip for the bag bottom.
If necessary, square up and trim the focus fabric. It should be approximately 27 inches long.
If using, cut the corrugated plastic into a 3-inch by 19-inch strip.
Step Two: Making the Handles
With the wrong sides of fabric facing, fold each 4-inch strip in half lengthwise. Iron with steam, creating a crease down the center of each strip.
Open the pressed strips with the right side of the fabric face down on the ironing board. Fold one side to the center crease of each strip and press. Repeat with the other side of each strip, so the fabric meets at the center crease.
Fold along original center crease and press, creating two handles, 1-inch in width.
Top stitch along the long, open side of each handle, about 1/8 of an inch from the edge. Set handles aside.
Step Three: Sewing the Bag Body
With right sides of fabric together, pin the long side of the 7-inch contrast strip to the body fabric. Sew, using a half-inch seam. (Note: if you are using directional fabrics, remember that the 7-inch strip will be on the bottom of the bag.)
Press the seam open. If either fabric strip is longer than the other, trim off excess fabric so the edges are even.
With right sides together, fold the stitched fabric in half lengthwise into a rectangle,
approximately 22 by 33 inches and press. Pin the edges. Starting with the bottom contrast fabric, sew around the three open edges, leaving an opening of 5-6 inches at the top.
Reach into the opening and turn the bag so the right sides are facing out. Use your fingers or a stylus to push out the corners and edges.
Fold the opening under half an inch and press. Stitch or zig-zag the edges of the opening to keep the fabric from raveling, but do NOT sew the opening closed.
Push the top half of the fabric through the opening, toward the bottom half, creating a lining for your bag. Nest the corners together at the bottom, align the upper and lower seams as closely as possible, and make sure that the top edge of the bag is even.
The body of your bag is done! It should measure about 16 x 20. (Don’t worry if it’s not exact)
Stitching the Boxed Bottom
Creating a boxed bottom gives the bag a finished look and is easier than you might think!
Turn the bag inside out with the bottom facing up, the lower seam centered, and the two bottom corners aligned evenly. (Refer to photos in post.)
Measure up one inch from the tip of each corner up the center seam and make a mark. Place the ruler across that point in the center, and draw a stitching line, two inches from one side to the other. Pin fabric. Repeat at the other corner. (If not using corrugated plastic bottom in bag, hand stitch to close the opening.)
Stitch across the corner along marked line, backstitching at start and finish. Turn bag right side out and push out the corners to create a boxed bottom.
Step Four: Sewing the Cuff and Attaching Handles
Fold the top down two inches and iron with steam, creating a cuff. Unfold cuff and make a small mark on the upper part, 5 inches from outer edge. Repeat on each edge and side, making 4 marks total.
Center the end of a handle on the first mark, butting up to the crease. Pin handle to cuff. Repeat on the other side, making sure handle isn’t twisted. Repeat on opposite side with remaining handle. (The handle loops should extend above the top of the bag.)
Secure the handle ends by stitching a quarter inch in from the crease, and once again a quarter inch from the top of the bag. Only stitch across the handles, not onto the cuff.
Fold the cuff down, so the handle loops are resting on the body of the bag. Fold the handles back up over the cuff and pin into place.
Step Five: Top Stitching and Finishing
Beginning at the seamed side of the bag, top stitch the cuff and handles to the body, ¼ inch from the bottom edge of the cuff and again ¼ inch from the top of the bag.
If using, slide the strip of corrugated plastic into the opening at the bottom of the bag.
Center the plastic so that it sits evenly in bag bottom. If desired, hand stitch the opening closed. (If you plan to wash tote, you may wish to leave opening so you can remove plastic before washing.)


