This post may contain affiliate links. Full disclosure policy
This post may contain referral links. If you click through and take action, I may be compensated, at no additional cost to you.
One of the toughest parts of moving into our new home was leaving our grandchildren behind. If you’re a grandma or, like me, a “grammy” – then you know how quickly you can get addicted to those grand-darlings! For over a year, we had actually shared our home with my middle son, his wife, and two of our grand-darlings so I had become very spoiled, getting to see them every day.
Technology definitely makes it easier to stay in touch with long-distance loved ones but visiting with your grands on FaceTime (especially if they spend most of the visit making faces into the camera) just isn’t the same.
But here’s the good news, if you are a long-distance grandmother like me – one of the most meaningful ways of connecting with people you love is also one of the most time-honored. And involves no technology whatsoever! Set up a Craft of the Month Club! Here’s how.
The Old Fashioned Correspondence that Trumps FaceTime
For more than 231 years, the U.S. Postal Service has been helping Long Distance Grammys (and everybody else) send love across the miles, the country, and even the world. Since today’s kiddos spend so much of their lives on screens, for this generation of grand-darlings, getting a real letter with their name on the envelope is a big pretty deal.
Of course, I still talk to my grand-darlings via telephone and FaceTime on a pretty regular basis but they really get excited when I send them a letter. I get even more excited when they send one back to me!
Becoming pen pals with my grandchildren has definitely made moving a little easier and been a tangible means of letting them know how much I care. This year, I decided to take things up a notch.
Each of my grand-darlings is now a member of Grammy’s Craft of the Month Club.
It’s an easy, inexpensive, fun, meaningful, and even educational way to connect with your long-distance grandkids. Every month, you pick an age-appropriate craft for your grandchildren, purchase the necessary supplies, write a letter with the instructions, package it up and pop it into the mail–simple!
Trust me, this is something your grandkids will love and look forward to. So will their parents!
After sending off the inaugural “Craft of the Month,” my daughter-in-love, who homeschools her three, wrote and said, “We are crafting with cocoa. Thanks, Grammy! So fun, counts as school, AND I didn’t have to trek all the kids through the craft store!!!”
Think what that means to a mother of preschoolers!
Make It Official
If you want to start a Craft of the Month Club for your grand-darlings, the first step is to build anticipation by making an announcement. Print a certificate on the computer or purchase a pre-printed certificate from your local office supply store, and fill in the blanks to inform your grands that they are official members of the Craft of the Month Club.
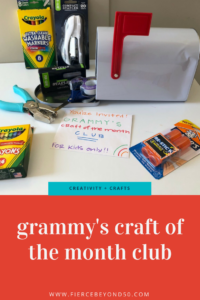
When I went to the JoAnn’s in search of supplies, I stumbled upon these perfectly adorable (and very inexpensive!) little mailboxes with real flip up flags! The mailboxes sit on a shelf at the home of each grandchild. When they come home from school or an activity and see the flag is up, they know that Grammy has sent a letter or new craft project!
Supplies
Along with the certificate, send a supply of basic, age-appropriate craft supplies they’ll need in the coming months. The crafting kit for my grands, ages 3-7, included…
- Crayons
- Washable markers
- Glue sticks
- Dull point scissors
- Stapler and staples
- Single hole punch
Chances are they already have some of these at home but it’s good to have everything stored in one place. Besides, who doesn’t love getting a brand new box of crayons?
My lei-test craft of the month
Since my husband and I recently came home from a trip to Hawaii, I thought it would be fun for the kids to make their own Hawaiian-style leis. It will make a fun topic of conversation for future letters.
Very little ones might need some help from mom or dad to make these leis, but most should be able to make them without too much assistance. Here’s all you’ll need…
- 6 drinking straws
- string
- floss threaders like these
- good quality card stock in reds, pinks, yellows or other flower colors
- flower paper puncher like this one
 Instructions
 Cut drinking straws into short half inch pieces. These will be used as “beads.”
- Use flower paper puncher to punch out flowers, at least 20.
- Use single hole punch to punch holes into the center of each flower.
- Cut string long enough for a necklace (leave a little extra room).
- Loop string through the floss threader.
- Thread the string through one straw “bead,” then one flower, then a bead again, and so forth until the full length of the string has been covered.
- Fasten lei on child.
- Show them how to hula.


