This post may contain affiliate links. Full disclosure policy
Temperature quilts are beautiful, colorful, fun-to-make fabric mementos of the new year to come. Read on for ideas and tips on how to make a temperature quilt for yourself!
What is a Temperature Quilt?
Though temperature quilts have been around for a few years, I only heard about them recently. A friend mentioned them to me a few weeks ago. After I did a little investigation, I knew I wanted to make a temperature quilt for myself!
The idea behind temperature quilts is pretty straightforward. Basically, you’ll be making a small, two-color quilt block every day in the coming year. One of the colors will represent the high temperature for a particular day, the other color will represent the day’s low temperature.
By the end of the year, you’ll have 365 blocks to stitch into a big, colorful quilt that will serve as a visual reminder of the temperature and weather fluctuations over the year, as well as a memento of that year.

An example of a temperature quilt, courtesy of Live a Colorful Life.
How to Make a Temperature Quilt – Start with the Fabric
Though I have seen a couple of temperature quilts that use prints, most are made with solid fabrics. I’ve been wanting to do more with solids this year. So as I was thinking about how to make a temperature quilt for myself for 2022, going that route seemed like the right choice for me.
I could have used Kona solids – I’ve got a lot on hand already and they’re not very expensive. However, I decided to go with Cherrywood fabric instead. It’s definitely a pricier option but I love that they are hand-dyed in the USA fabrics. They’re also 100% cotton but they look like suede!
How do they do it? No clue. But they look really cool and I thought using Cherrywood fabrics would give my temperature quilt a nice depth that regular solids can’t match.
(One thing to note if you decide to use Cherrywood fabrics; because they’re hand-dyed, they do require special care and a special detergent when washed.)
Choose Your Colors and Assign Temperatures
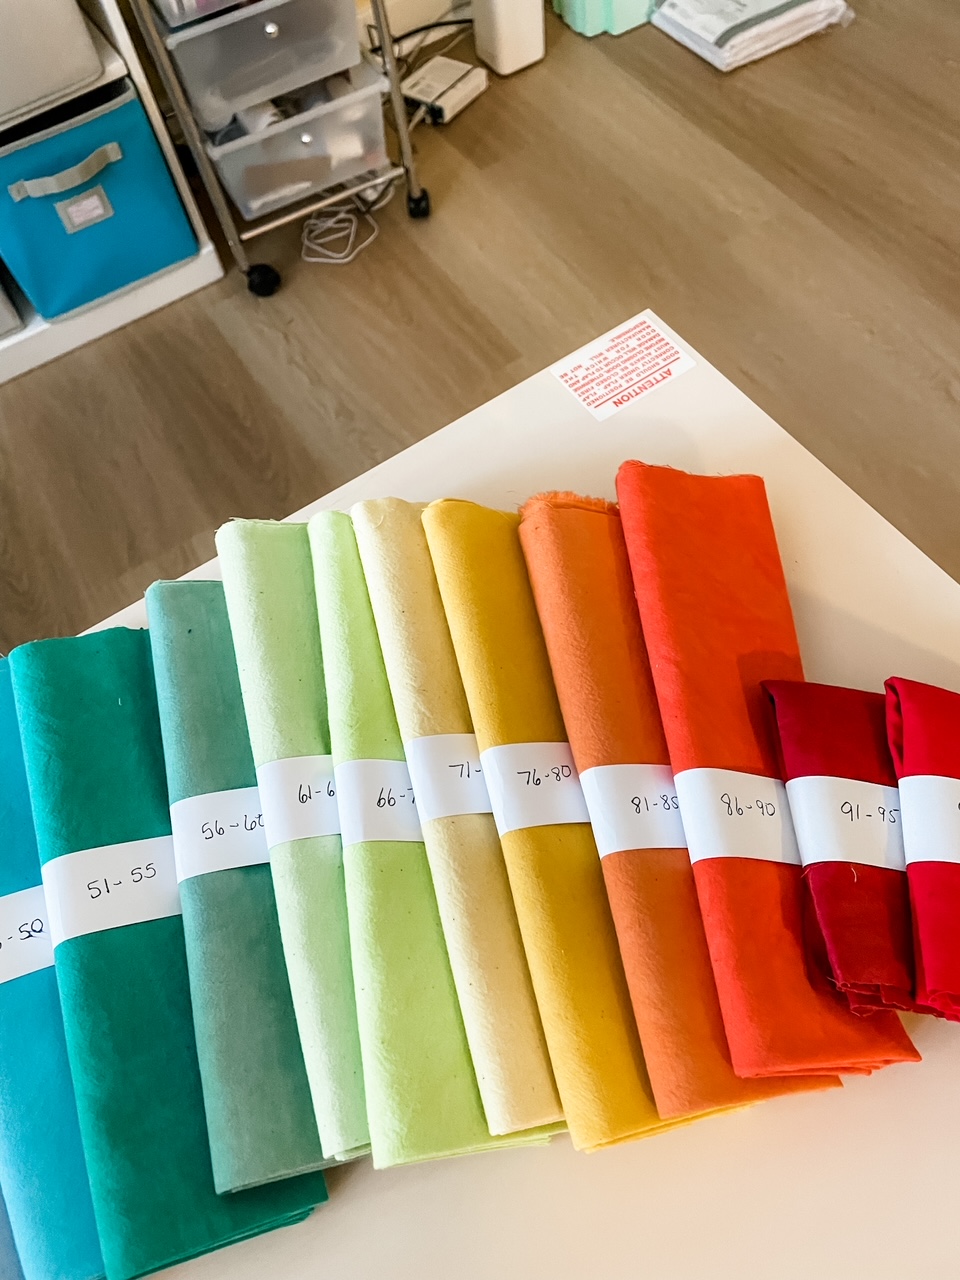
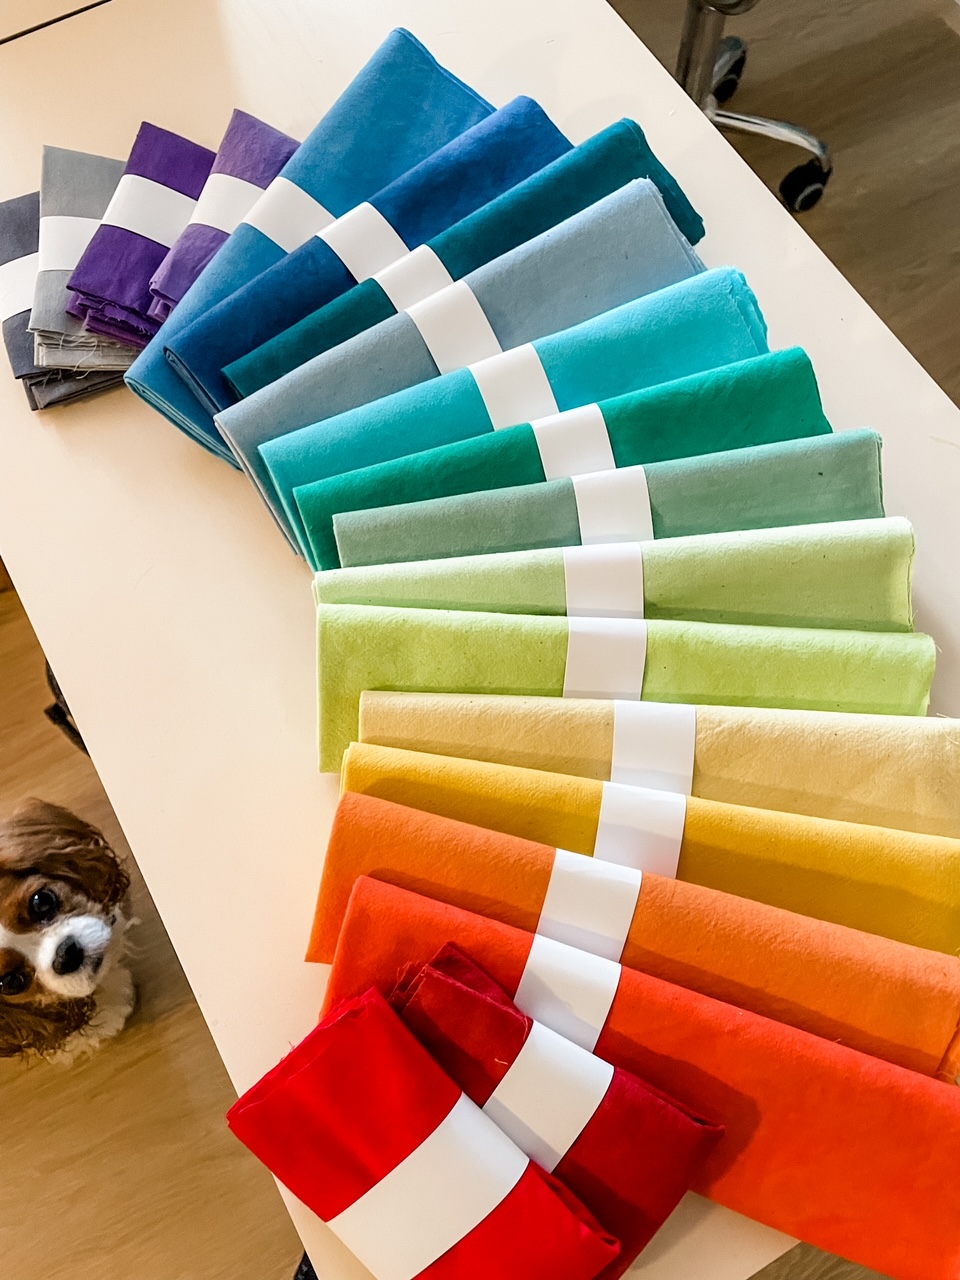
Each fabric in your temperature quilt will correspond to a particular range of temperatures.
As you can see, I arranged my fabrics from cool to hot, with a pewter gray for temperatures of ten degrees or less on the low end, and a bright red if the high is 96 degrees or above.
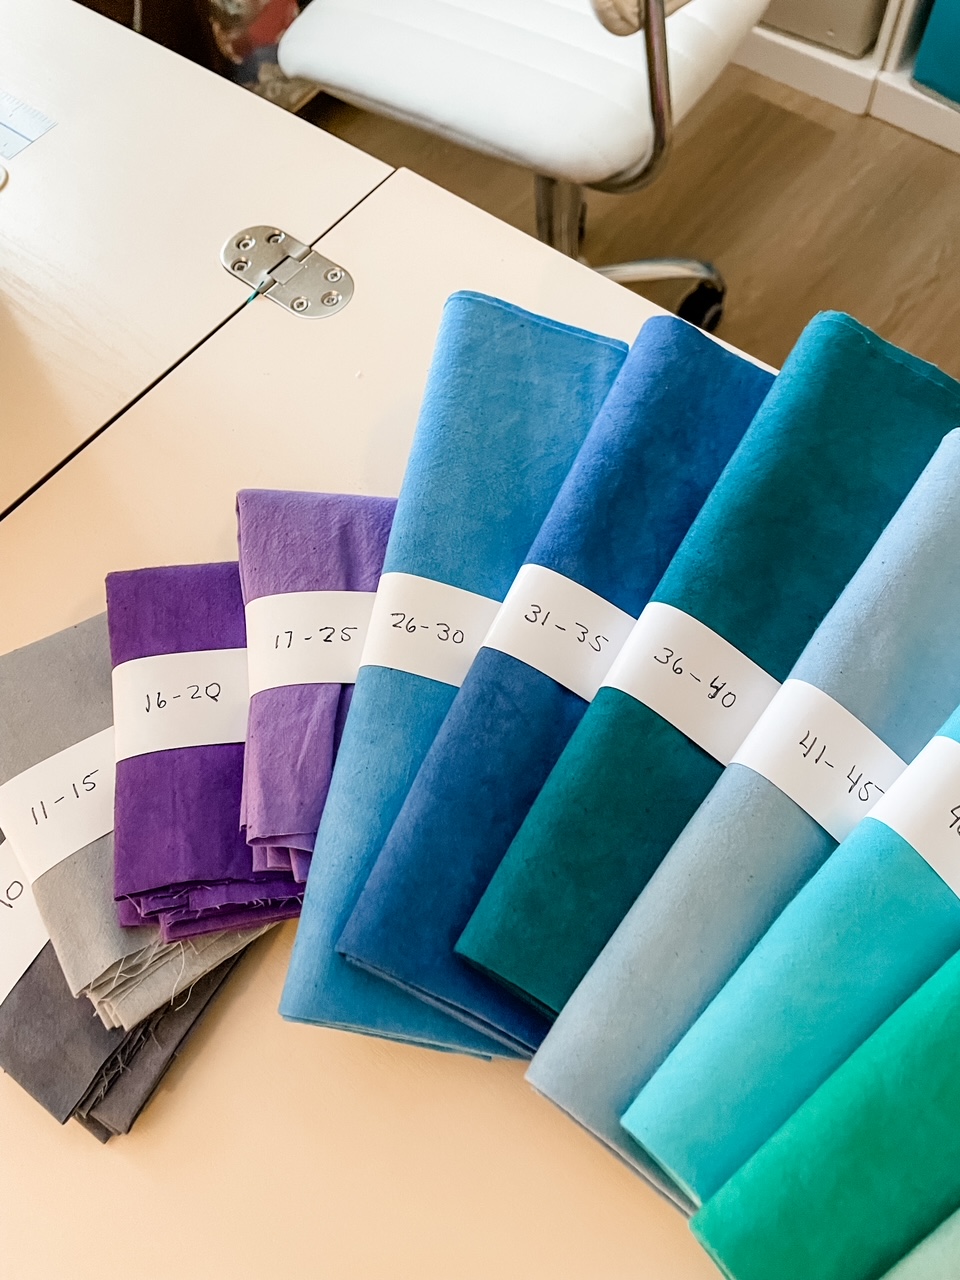
Since I live in a fairly temperate climate, I didn’t think there was much point in choosing additional fabrics below ten degrees or above 96. However, if you live in a very hot climate, such as Arizona, or a very cold place, like Alaska, you might want to bring in more fabrics for those blistering or frigid days.
Most temperature quilts use a five-degree range for each color. That’s what I’ve decided to do but you can increase or decrease the range if you’d like. I’ve seen some with a three degree range. You’ll choose two fabrics each day, one for the low temperature of the day and another for the daily high, and create a quilt block with those fabrics.
Getting Organized and Staying the Way
After and assigning temperature ranges to each color, I made a chart with fabric swatches. The temperature range, fabric color names, and order numbers are clearly written next to each swatch.
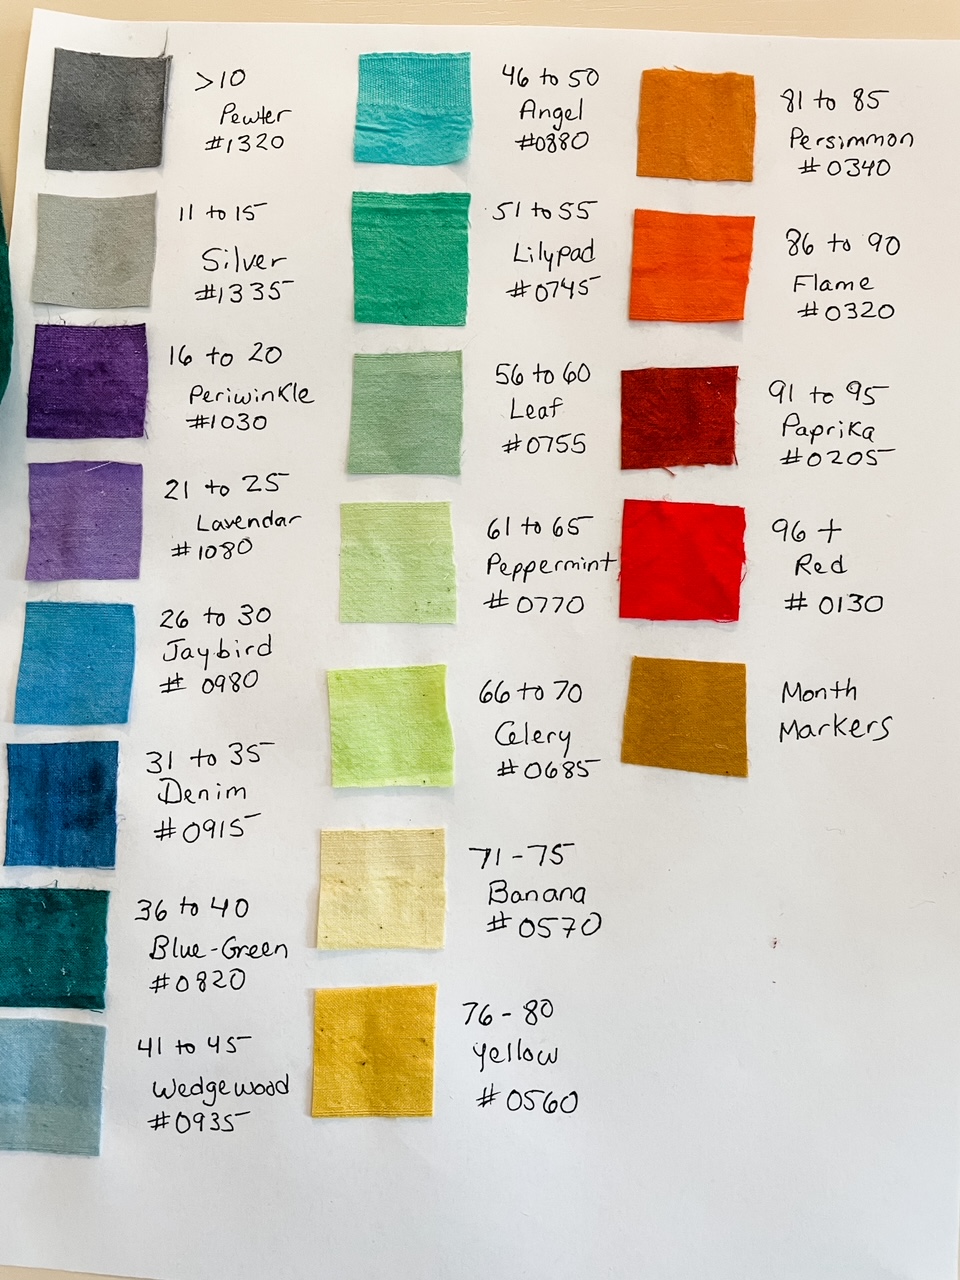
I decided to order half-yard cuts of most of my fabrics, and quarter yards of the colors for the lowest and highest temperatures. It’s really impossible to know exactly how much I’ll need of any given fabric. If I need to order more of a particular fabric, I can easily refer to the chart to make sure I’m getting the right one. The dye lots might be off a bit, but it should be close enough.
Finding the time for quilting can be tough for me. I’m hoping that making my temperature quilt will encourage me to spend at least a few minutes sewing every day.
My chances of sticking with it will be better if I have everything organized, so I cut my patches in advance and placed them in bags with temperature marked on each one. That way, all I have to do is sit down, grab two patches and stitch them together. Easy!
Temperature Pattern Inspiration
I also decided that my chances of sticking with this project would be much greater if I kept it simple. That’s why I’ve decided to use half square triangles (HSTs) for my temperature quilt blocks.
Rather than create a pattern myself, I am using one I found on Material Girls as inspiration for my quilt. I love the way the HSTs are arranged in this pattern, to create interesting secondary patterns. But you could also point your HSTs in just one direction for a different look.
The internet provides endless patterns and inspiration for how to make a temperature quilt. Even simple patterns, like the one I’m using, can give beautiful results.
This quilt from Live a Colorful Life is a good example of a simple temperature quilt that’s pretty and easy enough for novice quilters to make.
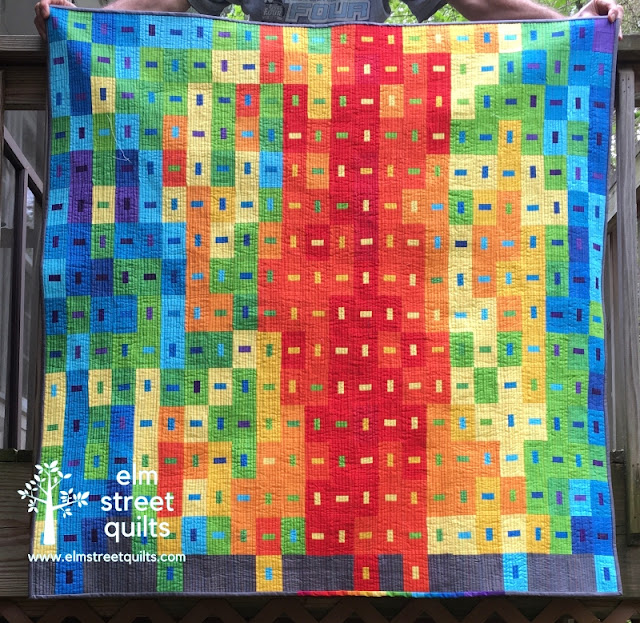
If you’re into modern designs, check out both the 2020 and 2021 temperature quilt designs at Elm Street Quilts. Both are really eye-catching and would be easy to make.
This flying geese temperature quilt from GillyMac Designs is lovely if you’re up for a little more work. And think what an expert you’d be at making flying geese blocks by this time next year!
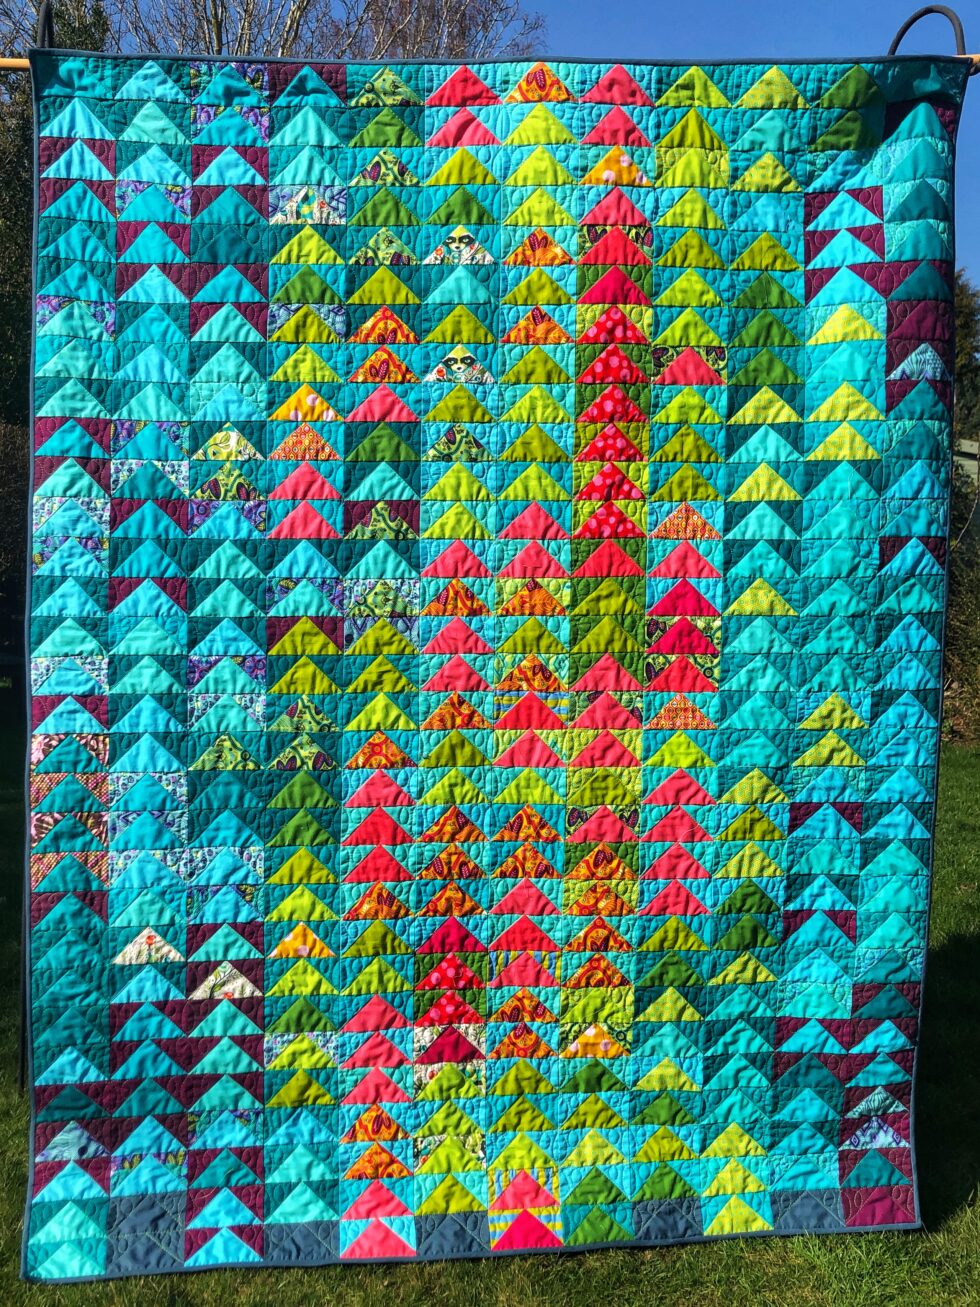
An example with a flying geese pattern, courtesy of Gilly Mac Designs.
As I said, I’ve elected to stick with a fairly simple design because I want to increase my chances of sticking with the project. The last thing I need in my sewing studio yet one more UFO! (Unfinished Object). However, I was sorely tempted to choose one of the curved piecing temperature quilts I found online. They’re just so gorgeous!
Who doesn’t love the Drunkard’s Path block? This quilt from Flourishing Palms made my heart go pitter-pat!
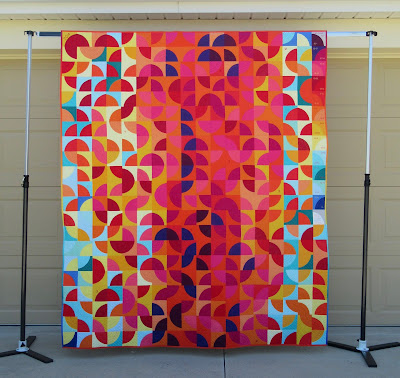
A curved temperature quilt, courtesy of Flourishing Palms.
Polka dots are always fun too. I loved the playful 2018 temperature quilt from A Quilting Sheep.
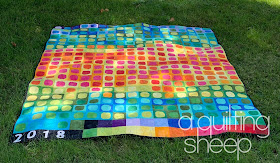
A vibrant temperature quilt created by A Quilting Sheep.
This orange peel design from Samelia’s Mum might be my very favorite. It’s just a stunner!
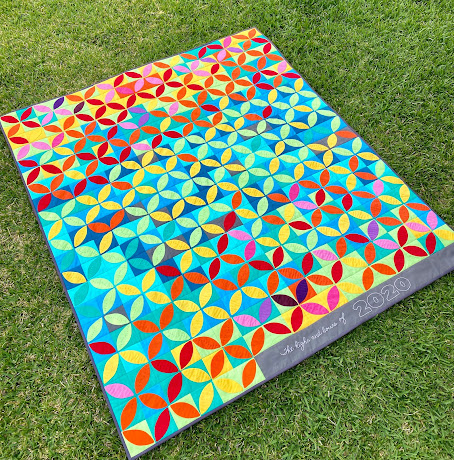
A beautiful example of a temperature quilt, courtesy of Samelia’s Mum.
Choose a simple block or a complex one. Use somebody else’s pattern or create one of your own. Any way you stitch it, making a temperature quilt is a fun and easy way to infuse the new year with color and creativity.


