This post may contain affiliate links. Full disclosure policy
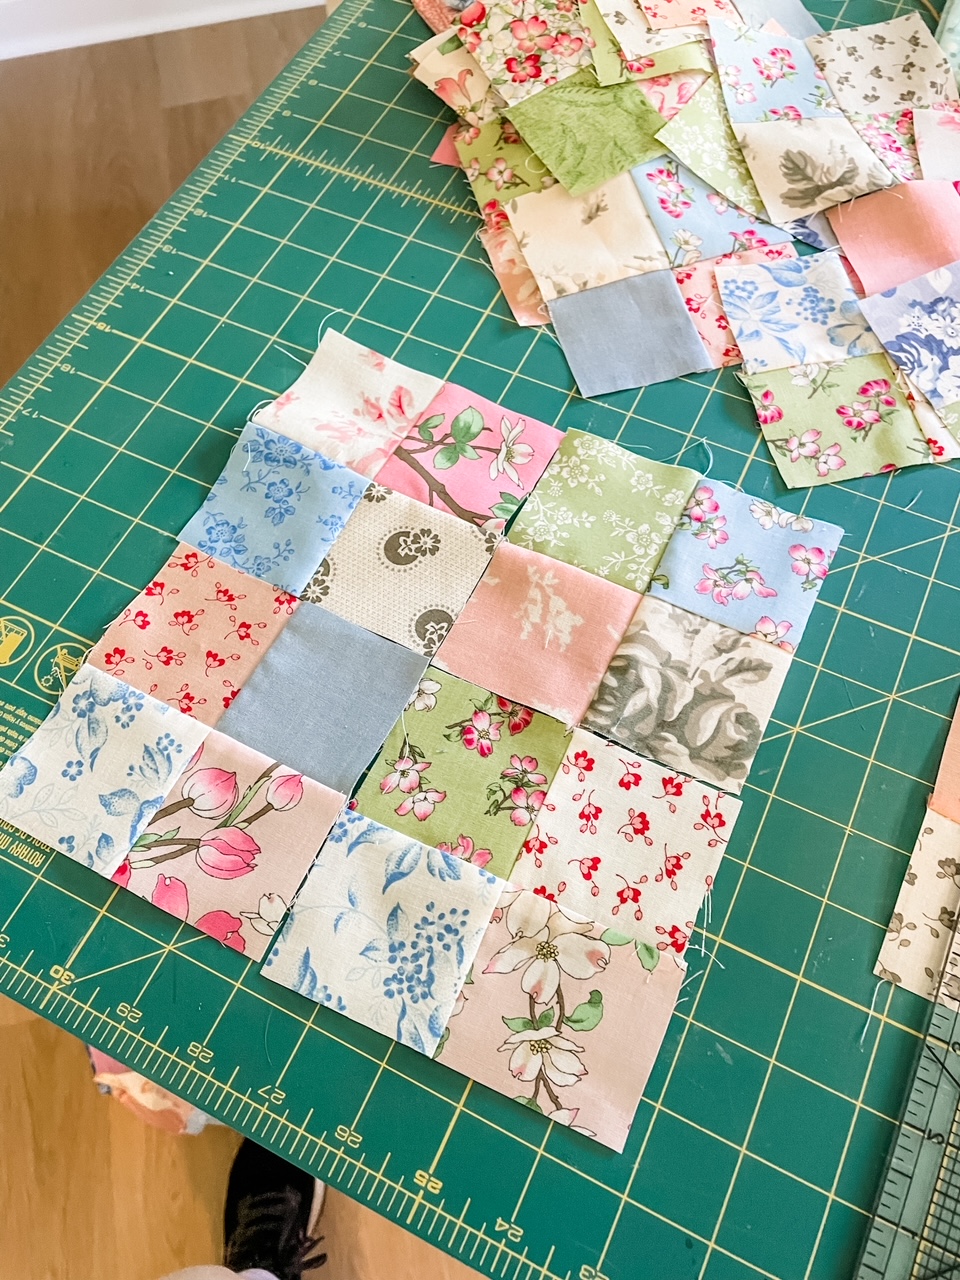
A sewing cheerful, scrappy quilt that looks terrific in any room is probably easier than you think! Read on for a tutorial and tips on how to stitch the first block you’ll need to make an Easy Two Block Quilt!
Easy Two Block Quilt: Happy, Scrappy, and Simpler than It Looks
When my husband came down with Covid, I made a pot of chicken soup, placed fresh flowers, cough drops, and tissues on his nightstand, and tried my best to not to get too close.
Though I ended up catching the bug anyway, I used those three days before I succumbed to get a good start on a project I’d been meaning to tackle for some time – an easy two block quilt.
Although our youngest granddarling has already turned three, I have yet to make her a quilt!
Because I don’t want the poor little cherub to have to wait another three years before getting her quilt, I wanted something that would stitch up fairly quickly. However, while I wanted the quilt to be easy, I didn’t want it to look easy.
When Susan, a member of an online quilting group I belong to, showed a photo of a quilt she’d recently completed, I knew I’d found a winner.
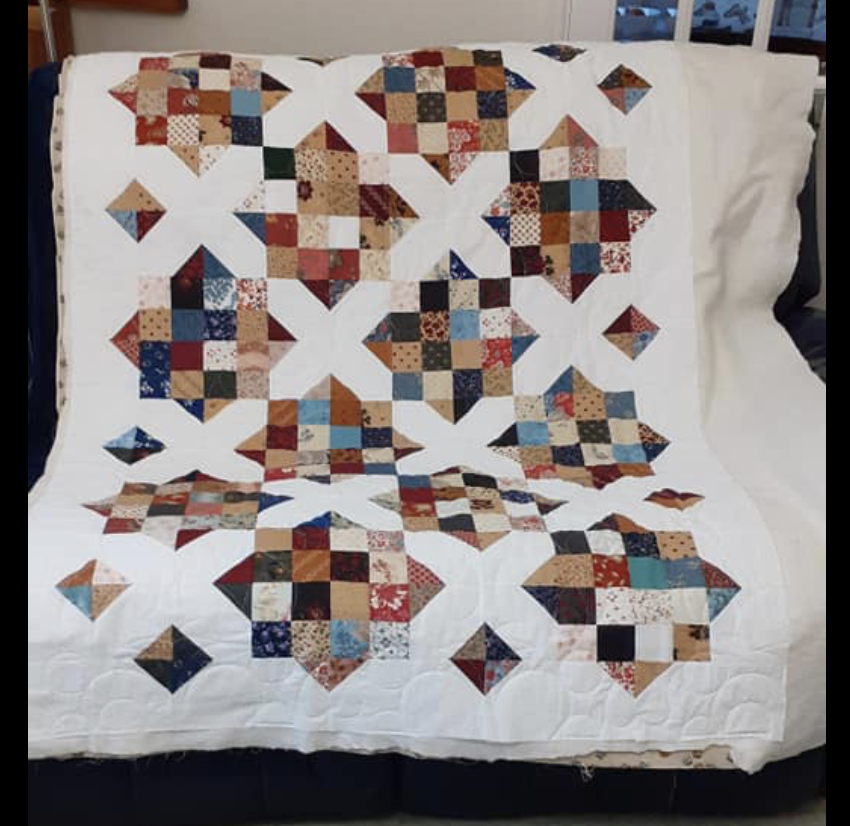
It was such a happy, scrappy quilt! And though it looks fairly complicated at first glance, I quickly realized that the entire quilt was composed of two easy blocks. Perfect!
Inspired by Irene
My online friend’s quilt was made with a “Goodnight Irene” pattern available from Missouri Star Quilting. This easy two-block quilt is just ridiculously cute, and the pattern is a bargain at just $5.95!
Over the course of two posts, I’ll show you how I made both blocks that I used to create an easy two-block quilt based on the “Goodnight Irene” quilt photo I saw. Maybe you’ll be inspired to make one of your own!
However, I won’t be including anything about yardage, design layout, quilt dimensions, or finishing instructions. So, if you want that information, I recommend you purchase the pattern from Missouri Star.
Easy Two Block Quilt: Block One – A Classic Sixteen-Patch
The first block I made for my easy two block quilt is a classic sixteen-patch. There are all kinds of ways to make that block, some are easier and faster than others. But we’ll get to that in a minute.
If you’re new to quilting, the idea of sewing a sixteen-patch block might seem a little daunting. However, it’s actually extremely easy. Because all you need to make that sixteen-patch block is four different four-patch blocks.
And really, blocks don’t get much simpler than a basic four-patch. However, as with most quilt blocks, some methods for sewing them are easier than others.
Making Some Easy Four-Patch Blocks
You can use this method to make easy four-patch blocks of almost any size, large or small. All you need to start with is a bunch of contrasting fabrics, cut into equally sized squares.
Since I happened to have a charm pack (5-inch square precuts) of cheery pastels on hand, I began with that and added more fabrics from my scrap bin. Bringing in lots of different fabrics will help you achieve a truly scrappy look. It’s also a great way to use up leftover fabric scraps.
Step One: Fabric Selection
The first step in creating your easy four-patch blocks is to select two contrasting fabric squares.
If one of the fabrics has a small-scale print, then choose a larger print for the other piece. Creating contrast in color is important too. You don’t necessarily have to use different colors for each block. But if, for example, you decided to use two blue fabrics, make one should be significantly darker than the other.
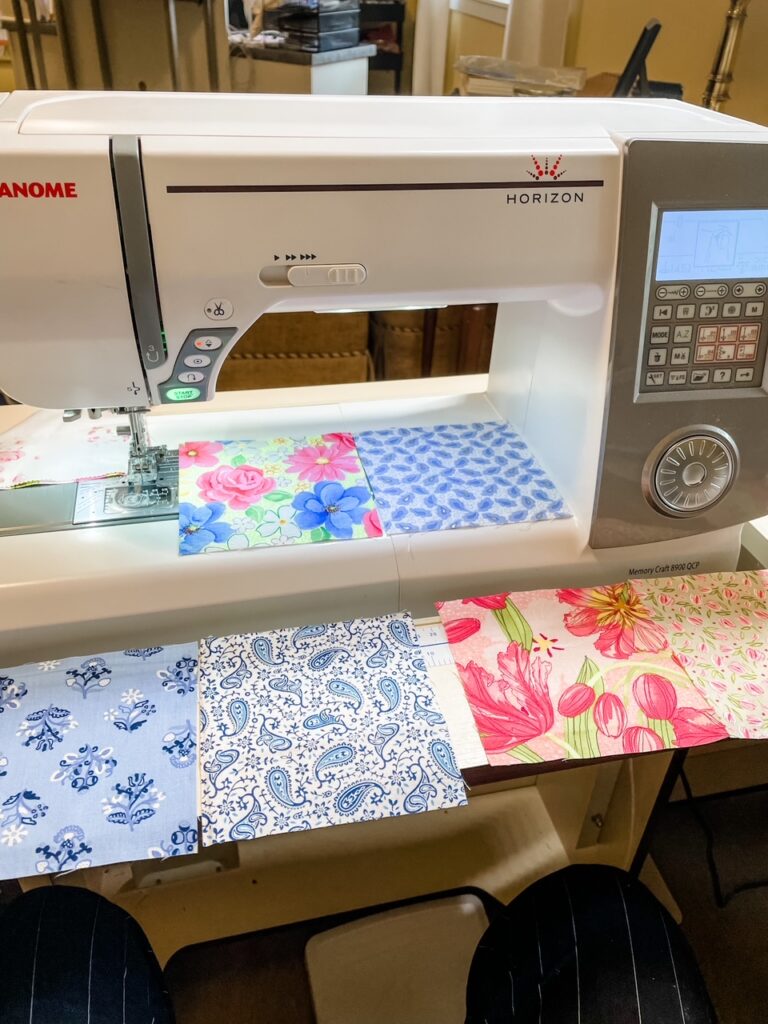
After choosing your first two fabrics, layer one on top of the other with the right (printed) sides together and all four edges even. Since we’re making a sixteen-patch block, you’ll need to layer at least two more fabric squares as above. If you’re planning to make several blocks, prepare even more layered squares.
Chain piecing all your patches at one time is part of what makes this block so quick and easy. However, you might want to start with one test block, just to make sure you understand the process.
Step Two: Chain Piecing Your layered Squares
Sew a quarter-inch seam along one edge of your first layered square. (Note: in quilting, all seams are quarter-inch unless specified otherwise.) When you get near the bottom, have your next square ready to go and keep sewing. Repeat the process until all your squares are stitched along one edge, creating a chain of sewn patches.
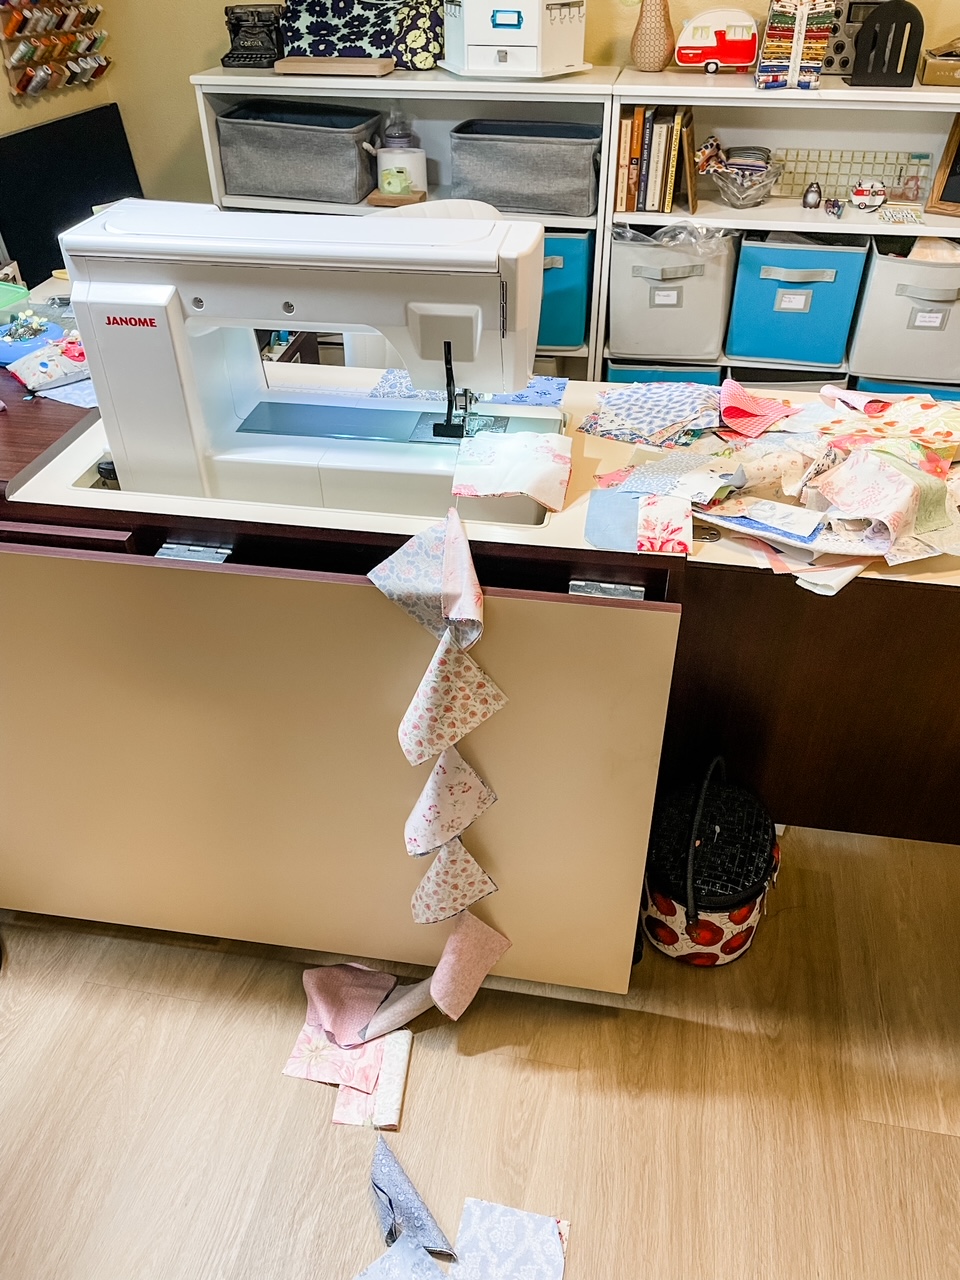
Cut your thread and remove the chain from the machine.
Starting with the first patch in your chain, sew another quarter-inch seam along the opposite edge of your first seam. Repeat with the remaining patches until all your layered fabric squares are sewn along the two opposite edges.
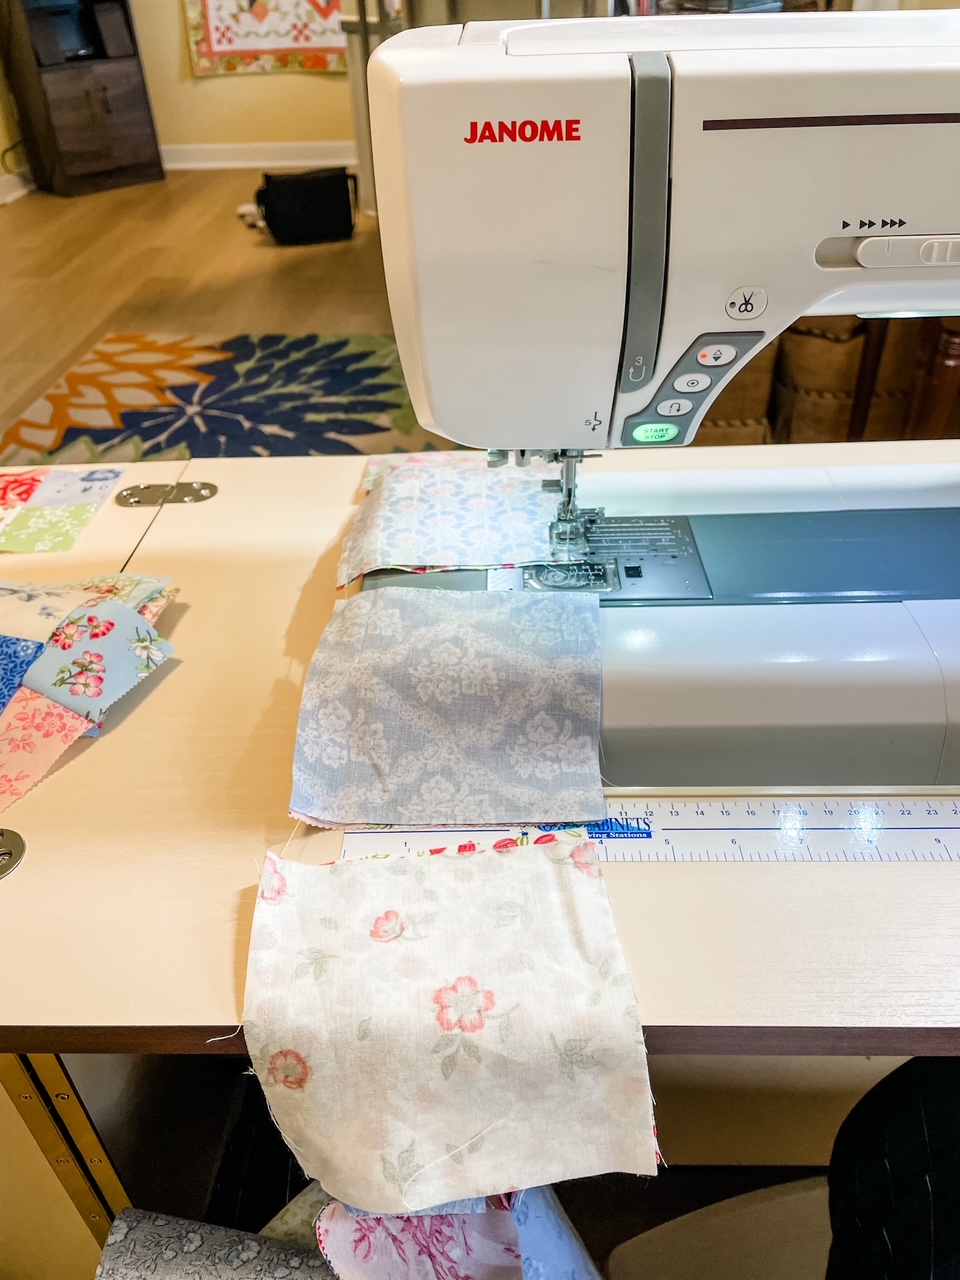
Step Three: Pressing and Piecing
Clip the threads between all your stitch squares. Use a rotary cutter or scissors to cut the blocks in half lengthwise. Make sure you are cutting halfway between the lines of stitching, not across the stitches. (Since I began with 5-inch squares, I will be cutting 2.5 inches from the outer edge.)
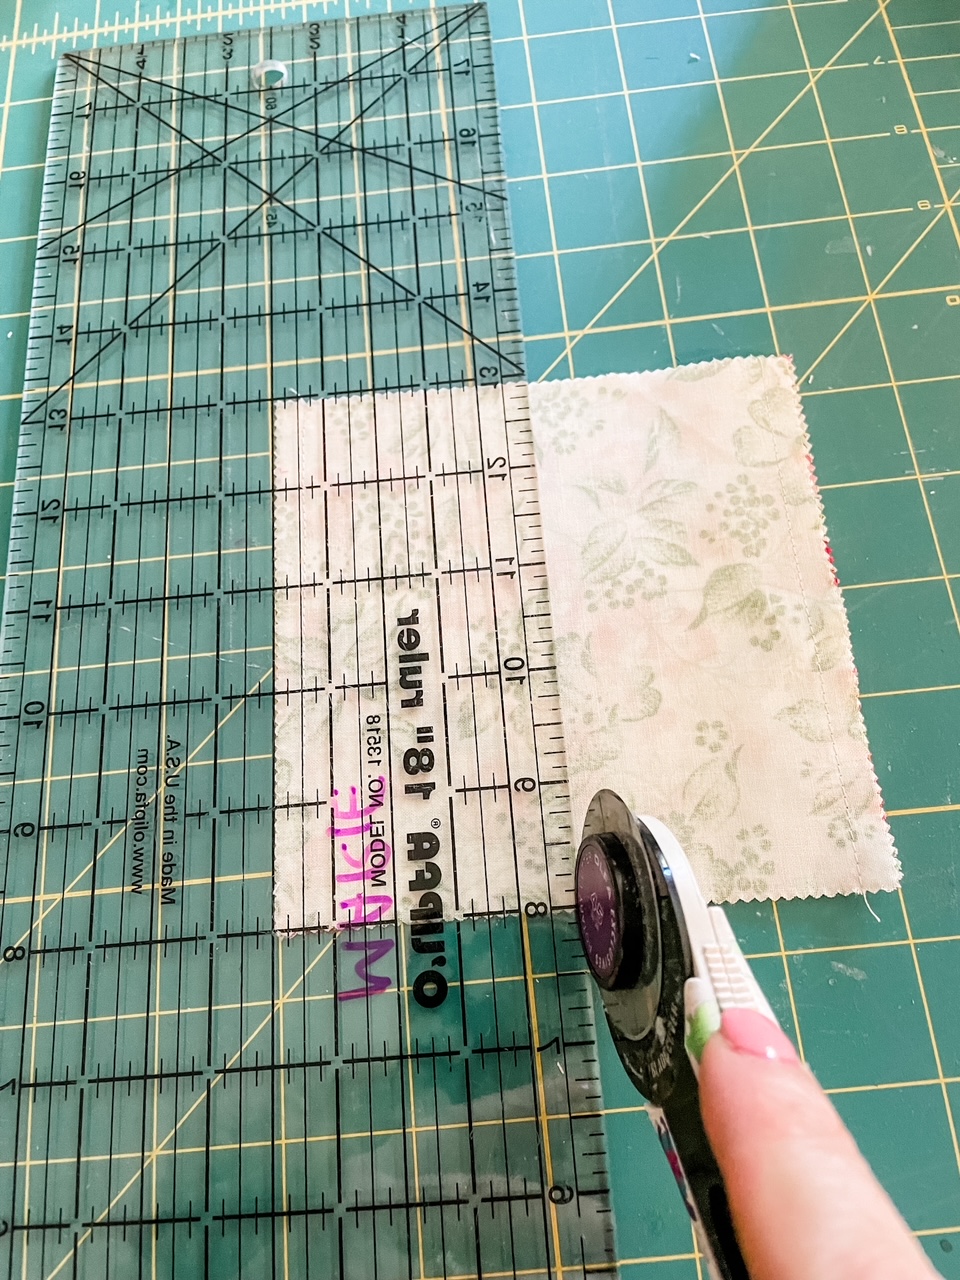
Press the cut patches open, making sure the seam allowance is ironed to one side. In quilting, the usual rule is to press the seams toward the darker fabric. However, you’ll need seams that lay in both directions to make these blocks, so be sure to press in varying directions.
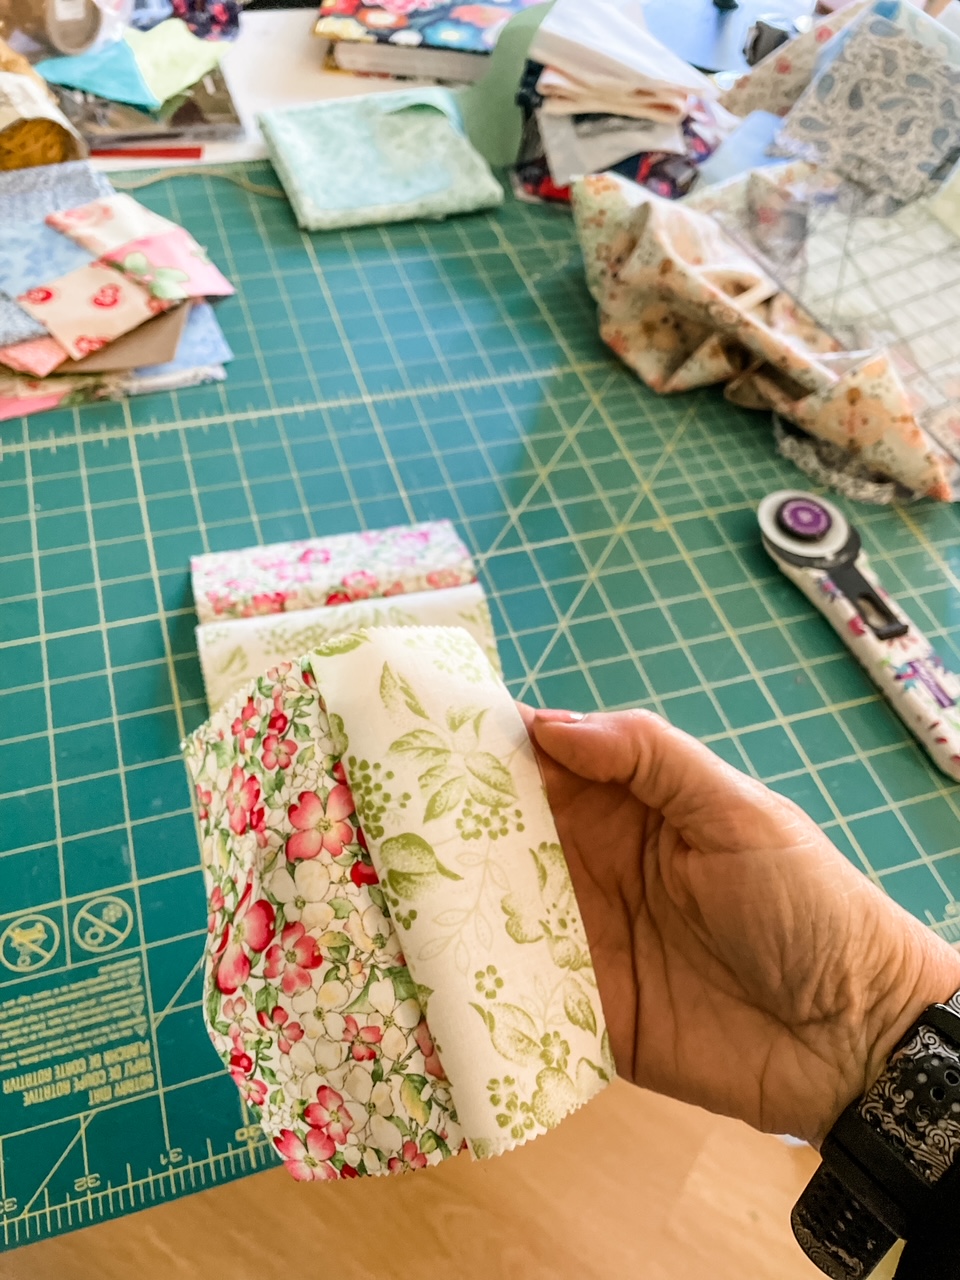
At this point, you’ve got a lot of pretty, rectangular two-fabric patches. Nice! (If you started with a 5-inch square, your rectangle patches will be 5 x 4.5 inches)
Keeping contrast in mind, layer two patchwork rectangles with right sides together and edges even. If your seam allowances are pressed to opposite sides, the seams will nest up next to each other nicely and match perfectly. You won’t even need to pin unless you want to.
Stitch a quarter-inch seam along the short edge of the layered rectangle patches. Cut the thread at the bottom edge. Open the stitched piece. Layer another rectangle patch onto one end of the sewn patches, and then stitch another quarter-inch seam along the short edge.
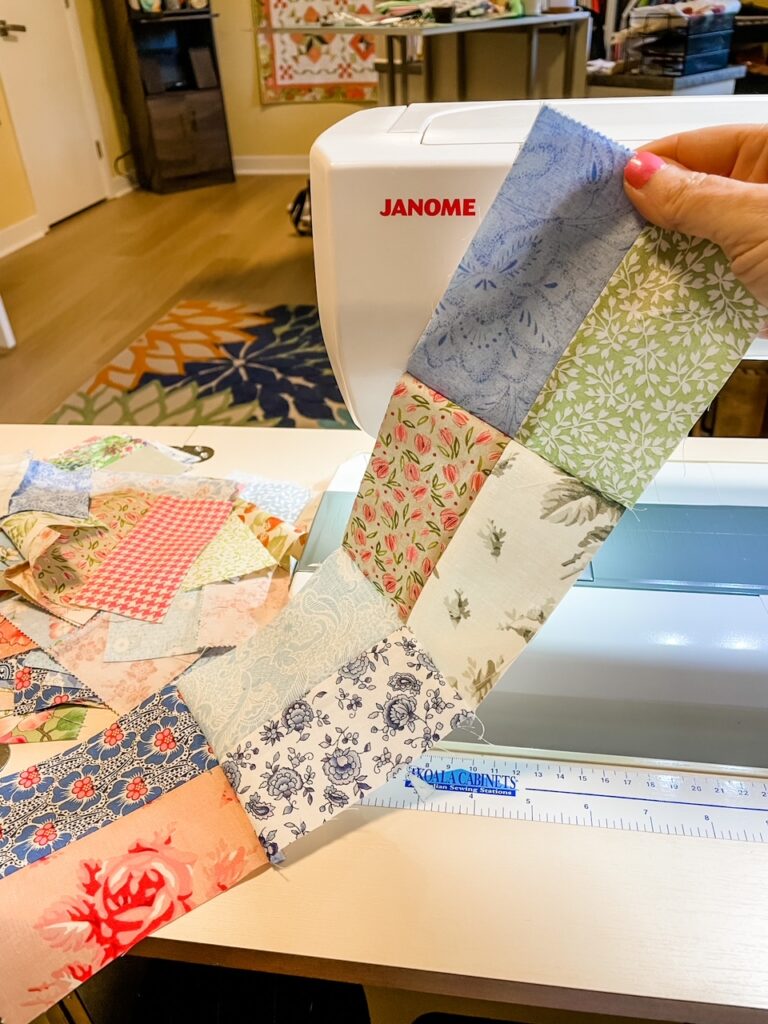
Repeat the process with all the rectangle patches, stitching them end to end, into a long patchwork “snake”. Take the snake to the ironing board and press, ironing seam allowances in varying directions, as you did before.
Step Four: Cutting the Easy Four Patch Blocks
After pressing, take your “snake” to the cutting mat.
Make an initial cut on the short edge that is half the length of the rectangle patches before they were sewn. (The length of my rectangle patch was 5 inches, so I made my first cut 2.5 inches from the edge.). Once you’ve got off that end piece, lay it aside. You won’t be needing it.
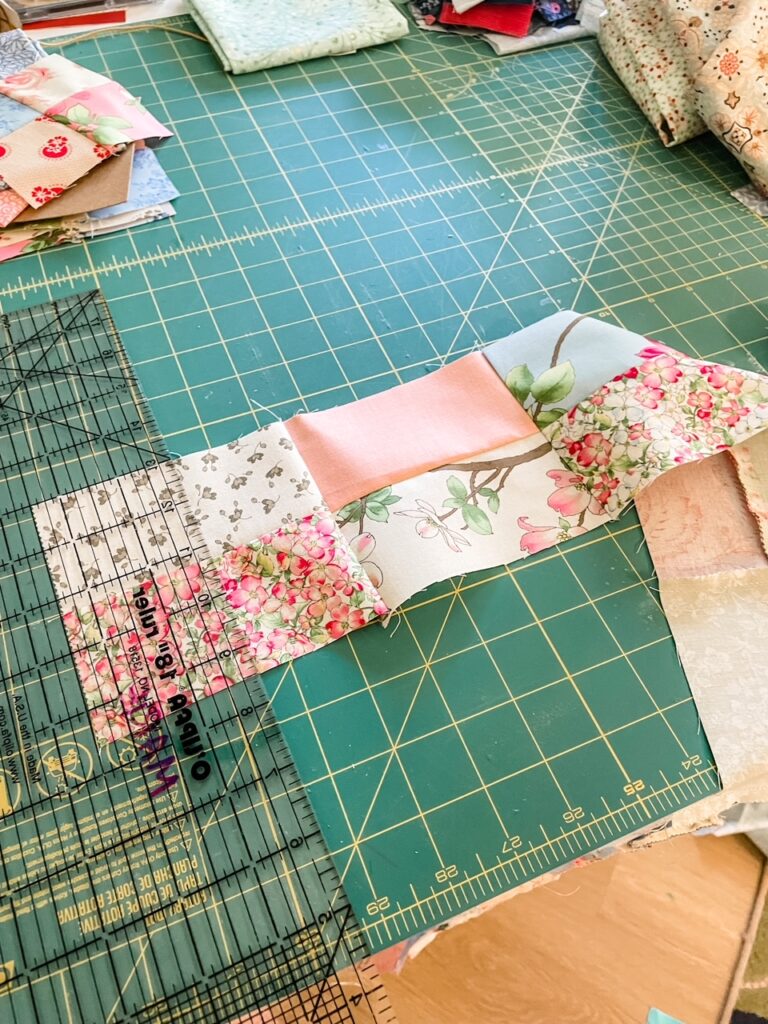
From that point on, cut each segment of your “snake” in the center of the two seams. (For me, that was 2.25 inches from the seams). With every cut, you’ll have created an adorable little four-patch block. Fun!
Step Five: 4 Four-Patch Blocks = 1 Sixteen-Patch Blocks
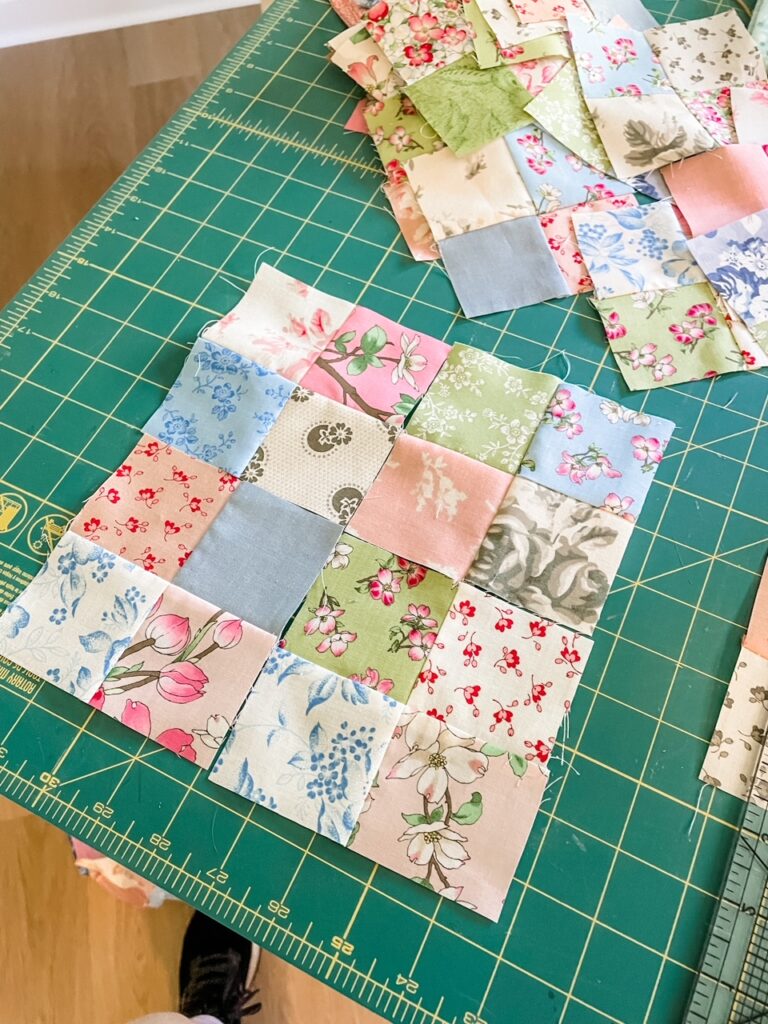
To create the sixteen-patch blocks you’ll need for an easy two block quilt, you’ll simply sew four of the four-patch block you’ve made together into a square.
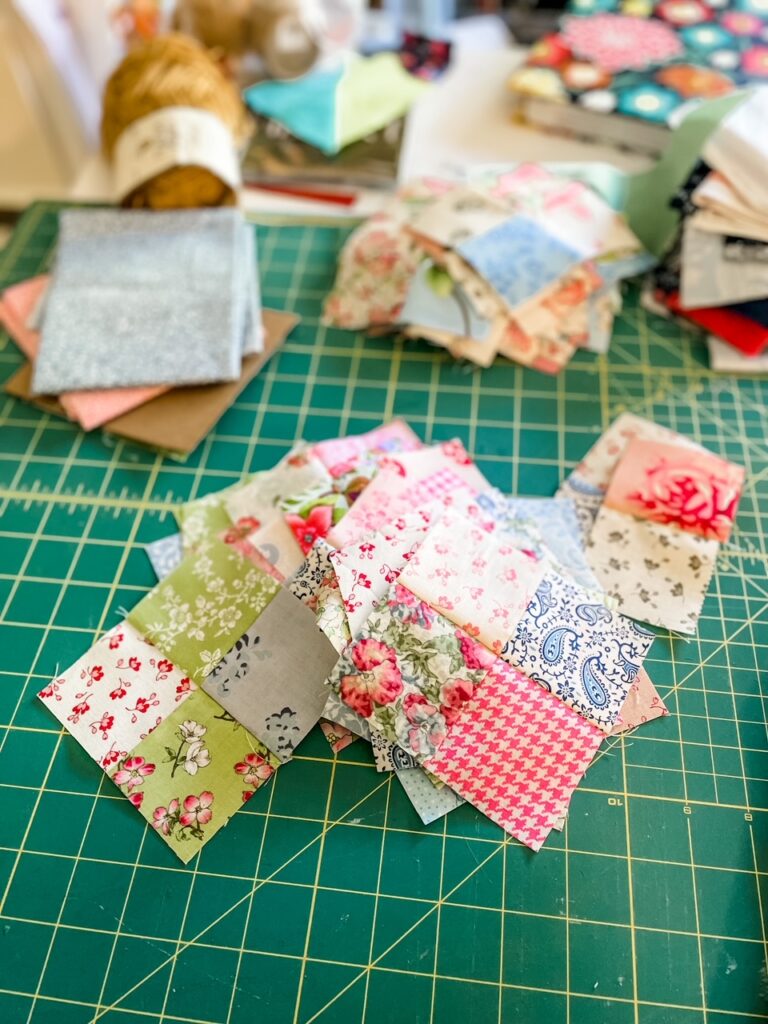
If you’ll be making a lot of sixteen-patch blocks, chain piecing will speed the process.
Layer two four-patch blocks, right sides together, aligning the seams. (Once again, pressing and nesting your seam allowances makes for perfectly matched seams.) Stitch the blocks together along one edge, chain piecing all the remaining blocks in a similar fashion.
Cut the threads between the stitched blocks and press, ironing the seam allowance to one side.
As you did with the other blocks, layer these eight patch rectangle units with right sides together and seams aligned. Stitch along the long edge of all your layered blocks.
Take the stitched blocks to the ironing board, and press them open. You’re done! Pause to admire your handiwork!
Easy Two Block Quilt: Fast, Easy, and Fun!
What I love about this method for making sixteen-patch blocks is that it really is fast, especially if you’re wanting to make a lot of blocks for a big project.
When I began working on my easy two block quilt, I really wasn’t sure how big I wanted it to be. I just decided to start sewing and figure the rest out later.
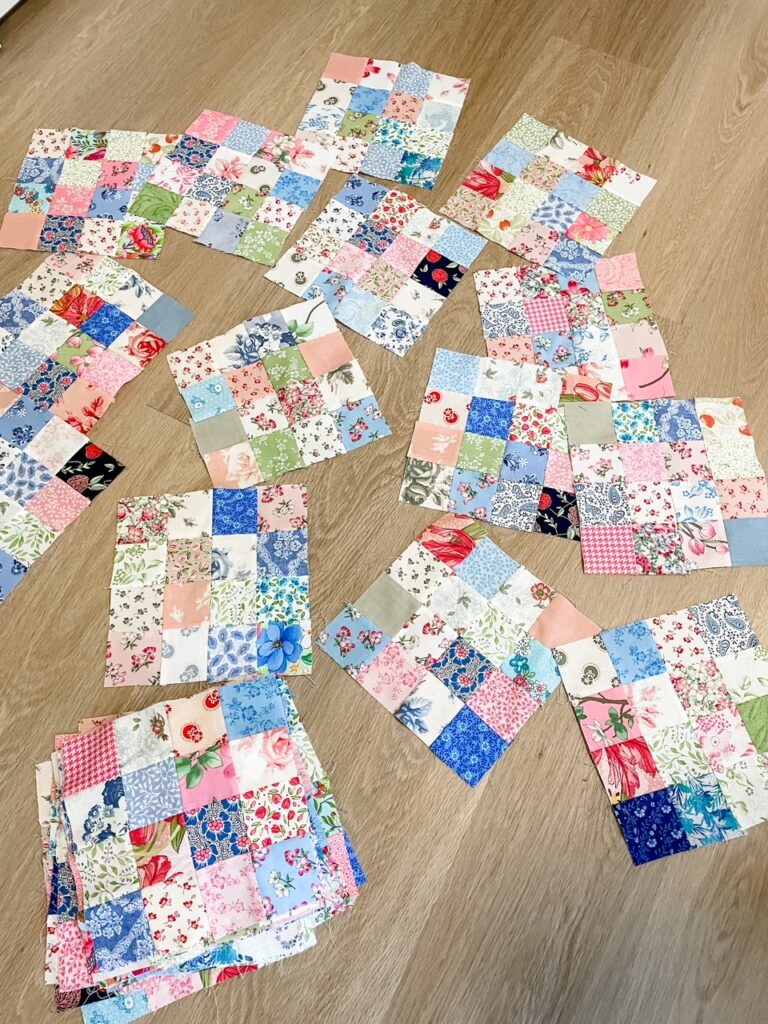
Making these blocks was such fun, and went so quickly, that I was able to finish 40 blocks over the weekend! I’m not sure how many total hours I spent to get those 40 blocks, but I know it was less than eight total. I’ve never really been a speedy sewer – too easily distracted, I’m afraid – so this is saying something!
For me, reading and doing are the most efficient means of learning; I like to break things down step by step. So I hope that reading this post and tutorial will be a help to other people who learn the same way.
But I also know that some people find written tutorials confusing. If you’re somebody who learns more by watching, take a look at the Missouri Star Quilt Company’s video tutorial for scrappy four-patch blocks, which you can use to make sixteen-Patch blocks.
Easy Two Block Quilt – One Block Down, One to Go!
Making this first set of blocks for my easy two patch quilt was SEW much fun! I hope you’ll be inspired to try some for yourself. As soon as I finish the next set of blocks, I’ll be back with another tutorial. Until then, maybe you’ll quilt along with me? Hope so!
