This post may contain affiliate links. Full disclosure policy
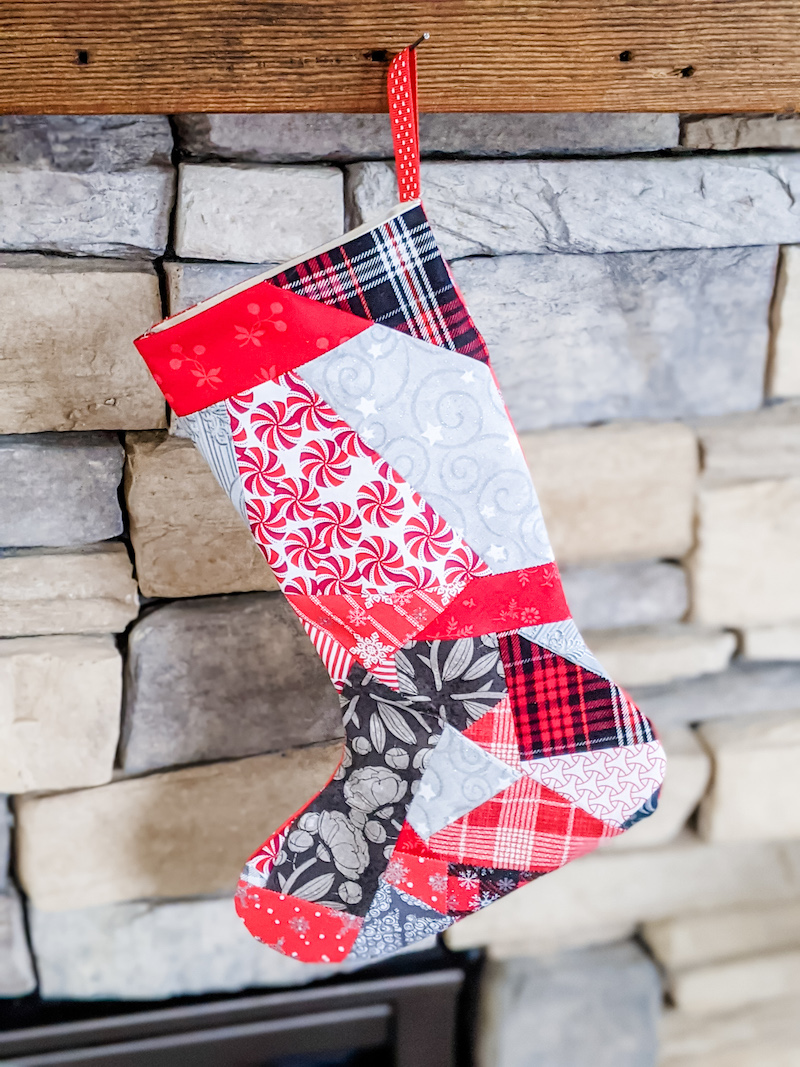
My Easy Patchwork DIY Christmas stockings are a fun, fast, festive sewing project that even beginning sewists will enjoy. It’s also a great way to use up fabric scraps!
The Quest for a Truly Easy Patchwork DIY Christmas Stocking
A few weeks back, a young friend of mine sent me a link to a blog post for a DIY patchwork Christmas stocking that claimed to be easy. “I would love to make this!” she declared.
It was a really cute project so I understood her enthusiasm. However, my friend is a beginning sewist. After looking over the instructions, I had the sad task of informing her that the project was a long way from “easy”. It would have proven a challenge even for intermediate sewists, let alone beginners.
Her disappointment set me off my quest. I decided to create a tutorial and pattern for Easy Patchwork DIY Christmas Stockings that even beginners could sew successfully and complete in two hours or even less.
Because with Christmas just around the corner, we really do NOT have the juice for a time-sucking project, right?
A Project that Everyone Can Enjoy
I love quilting only a little less than my family, my dog, and reading. I think it’s basically the greatest hobby on earth. And there’s nothing quite as cute as a home-sewn patchwork Christmas stocking.
But if you’re fairly new to sewing and looking to make a patchwork stocking, like right now, you probably don’t have time to learn the nuances of precision piecing. And even you’re already an experienced quilter, sometimes it’s just fun to stitch up a fun, easy, free form project.
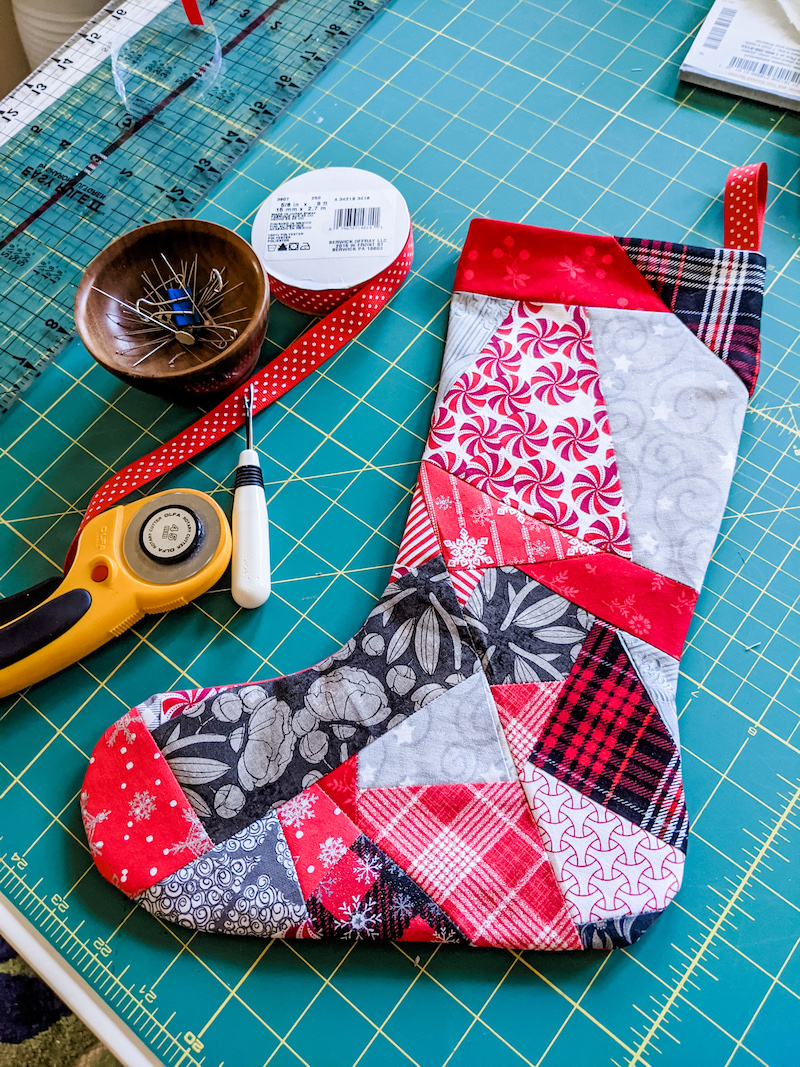
That’s why I decided to make my Easy DIY Patchwork Christmas Stocking from “made fabric”.
‘Made Fabric’ Makes it Easy
Several years ago, I took a quilting workshop from a friend of mine, the amazing master quilter, Victoria Findlay Wolfe.
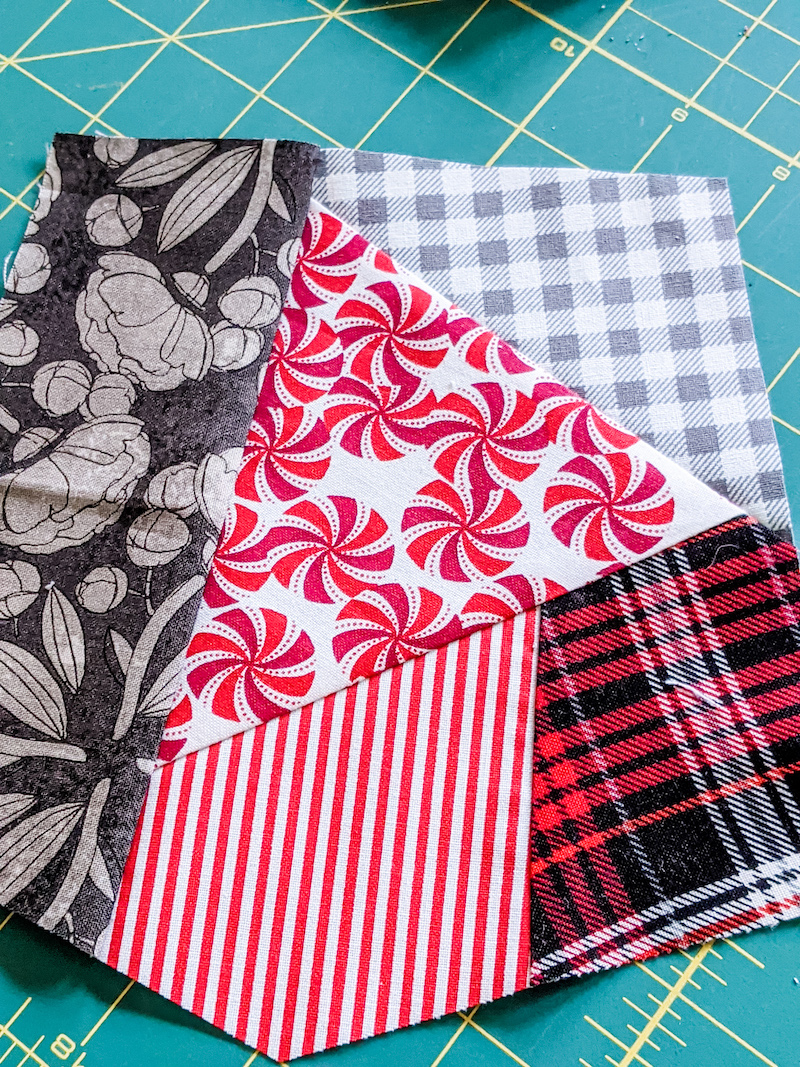
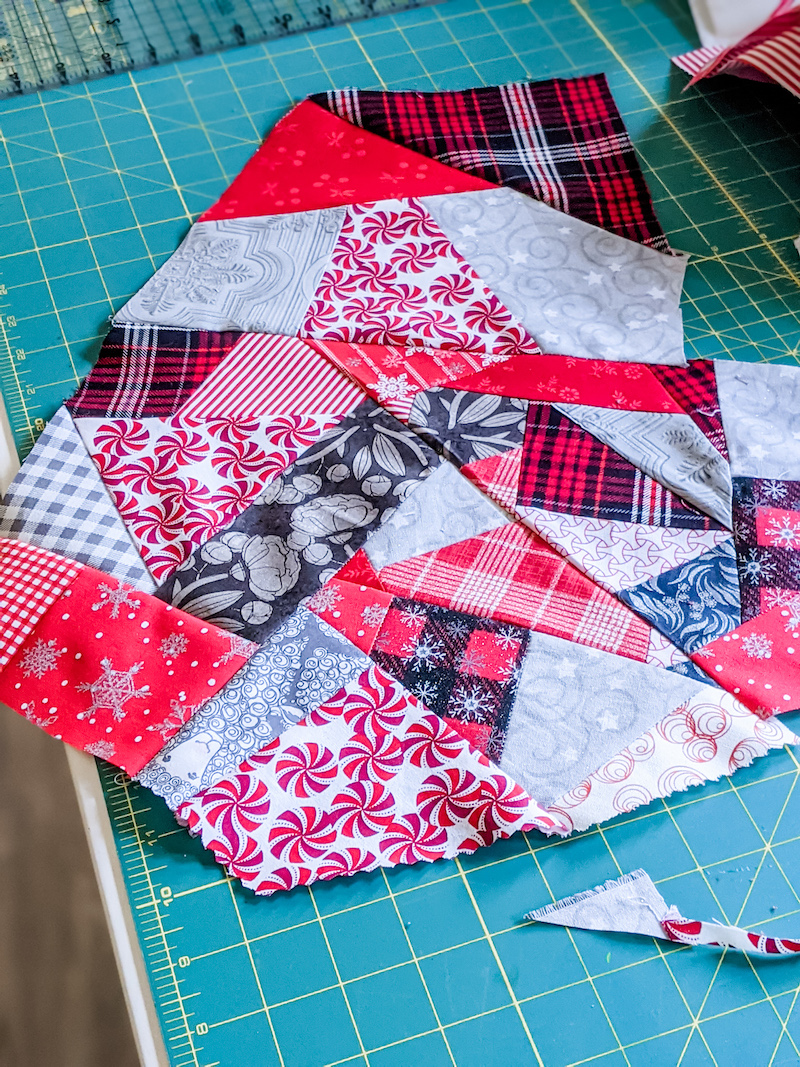
One of the things she taught me was how to create my own “made fabric” by stitching together randomly sized and shaped fabric scraps. It’s an easy, fun way to create a patchwork look without sewing quilt blocks or following a pattern.
If you’ve got a lot of fabric scraps, creating some “made fabric” is a wonderful way to use them up. But the best thing about creating “made fabric” is there is really no wrong way to do it! The process is intuitive and creative, and results in a truly unique look.
How to Make ‘Made Fabric’
If you’ve ever done paper piecing, the process of creating made fabric will seem very familiar. It’s essentially paper piecing without a pattern. But even if you’ve never quilted, you’ll be able to create your own made fabric from scraps.
- Gather a selection of scraps. Just about any shape or size will do but the process will be easier and faster if your scraps are no smaller than 2 inches square. Remember, the scrap shapes don’t have to be the same. In fact, your finished fabric will be much more interesting if the shapes are varied and random.
- Choose two scraps. Layer the scraps on top of each other with the right sides of the fabric facing together. Lay a ruler or straight edge tool on top of the fabric. If you have a rotary cutter and cutting mat, simply trim a straight line along one edge of the fabric. (Using a rotary cutter is definitely the easiest method. However, you can also use chalk or a fabric marker to draw a straight line on the fabric, then trim along the line with scissors.)
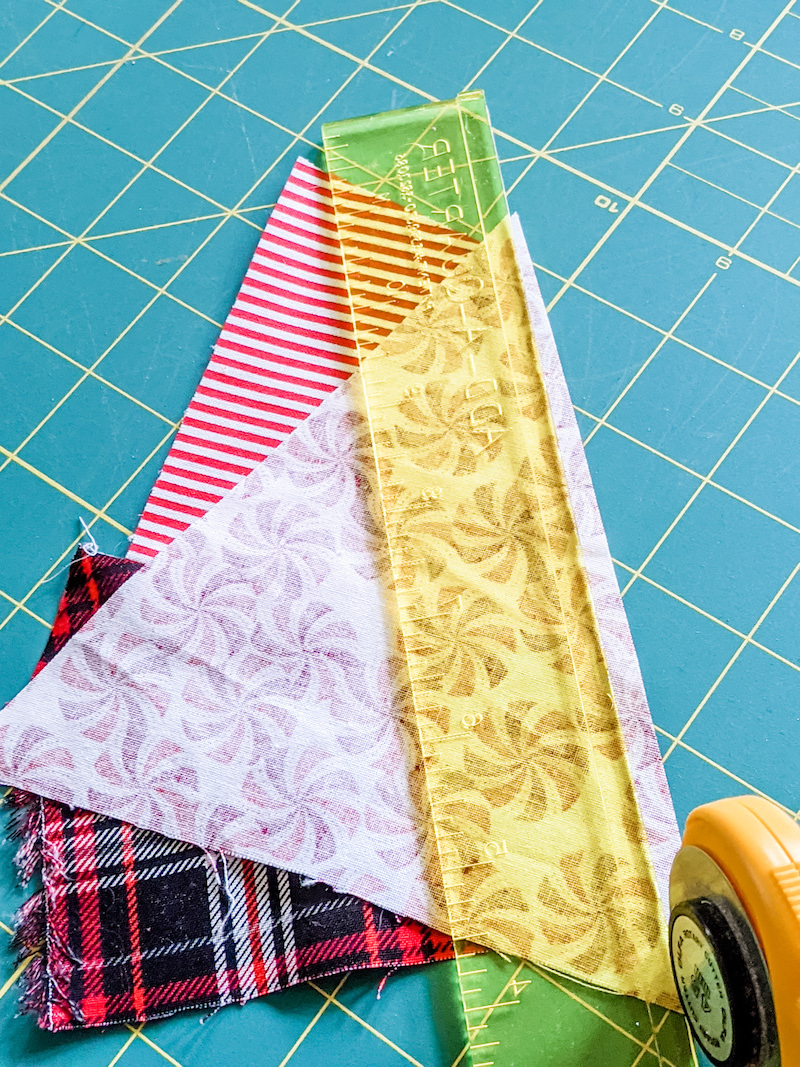
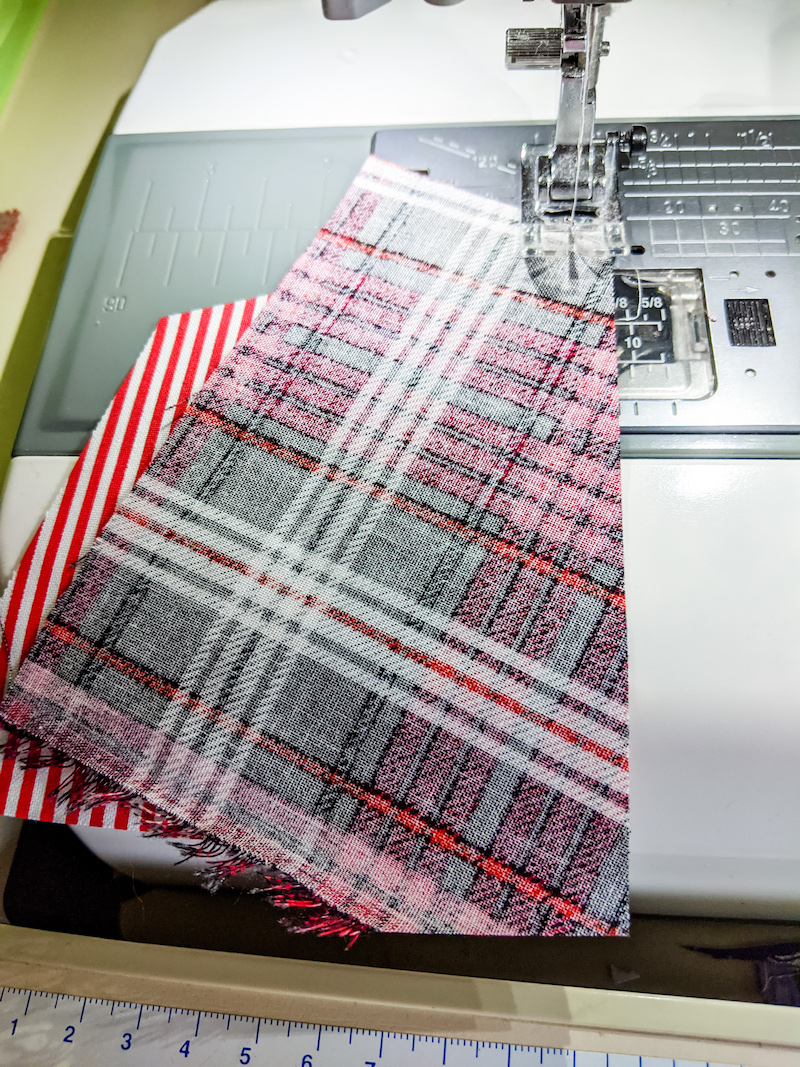
- Layer the scraps on top of each other with the right side of the fabric together and the trimmed straight edges matching. Sew a quarter-inch seam along the straight edge.
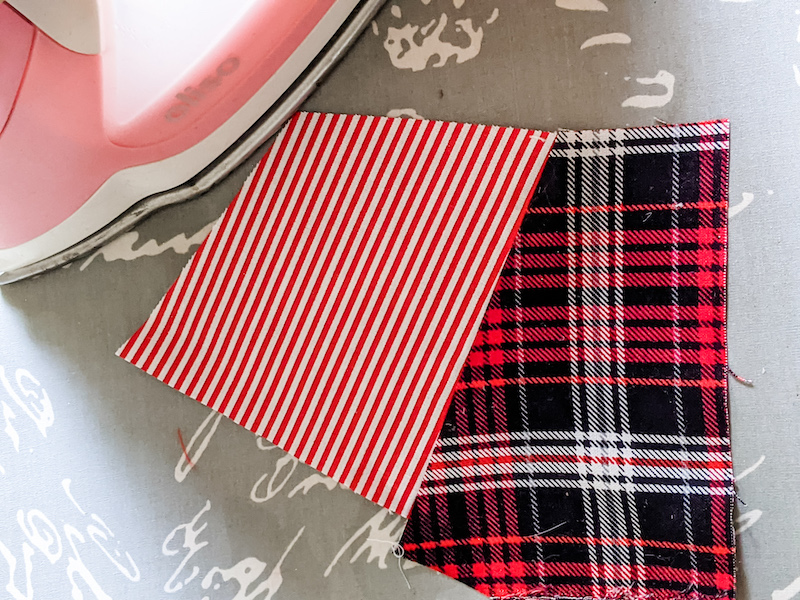
- Use a hot iron to press the seam of the darker fabric toward the lighter fabric. Then, flip the sewn scraps over to the right side of the fabric and press it flat.
- Place another scrap on top for the sewn scraps, with the right sides of the fabric facing. Trim another straight edge along the fabric (or mark and cut with scissors), and sew as before. Continue adding scraps, trimming, and sewing until you have created a piece of “made fabric” that’s large enough for the project.
What Will I Need to Make My Easy Patchwork DIY Christmas Stocking?
If you sew at all, you probably already have everything you to make an Easy DIY Patchwork Christmas Stocking.
In addition to scraps for your made fabric stocking front, you’ll need fabric for the stocking back and for the lining. I prefer to use plain muslin for the lining but patterned fabric is fine too. You can also create more made fabric for the back as well as the front if you’d like. Additionally, you’ll need thread, plus a little fabric, rickrack, or ribbon to create a hanging loop.
As far as tools, you’ll need a sewing machine, rotary cutter and mat, and cutting ruler or straight edge, and straight pins. (If you’re not using a rotary cutter, you’ll need chalk or a fabric marker and scissors.)
How Do I Make my DIY Christmas Stocking?
Making the stocking is really easy. Step by step instructions are included in the pattern, which you can download here. But if you have even basic sewing skills, it should be pretty self-explanatory.
However, I will share just a couple of tips.
First, make sure that the scale on your printer is set to 100%. Otherwise, the pattern might end up a little smaller than the original. However, if you don’t know how to set your printer scale, don’t make yourself crazy. The size should be pretty close no matter what so just print it out and don’t worry.
Second, probably the trickiest part of making my Easy DIY Christmas Stocking is sewing the loop. It’s fairly small when sewn, so turning it inside out can be kind of a pain. Don’t get me wrong, it’s doable but if you’d rather not bother with it, just use ribbon or rickrack for the loop. It’s a really cute look.
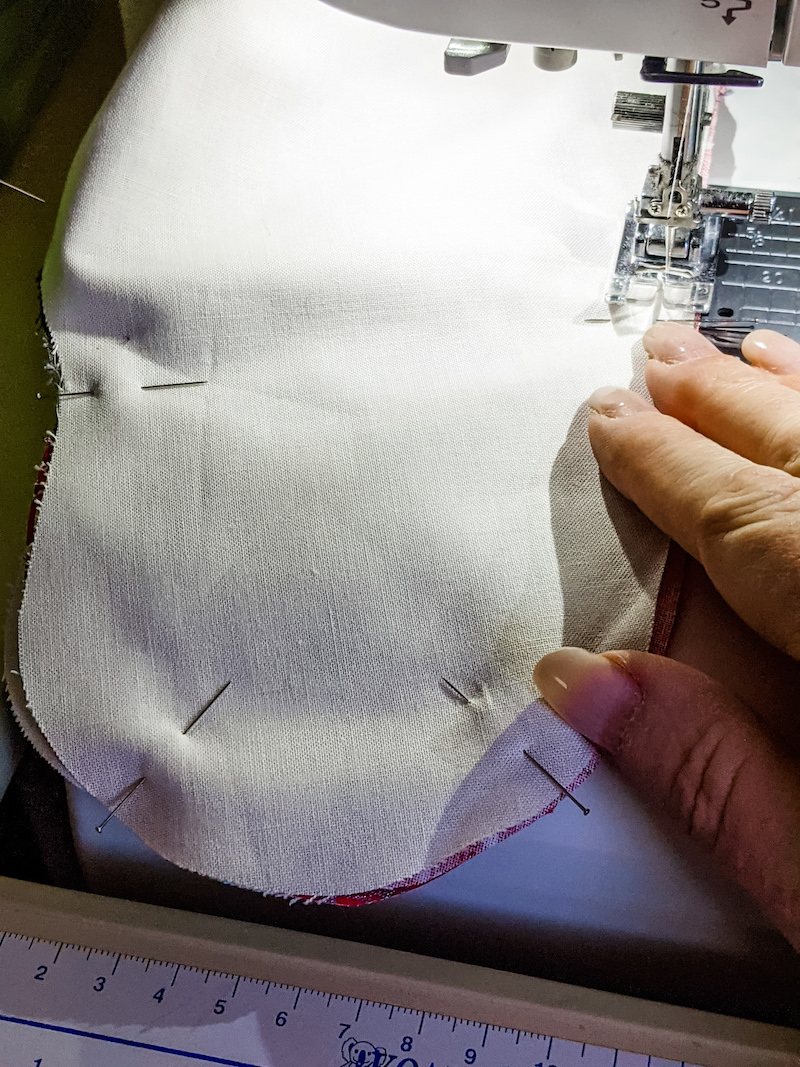
Third, driving a sewing machine is a lot like driving a car; it’s a good idea to slow down on the curves. Also, use enough pins so your fabric doesn’t slip. Personally, I prefer to use silk pins when I’m sewing. They’re really skinny so if I accidentally sew over one, it’s probably not going to break my needle.
Finally, remember to clip the curves (but not the stitches!) before turning the completed stocking inside out. That will help the curves lie nice and flat.
How to Sew Your Easy Patchwork DIY Christmas Stocking
Cutting the pattern and fabric
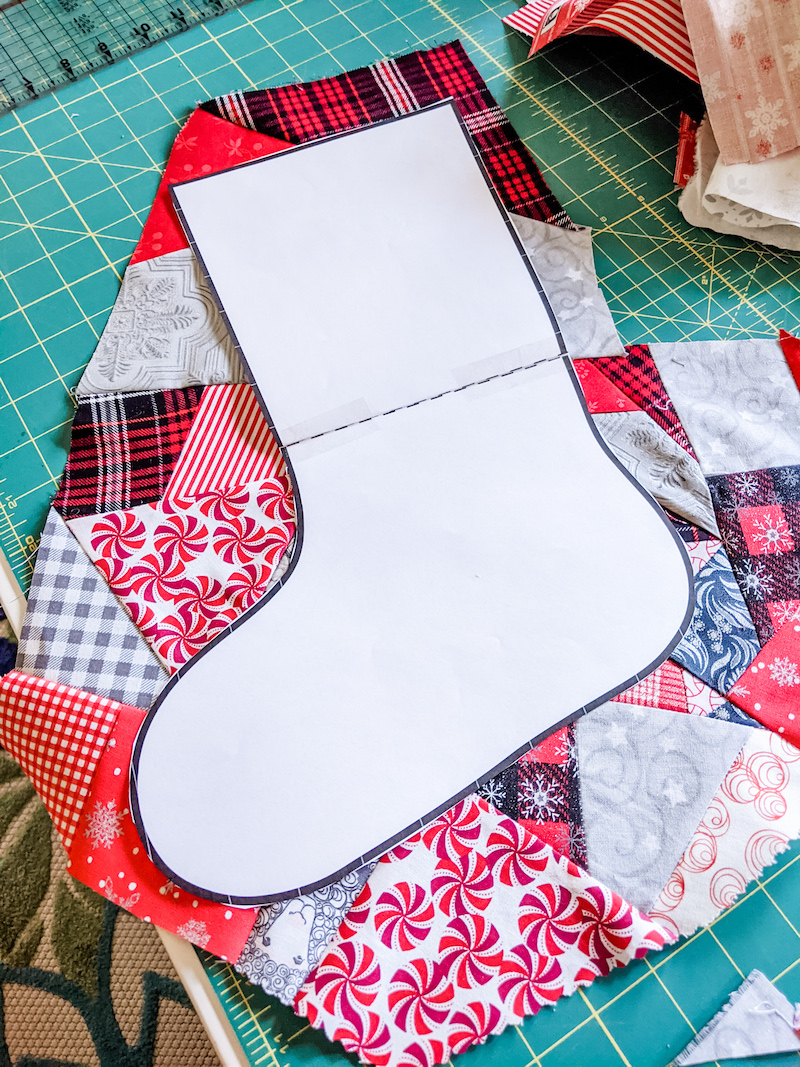
- Print out one copy of the pattern at 100% scale. Cut out upper and lower sections of stocking pattern. Tape pattern pieces together along the black dotted line.
- With fabric facing right side up, cut one stocking front (using “made fabric”) and one liner. Next, flip the pattern over to cut out a mirror image of one stocking back and one liner.
Sewing the stocking
- Pin the loop, rickrack, or ribbon to the stocking back on the right side of the fabric, 3/8 of an inch from the heel side edge, with raw edges of the loop a little above the upper edge of the stocking, and the looped end pointing toward the lower part of the stocking.
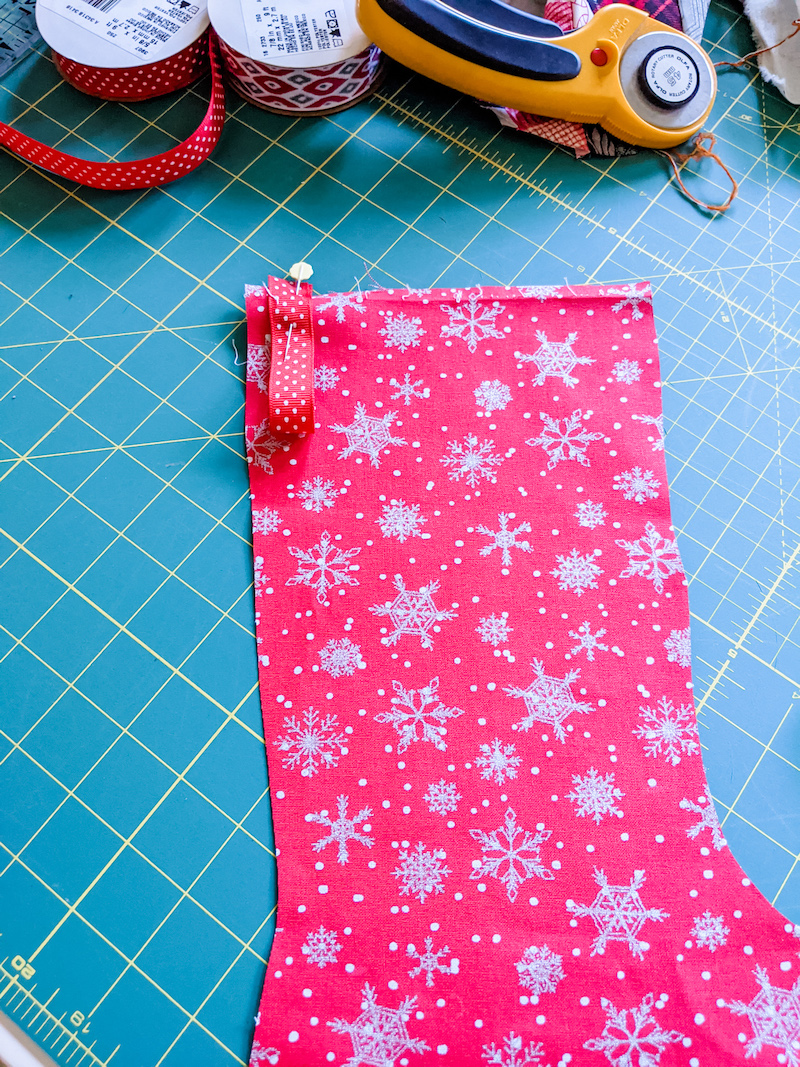
- Layer one liner over stocking back and loop, right sides of the fabric together. Pin the upper edge of the stocking. Sew along the upper edge, making sure to stitch the loop into the seam. Turn the seam and press. (Loop will now stick out above the upper edge of the stocking.)
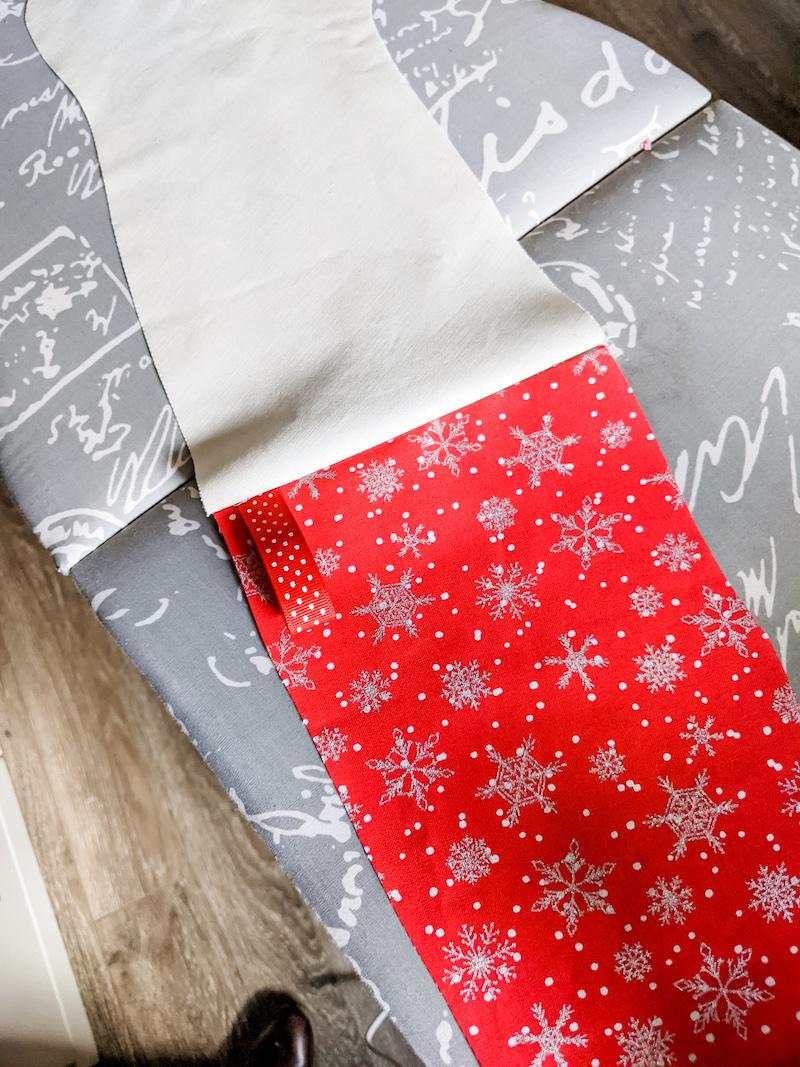
- Layer one liner over stocking front, right sides together. Pin the upper edge of the stocking and sew. Turn seam and press.
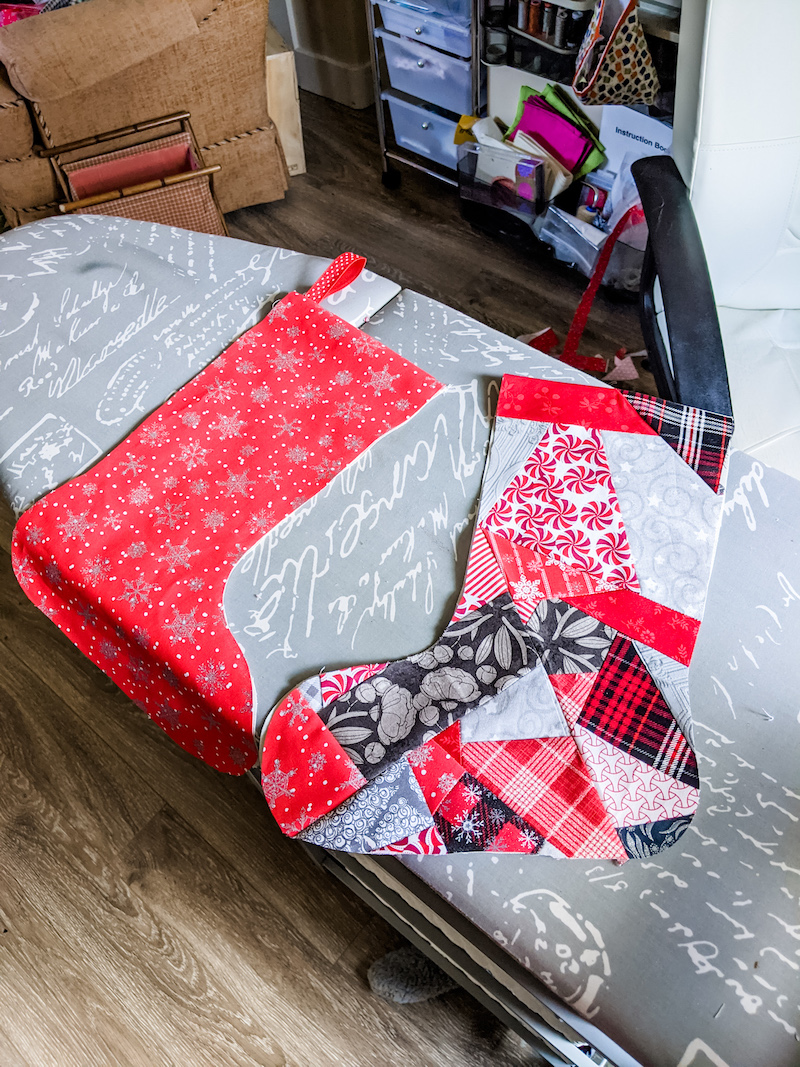
- Pin stocking front to stocking back, with right sides together. Sew along the outer edge of the stocking, taking care as you stitch around curves. Clip curves along the stocking toe, heel, and instep. (Clip close to the seam but do not to cut the stitches). Turn the stocking inside out. Press to finish.
Easy DIY Christmas Stockings – Hung by the Chimney with Care!
Friends, whether you’re an expert sewist or a beginner, I hope you’ll have a chance to stitch up some of these adorable Easy Patchwork Christmas Stockings this year. And if you do, would email me a photo of your creation? I’d love to see a picture of your precious patchwork stocking, hung by the chimney with care.
Merry Christmas, my friends!


