This post may contain affiliate links. Full disclosure policy
Is there any surprise quite as wonderful as answering the doorbell and finding the delivery person from the local florist standing on the stoop, holding a beautiful bouquet with your name on it?
Not for me!
If I could afford it, I’d have flowers delivered to my home every week. Unfortunately, my budget simply doesn’t stretch far enough to allow for such civilized luxuries. Chances are, you’re in the same boat.
But arranging pretty, professional looking bouquets is a lot easier than you might think. I took a flower arranging workshop at my local community center about ten years ago and have been enjoying the pleasure of making fresh, fragrant floral arrangements for my home ever since.
Even if you’re not the least bit crafty, with just a little bit of effort and practice, you can make pretty floral arrangements and centerpieces.
CHOOSING YOUR FLOWERS
Obviously, the most important element of any floral arrangement is the actual flowers. If you have a garden, getting yours can be as easy as taking a walk outside with a pair of shears.
However, if you’re not lucky enough to have a cutting garden or have been cursed with a brown thumb, you can probably find a nice supply and selection of relatively inexpensive flowers at your local grocery store. One of my favorite places to purchase flowers by the bunch is Trader Joe’s. They always have a good variety of very fresh blooms (never buy wilted flowers!) at reasonable prices.
For my arrangements, I frequently choose either a single color – all pink, all green, etc. – or a base of mostly white blossoms with two or three secondary colors. However, one of the great things about arranging flowers is that it’s pretty hard to go wrong with color combinations. Mix and match at will!
The job will be easier if you choose flowers with sturdier stems that won’t easily bend or break. Since tulips are my favorite, I don’t always listen to my own advice. Just be aware that using flowers with a delicate stem might require a little more patience and effort.
Whatever flowers you choose, cut or purchase about twice as much as you think you’ll need. I always double what I think I’ll need, telling myself I can always make a second arrangement from the leftovers. In all these years, never once have I had any leftover. The same goes for the greenery and filler leaves – however much you think you’ll need, double it.
SUPPLIES FOR FLOWER ARRANGING
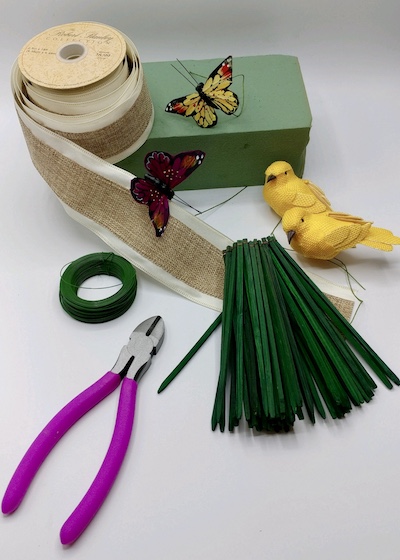
Once you’ve got your flowers, you’ll need some other basic supplies. A waterproof container and sharp scissors are a must. I also recommend taking a trip to the craft store to purchase floral wire, floral picks, floral foam (also called wet foam).
Wet foam is really the secret weapon of floral arrangements. It can be cut to fit just about any size or shape of container. Soaking the foam thoroughly with water will ensure that your cut flowers have a constant supply of moisture to help them stay fresher longer. But the best thing about wet foam is that you can stick your flowers into it at almost any angle and they’ll stay put.
While you’re at the craft store, search through the sale racks for ribbons and embellishments to enhance your creations. I spent about three dollars on cute birds and butterflies like these – perfect for a spring bouquet or Easter centerpiece!
ARRANGING THE BOUQUET
Keep your sharp scissors nearby and make a fresh cut on each stem. That will ensure your flowers are all the perfect height and that the stems are open and are able to draw in plenty of water. If you’re using roses, it’s a good idea to actually fill a bowl with water, immerse the stems, and make your cuts underwater. It will help them stay fresh longer.
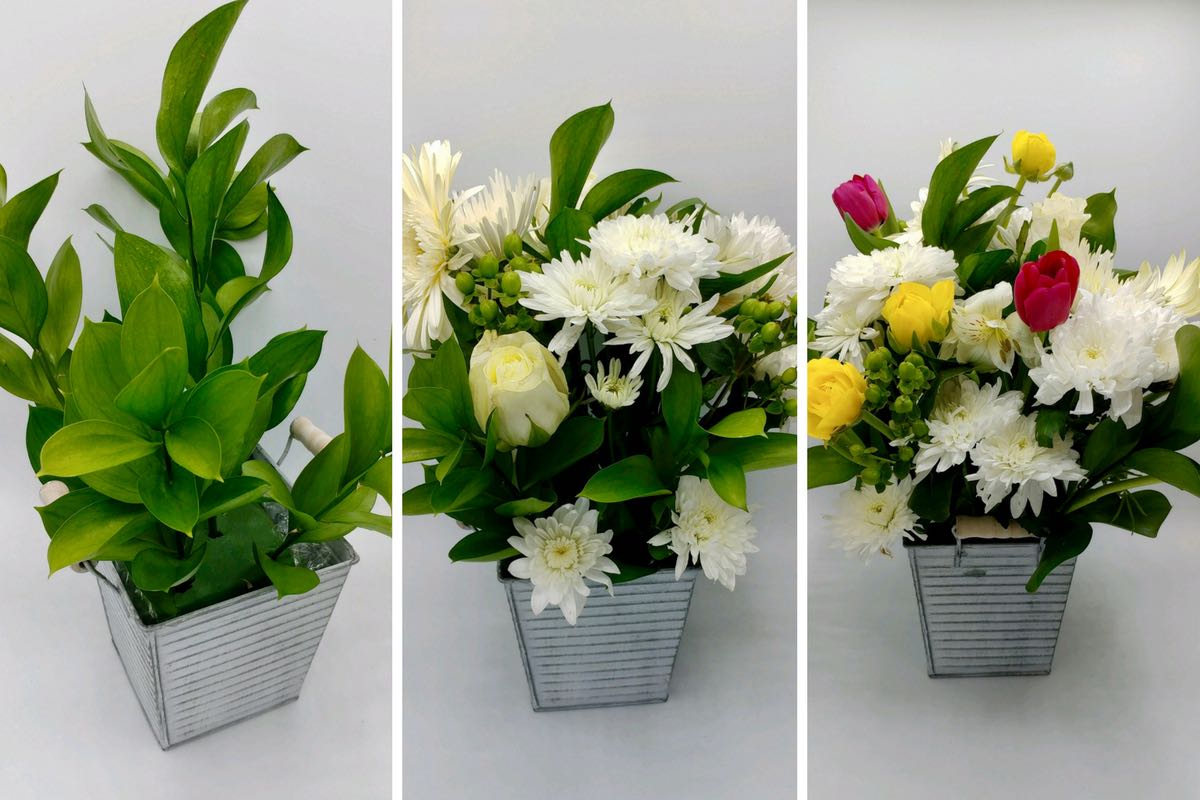
Creating a pretty flower arrangement is really a process of building up the bouquet, layer by layer. I usually begin by using about half the greenery, placing some in each corner, to loosely concealing most of the floral foam. I’ll use the reserved greens at the very end to hide or even out any bare spots.
Once the greens are in place, start adding the flowers. Make sure to push each stem well into the floral foam so it will stay securely in place. One of the great things about using foam is that you can easily move a flower if you change your mind about its placement or if the balance seems off.
If you’re using a base color, as I did with the white, use those first. Begin at the center, placing the tallest, largest, showiest bloom(s) in the middle. Use shorter, smaller flowers (you can trim the stems if need be) to fill in holes and work toward the outer edges, creating something of a dome shape.
Next, add more flowers of different colors and types to create a pleasing balance to the arrangement. Avoid placing flowers of one type or color too close together or bunching them in one area. Instead, spread a variety of blooms among all areas and sides of the arrangement so it looks attractive from every angle. As you work, turn the entire arrangement from time to time, so you can see it from all sides.
FINAL TOUCHES
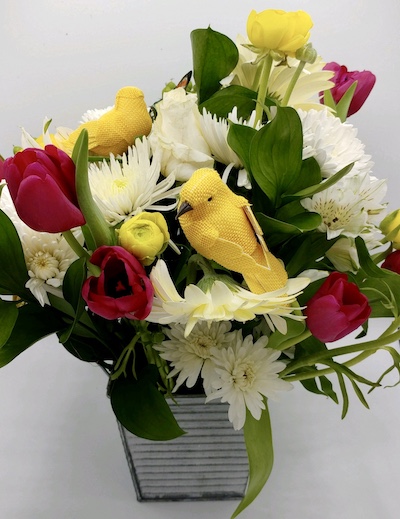
Once you’re satisfied with the number and placement of the flowers, you can add embellishments if you’re using them. Use the wire to secure the embellishments (in this case two yellow birds and three butterflies) to the floral picks. Choose a spot for each embellishment and push the pick deep into the wet foam to hold it in place. Using an odd number of embellishments generally provides better balance and looks more attractive.
Finally, look the piece over one last time for all sides and add some of the reserved greenery to fill in any bare or unbalanced spots.
Creating your own DIY flower arrangements is a wonderful way to express your creativity and to bring the beauty of fresh flowers into your home year-round.


