This post may contain affiliate links. Full disclosure policy
These sweet Christmas Clay Pot Ornaments are a fun holiday craft to make on your own, with friends for a craft night, or with the littles in your life. Festive, fun, and cute as can be! No advanced crafting skills required!
Christmas Clay Pot Ornaments – A Fun Holiday Craft to Make with Kids or Friends
Whenever I go to visit my granddarlings, the kiddos know there will be two Grammy-organized activities they can absolutely count on.
First, we’ll be going shopping at the local independent bookstore. Second, we’ll be making some kind of craft project.
Our recent trip to Oklahoma fell just before the holidays, so I decided that we needed to make a fun Christmas craft. After a little internet surfing, I found some absolutely adorable Clay Pot Ornaments at the Projects with Kids blog that seemed like the perfect project.
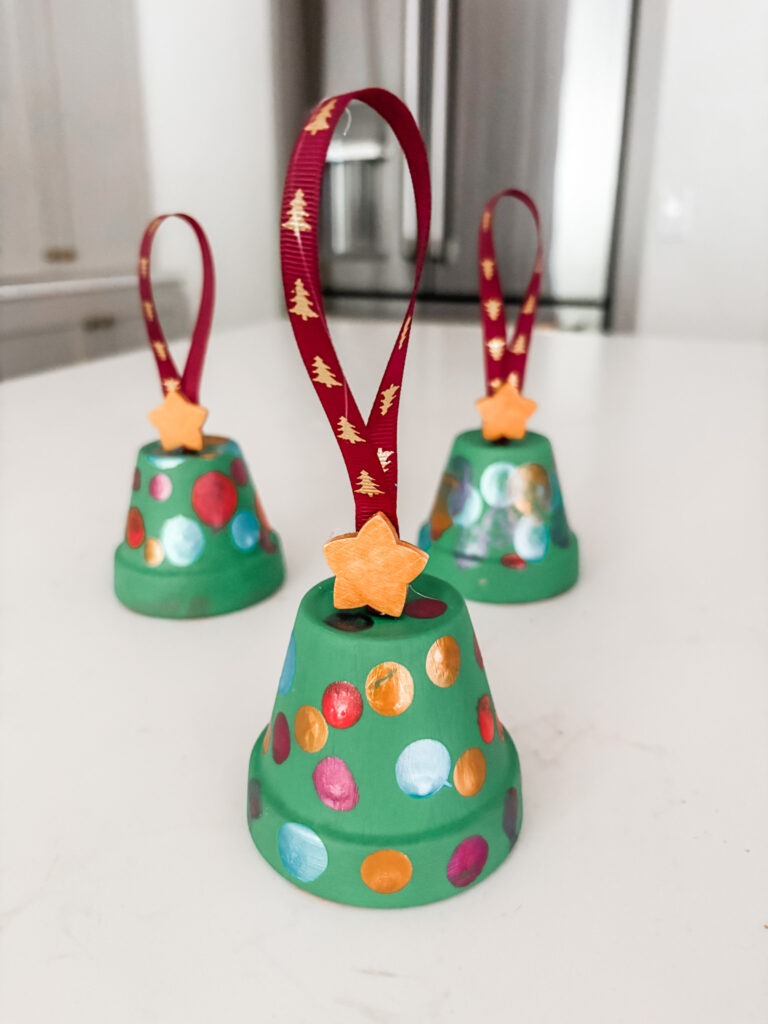
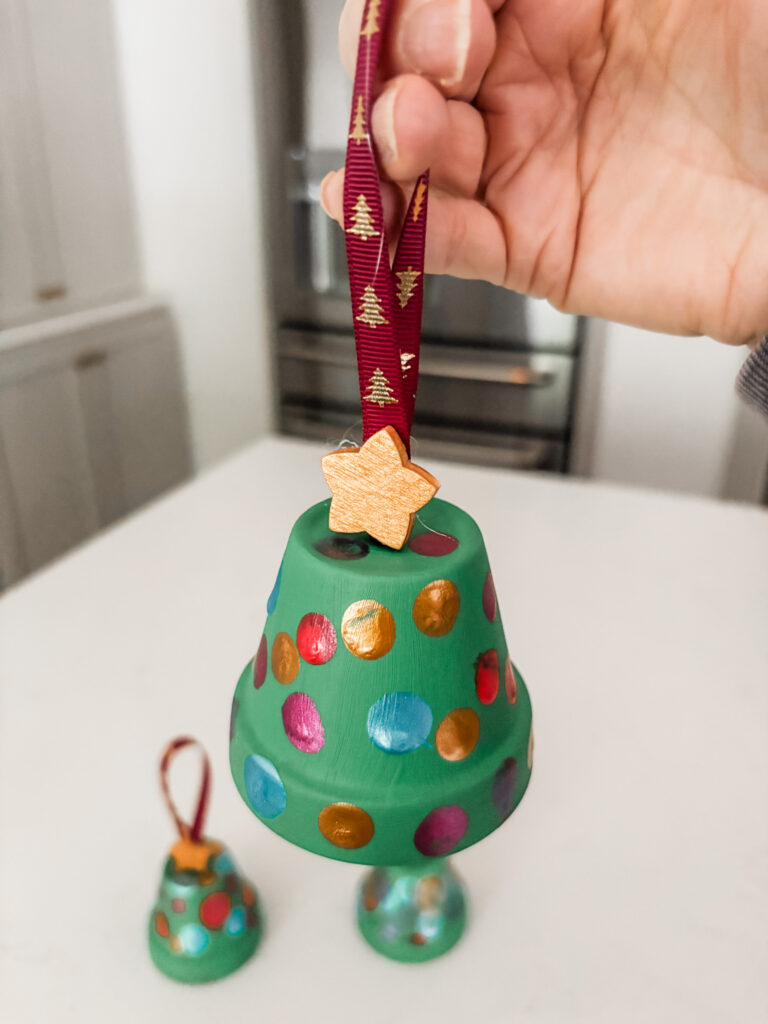
Aren’t they cute?
Each finished Clay Pot Ornament looks like a tiny Christmas tree, complete with painted ornaments and topped with a star. The ribbon at the top makes it easy to hang them on the tree.
Most of the project just involves painting, so it’s a perfect craft to make with kids of almost every age. But these sweet little ornaments are a fun Christmas craft to make with adults, too.
Not counting drying time, each one only takes about twenty minutes to make. So it’s a terrific activity for holiday parties with your book club, church group, or girlfriends from the neighborhood.
What Do You Need to Make Clay Pot Ornaments?
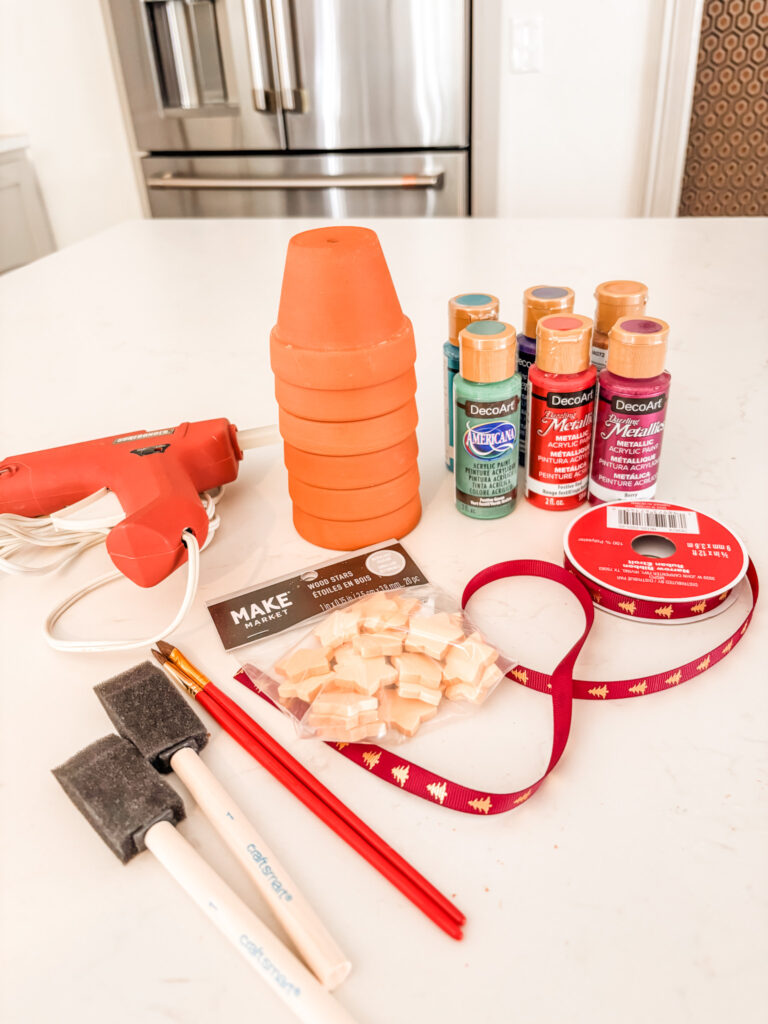
The supplies you’ll need for this fun Christmas craft are fairly basic. If you do a lot of crafting, you may have most of the supplies on hand already. I was able to find everything I needed at my local Michael’s store.
- Two-Inch Miniature Clay Pots – You could use somewhat larger pots, if you want. However, I wouldn’t go smaller than two inches as it could get pretty “fiddly” and you might have a hard time getting the ribbon through the hole in the bottom of the pot.
- Acrylic Paints – The main color you’ll use is green. You’ll paint it over the whole surface of the pot so it looks like a tree. The rest of the colors are up to you. You can use as many or as few as you want. A simple pattern with gold and red could be lovely. In my case, I picked 5 additional colors so that the kids had some options to work with. Plain paint can be very pretty, but I chose metallic paints to add a little extra shine.
- Paint Brushes – For the green paint, you’ll want a fairly wide brush. Otherwise, painting your “tree” could take a very, very long time. Just basic, inexpensive brushes will do.
- Foam Stippler Brush or Q-Tips – To paint the dots that represent ornaments on your tree, you can use small, round foam brushes (stipplers), regular small brushes, or even Q-tips.
- Cloth Ribbon – Use a skinny ribbon (quarter inch is perfect) in the color or pattern of your choice. You’ll need about 10 inches of ribbon for each ornament
- Scissors
- One-Inch Wooden Stars – The wooden stars are the finishing touch for the top of your Christmas tree. You can paint them or leave them as is.
- Hot Glue Gun and Glue Sticks – If you’re making this fun Christmas craft with kids, a grown-up should handle the hot glue gun!
- Paint Palette – A basic plastic paint palette is helpful if you’ve got one. In a pinch, the lids of old jars will do the trick, too.
- Mod Podge – I consider this optional. If you’ve got Mod Podge on hand, it can be nice to paint a thin layer of it over the ornament once the paint is dry. That will help protect it from chipping. But I don’t consider this absolutely necessary.
How Do You Make Clay Pot Ornaments?
Here are the instructions for making your cute little ornament. But I’ll also do an abbreviated version and supply list below. Because it’s so much easier to print out one page than a whole post, yes?
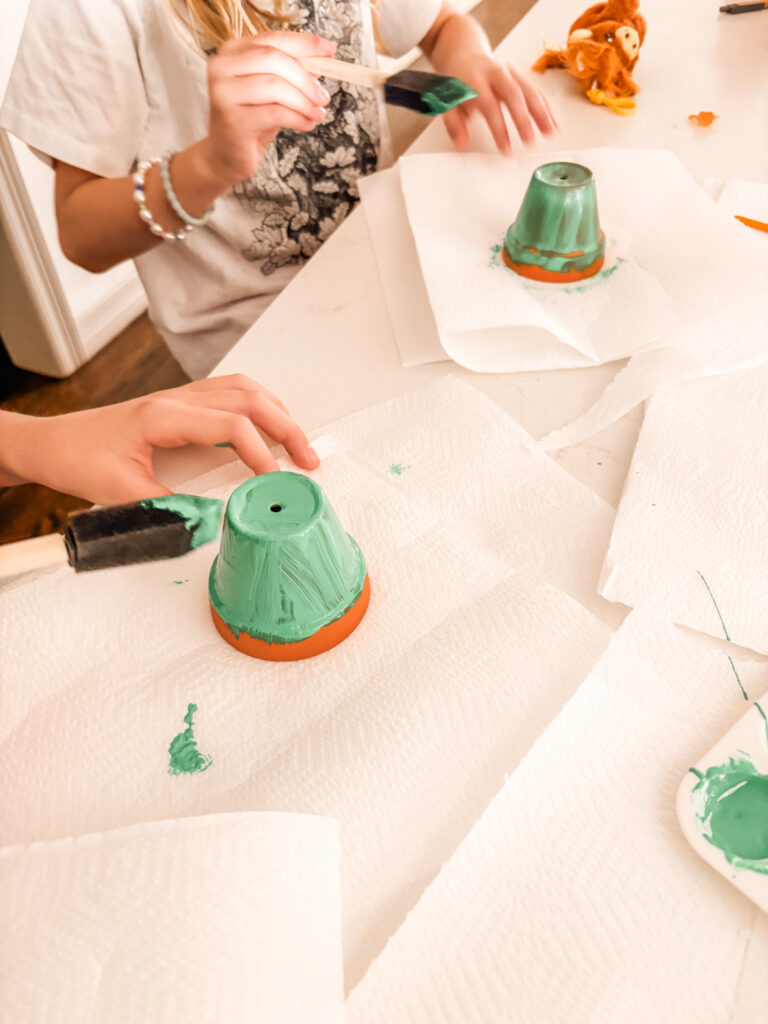
- Assemble your supplies. Cover the work area with paper or a drop cloth to protect it from paint spills.
- Paint the entire outer surface of the clay pot with a coat of green paint. Let it dry.
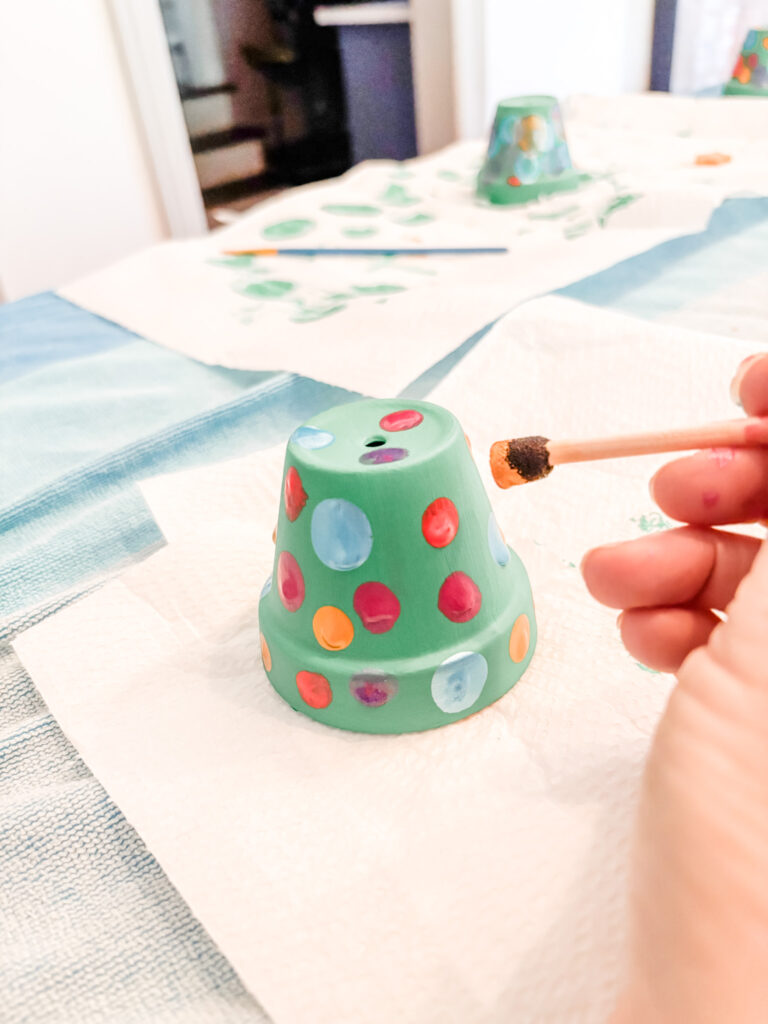
- Using the other colors, paint small dots on your clay pot “tree” to represent ornaments. Let the paint dry.
- Optional step – If you would like to, paint a thin layer of Mod Podge over the entire outer surface of your painted and dried clay pot ornament.
- Cut an approximately 10-inch length of ribbon. Thread the two ends through the hole in the top of the clay pot. Tie the two ends into a large knot to keep the ribbon from slipping back through the hole. (May need to make two knots)
- Place a dot of hot glue onto one side of the wooden star. Press the glued side of the star onto the ribbon, just at the top of the pot.

Clay Pot Ornaments – A Fun Christmas Craft
Ingredients
- 2-inch miniature clay pots
- Wide paint brush, regular or foam
- Small round stipple foam brushes, Q-tips, or regular small brushes
- ¼ inch fabric ribbon (about 10 inches per ornament
- Acrylic paints – green plus assorted other colors (see post notes)
- 1-inch wooden stars
- Glue Gun and glue sticks
- Scissors
- Paint palette
- Mod Podge – optional
Instructions
- Assemble your supplies. Cover the work area with paper or a drop cloth to protect it from paint spills.
- Paint the entire outer surface of the clay pot with a coat of green paint. Let it dry.
- Using the other colors, paint small dots on your clay pot “tree”, to represented ornaments. Let the paint dry.
- Optional step – If you would like to, paint a thin layer of Mod Podge over the entire outer surface of your painted and dried clay pot ornament.
- Cut an approximately 10-inch length of ribbon. Thread the two ends through the hole in the top of the clay pot. Tie the two ends into a large knot, to keep the ribbon from slipping back through the hole. (May need to make two knots)
- Place a dot of hot glue onto one side of the wooden star. Press the glued side of the star onto the ribbon, just at the top of the pot.