This post may contain affiliate links. Full disclosure policy

Our cute but compact house had no space for a sewing studio, but it did have three garages! When it came to looking for a corner for a sewing studio, one of those provided ample space for a new garage-to-sewing-room conversion, giving me a bright and airy sewing studio with tons of storage space!
No Space for a Sewing Room? Consider a Garage Sewing Studio
There was nothing wrong with our old house. In fact, we’d put in a lot of effort and remodeling to transform a seventies-era rancher into a home we really enjoyed.
But as time passed, we realized how much walkability mattered to us. Since we couldn’t pick up the house and drop it into a neighborhood with sidewalks, we decided to move.
Our new neighborhood is less than a mile from restaurants, stores, and the movie theater. The house has wonderful windows that let in lots of light, plus room for my piano, and a layout we love.
It’s cute as can be but compact, with zero space for a sewing room. As much as I liked the house and neighborhood, that was almost a deal-breaker for me.
Quilting and sewing are my favorite hobbies. I wasn’t about to give it up, not even for a cute house in a friendly, walkable neighborhood.
When I explained that to my husband, pointing out that there was no place to keep my sewing machine, let alone my vast fabric collection, he just shrugged.
“Well, what about the garage?”
He had a point. The house had three garages, and we only have two cars. At twenty by ten feet, the smallest of the garages could give me plenty of space for all my sewing projects.
We bought the house, called our remodeler, and started making plans.
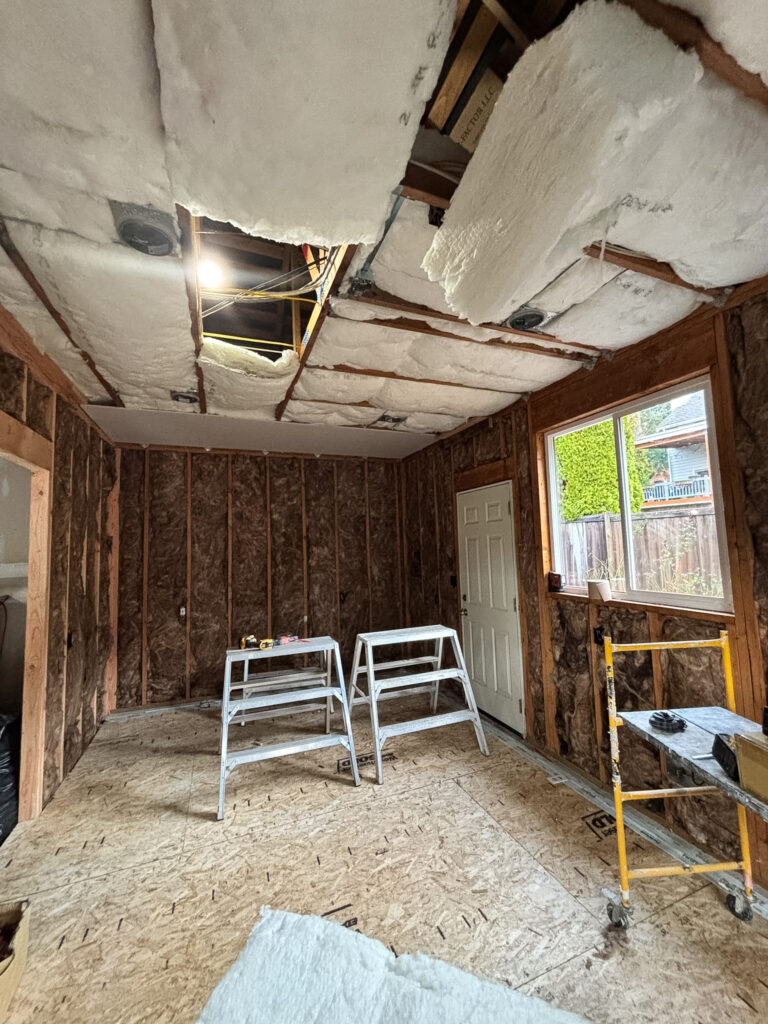
Creating the Shell: Walls, Floors, Ceiling, and Electrical
Walls
Though I didn’t want to sink a ton of money into my garage to sewing room conversion, I did want a bright, comfortable space that I’d enjoy spending time in.
And although I planned to use the space for sewing and quilting, a nicely finished room could do double-duty as a guest room, workout space, or home office. That would be an attractive feature for buyers, should we ever sell in the future.
Also, finishing the shell to a level similar to the rest of the house would make it more pleasant to spend time in. That’s an investment that pays off in a more personal way!
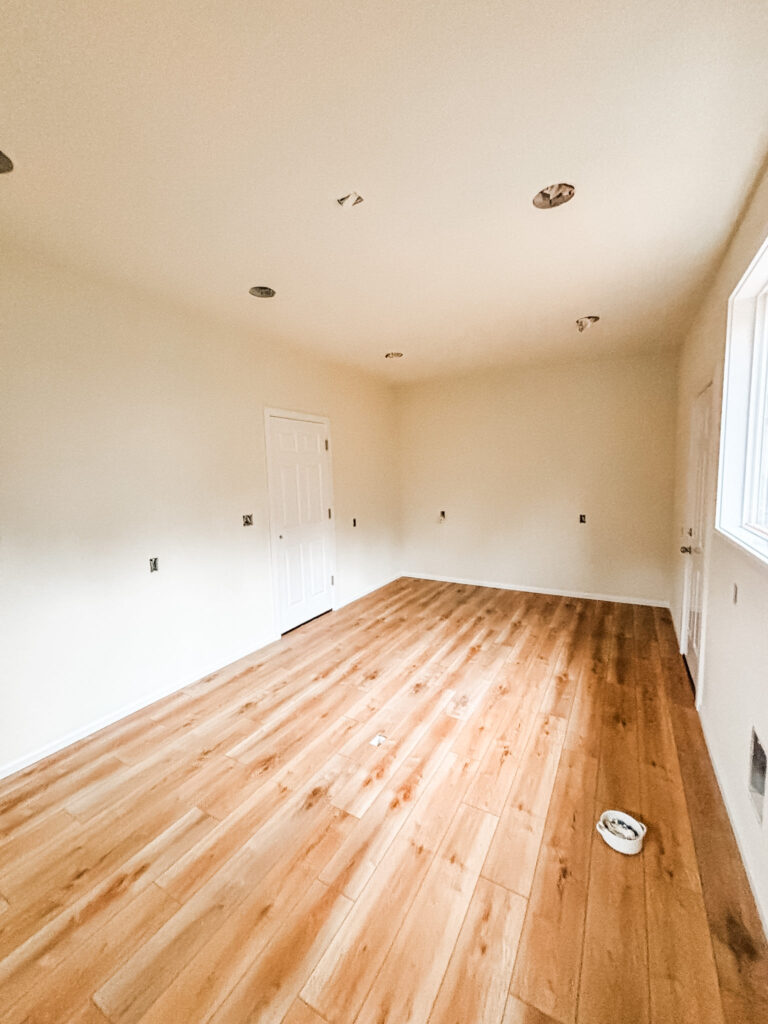
The walls were easy to frame, insulate, sheetrock, and paint. We added some basic trim, too, so it would look similar to the rest of the house.

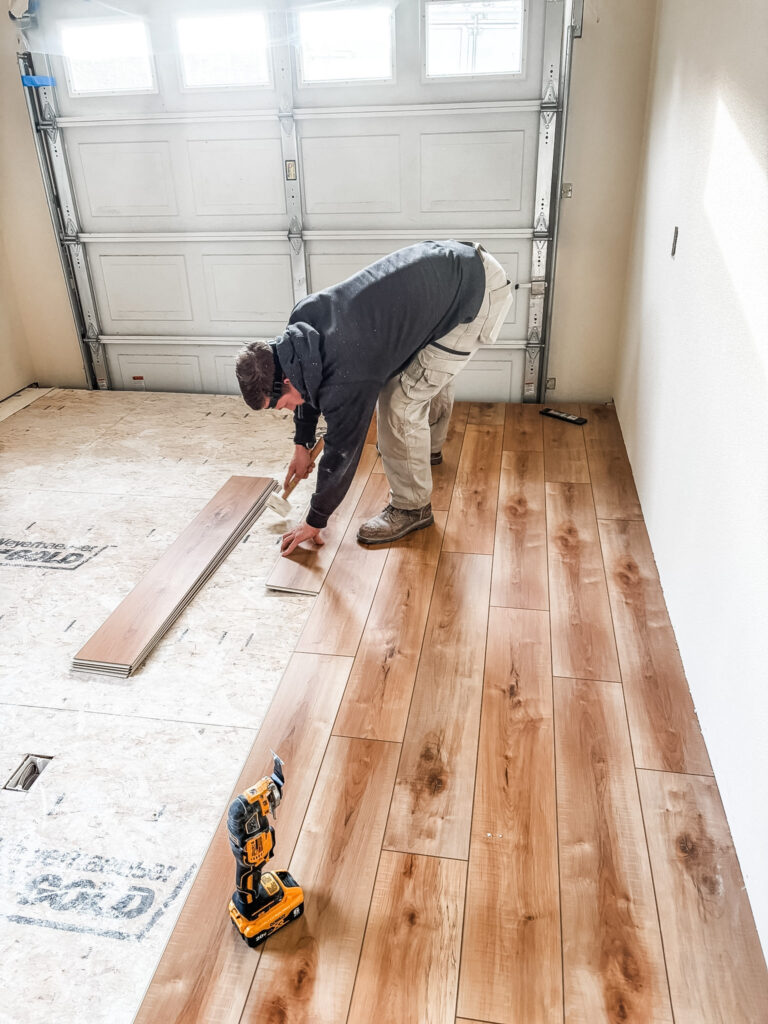
Flooring
Figuring out what to do with the floor was a little tricky and required a few decisions.
The cheapest option would have been to just put some basic foam floor tiles directly onto the concrete. However, winters can get chilly in here in the Pacific Northwest. Also, like most garage floors, ours was graded to allow for drainage. Walking around on cold, tilted floors didn’t sound like fun.
In the end, we decided to frame, raise, and level the floor. Though this meant I would have to step up to enter the room, the airspace below made the floor warmer – and level. My contractor found beautiful LVP flooring for just $4.35 a square foot!
Electric and Lighting
Because I hope to have friends come over for sew days, I made sure we had lots of wall outlets, and another in the middle of the floor. Between sewing machines and irons, quilters need lots of places to plug in!
Good lighting is essential for sewing, so we put in six recessed “can” lights. I love them! The room is bright and cheery, even on the gloomiest of days.
Heating, Cooling, and What to Do With the Garage Door
Heating and cooling were the next things I had to think about.
In the end, a Cadet wall heater seemed to offer the best balance between comfort and budget. Honestly, I wasn’t too sure about it at first. However, I’ve been using it for several weeks now and like it a lot.
For cooling, we just decided to go with a ceiling fan for now. This garage does have a window, so we can always add a portable AC unit later if needed. But I really doubt it will be necessary.
Some garage conversions involve turning the garage into an actual room by removing the garage door. For a couple of reasons, I decided against that.
First, removing the door and adding a full wall and exterior siding would have added a lot to the construction budget. Second, a future buyer might want that third garage. If that were so, all they’d need to do is take out the floor.
So, leaving the garage door in made a lot of sense. But there were a couple of tradeoffs involved.
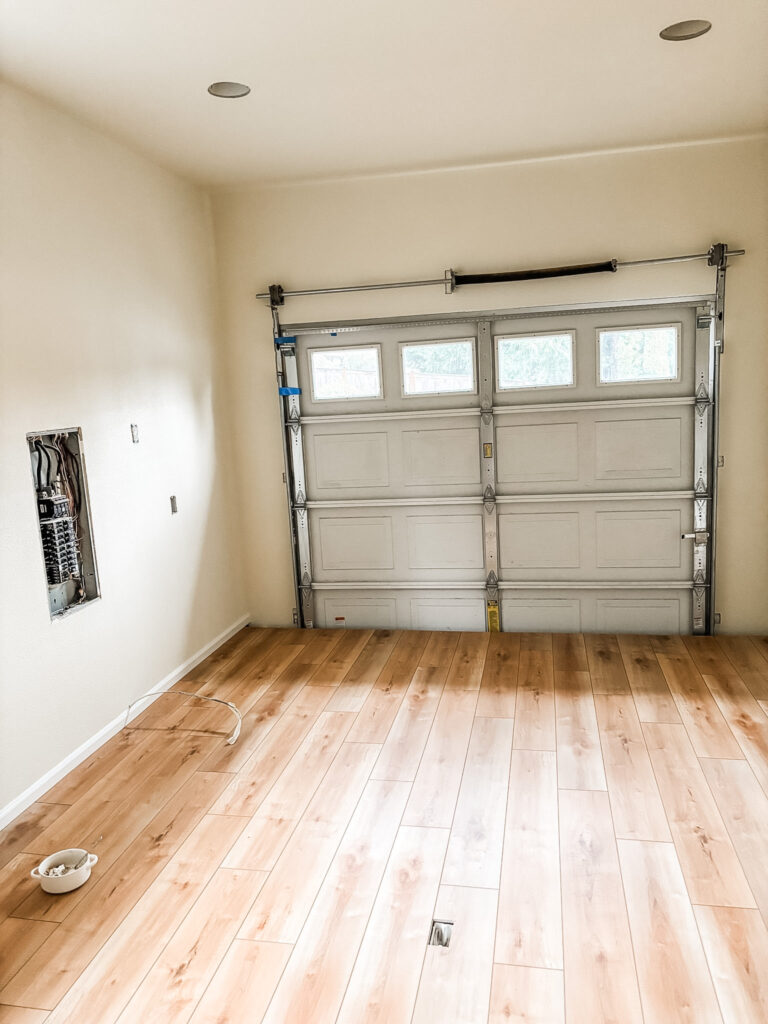
The garage door let in the cold. Also, it was ugly.
Inserting rigid insulation panels in the garage door definitely helped keep out the cold. But even with the shiny foil insulation panels installed, it was something of an eyesore.
Still, the basic sewing room was finished, and looking pretty good!
Storage Solutions for a Sewing Room That Actually Works
The contractors were gone! It was time to move in!
But I quickly realized that the drawers and shelves from my old sewing room didn’t provide nearly enough storage for all my fabric, tools, and sewing notions. Not to mention my space for my yarn and other crafting supplies.
How was I going to store all my stuff? And in a manner that was attractive, efficient, and organized?
IKEA had the answers.
IKEA Cabinets, Tables & More: How I Furnished My Sewing Studio
IKEA BESTA Cabinets for Fabric and Supplies
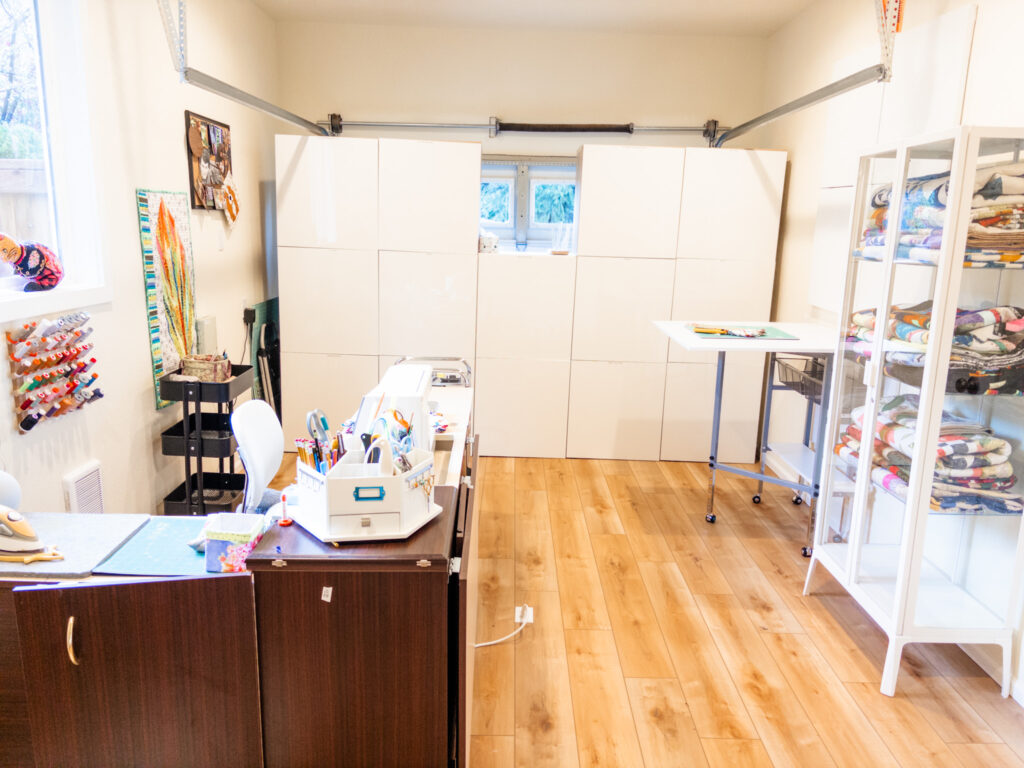
These attractive BESTA storage cabinets have given me tons and tons of storage!
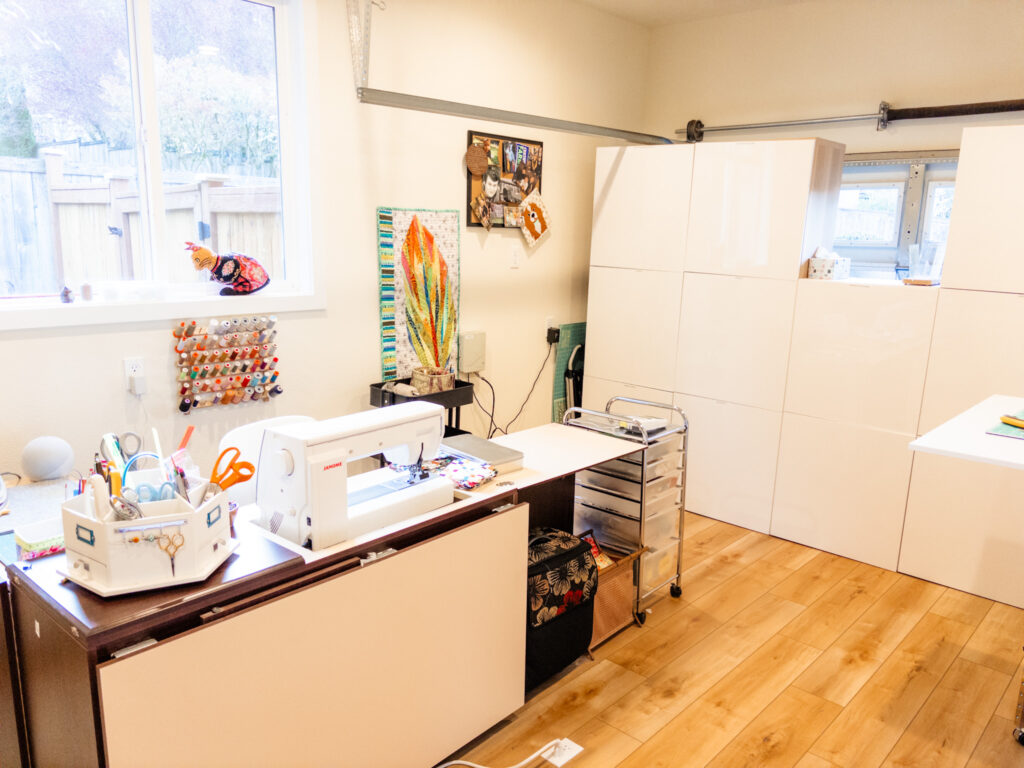
I went with white stained oak effect cabinets and upgraded to high-gloss white doors. I love the sleek, modern look. But there are 38 different options for door color, styles, and finishes. Choosing a different door can increase or lower the price.
Considering how much storage this gave me, these cabinets were a pretty affordable option. ALL my fabric and sewing supplies fit inside. And building a whole “wall” of storage was a great way to camouflage the ugly garage door!
The interior shelving is movable. I used the two upper cabinets of each unit for fabric. I left the lower cabinet without shelving so I could store fabric bolts, boxes, and other larger items.
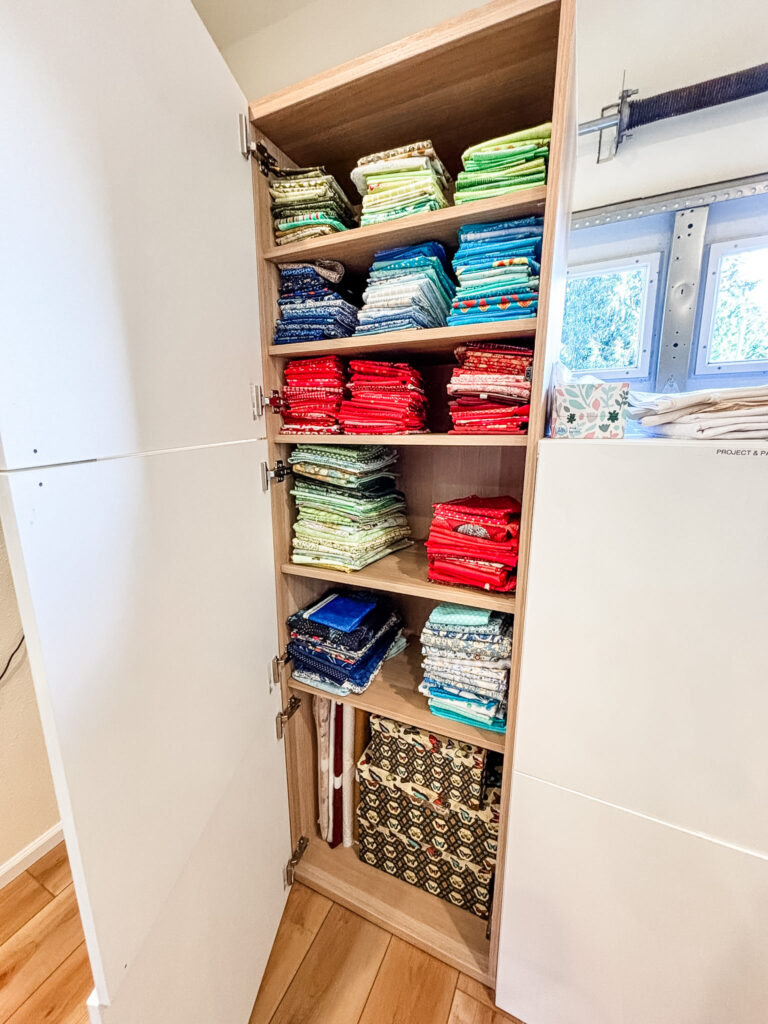
Shelves that I didn’t need for the lower cabinets went into the two-level unit in the center. The extra shelves gave me a place to keep the plastic boxes that contain my projects in progress. It’s so easy to see everything and keep myself organized!
IKEA MILSBO Glass Cabinet for Finished Quilts
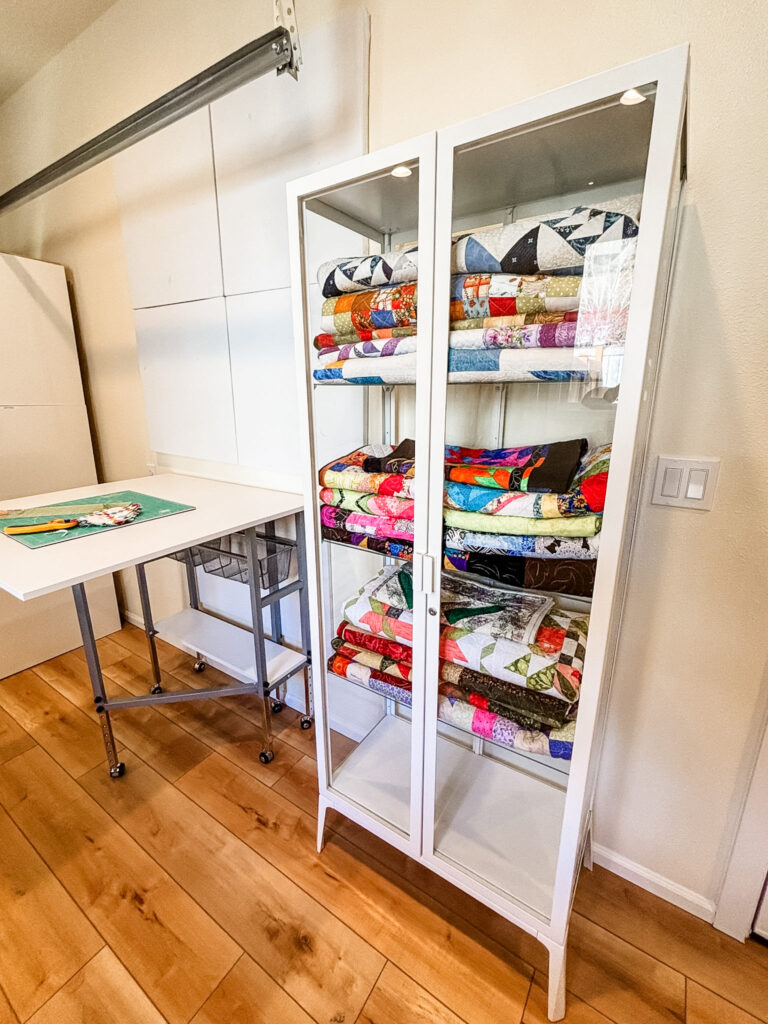
Another great find on IKEA was this glass MILSBO display cabinet. It’s the perfect spot to store and show off my finished quilts, while keeping them free of dust.
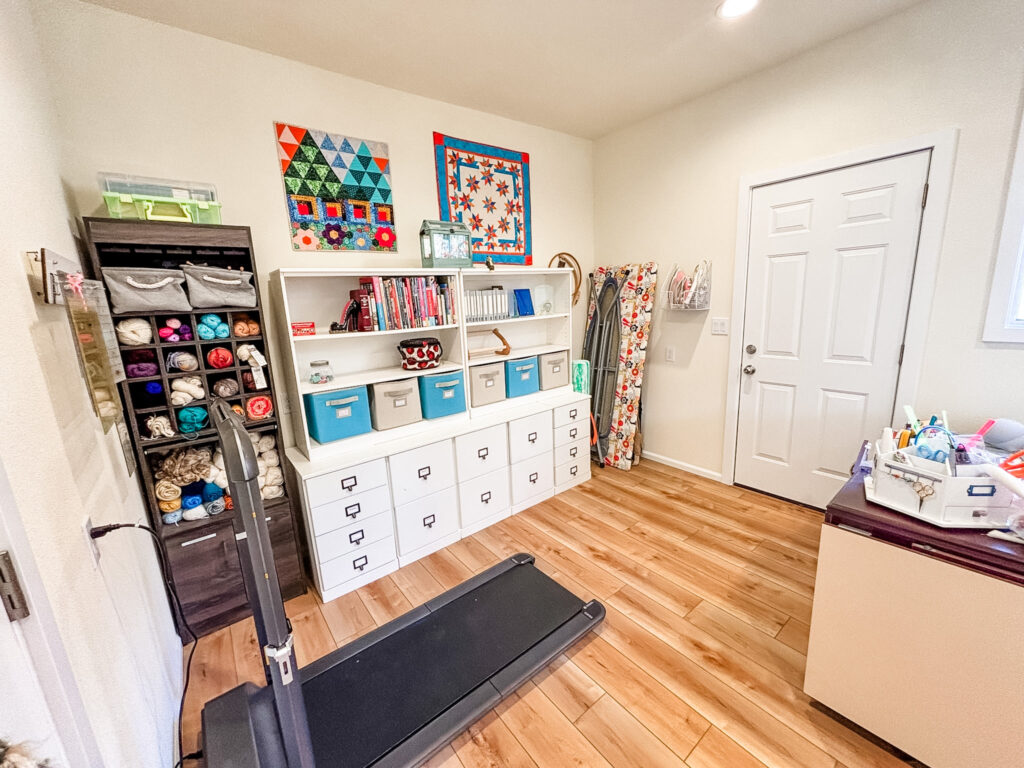
My older cabinets and shelving are used to store my yarn, crafting, and art supplies. There’s so much space now that I can actually keep books and a few keepsakes on the shelves.
The Drop-Leaf Table That Does Double Duty
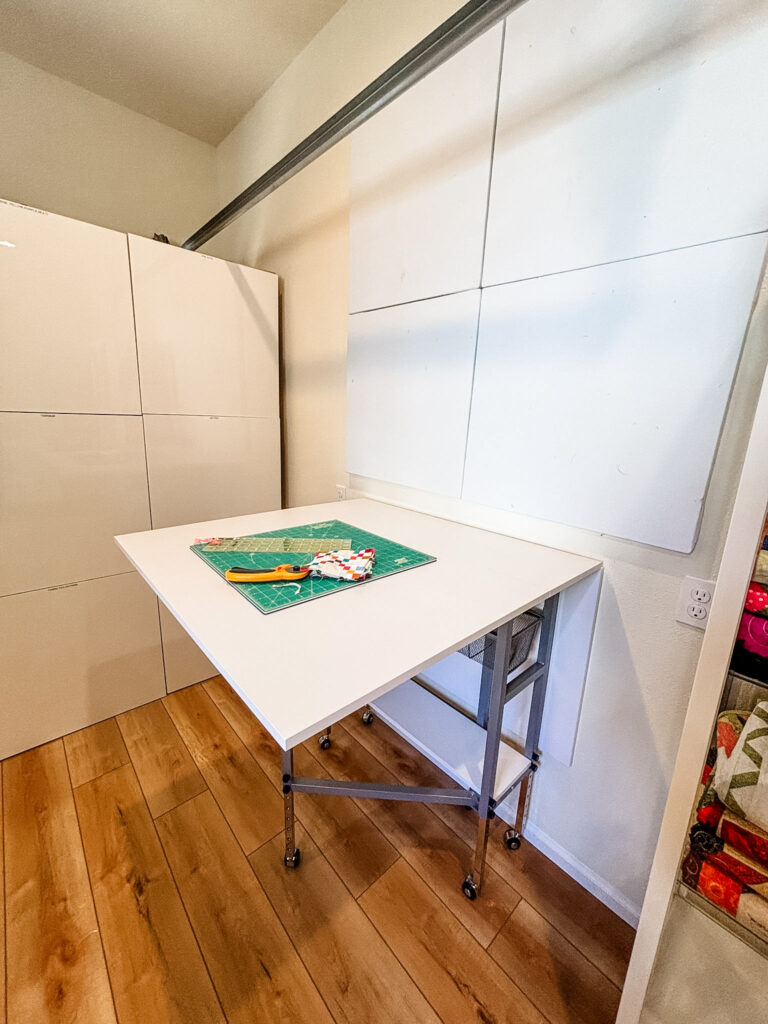
A final purchase was the drop-leaf table that I found Amazon.With stores neatly against the wall when the leaves are down, right under the design wall I made a while back.
But with one or two leaves raised, it’s a great place to cut fabric. Plenty of room here to cut out an entire quilt.
Something else I love about this table is the legs. They’re adjustable! If I invite friends for a sewing day, I can decrease the height and turn it into a sewing table that’s big enough for two.
Now that the conversion is done, I’m so happy with my new sewing room! It’s a bright, cheery, efficient, and all-around wonderful place for stitching and all my creative hobbies.
Thanks for letting me show it to you!