This post may contain affiliate links. Full disclosure policy
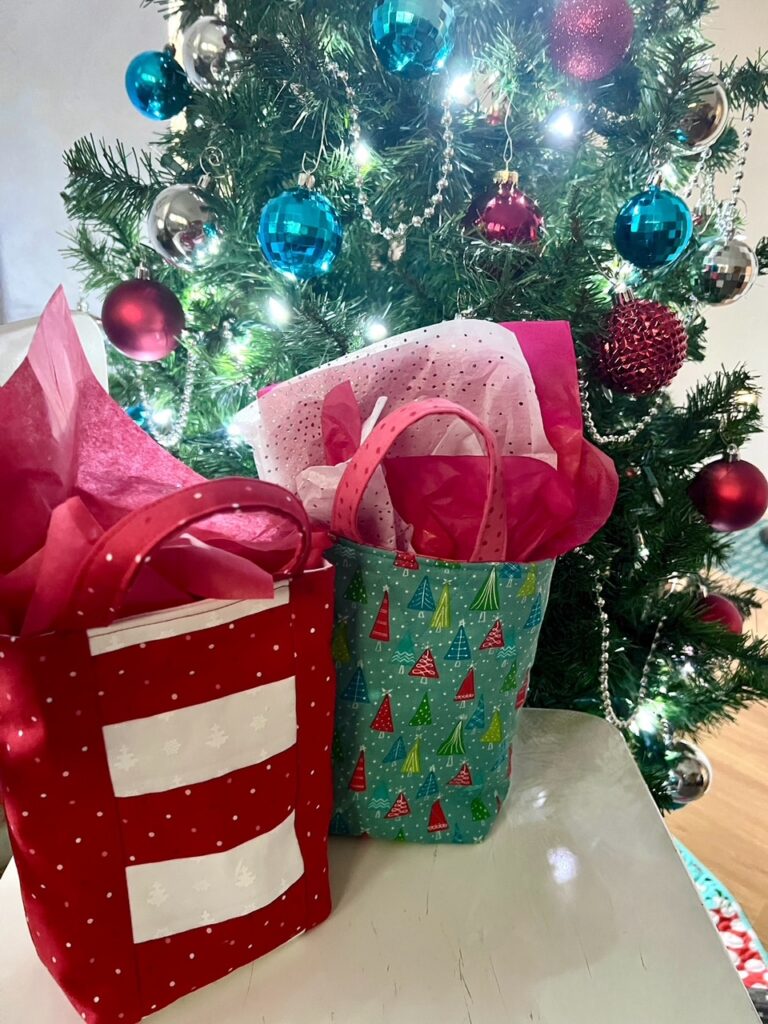
These easy, fun-to-sew, super cute DIY Fabric Gift Bags add an extra special touch to holiday gifts. Use year after year to save money, paper, and bother. A great way to use up scrap fabric!
DIY Fabric Gift Bags – A Tutorial from A Talented Friend
If you’ve been following my blog posts for any length of time, you know I almost never hand the reins off to anybody else. Ninety-nine-plus percent of the blog posts you’ll find here are written by yours truly.
But once in a very great while, I ask a friend with special knowledge, skills, or insights to write a guest blog that I know you’ll enjoy. This is one of those times.
One of the things I love about my job is that I get to meet so many interesting, creative people like Ellyn Zinsmeister. We met when I was on tour in Texas many years ago, bonded over books, quilts, and our mutual weird sense of humor, and stayed in touch.
Ellyn is a wonderfully creative and inspiring art quilter, who shares her talents with quilt guilds through her lectures, and with the world as a whole through her blog – Ellyn’s Place. If you love quilts as much as I do, you definitely need to check it out!
Quilters obviously love making quilts. But stitching quicker, stash-busting projects – especially if the end result is something we’ll actually use – can also be fun. And oh-so satisfying!
Today’s tutorial for DIY Fabric Gift Bags ticks off all the boxes. I’m so grateful to Ellyn for showing us how to make these darling gift bags. They’re not only as cute as can be, but they can also be used year after year. And if you’re looking for other handmade ways to fill these DIY Fabric Gift Bags? Check out my series on handmade gifts!
Scroll down and let Ellyn Zinmeister show you how easy it is to make these sweet fabric gift bags for yourself!
What You’ll Need to Make DIY Holiday Gift Bags
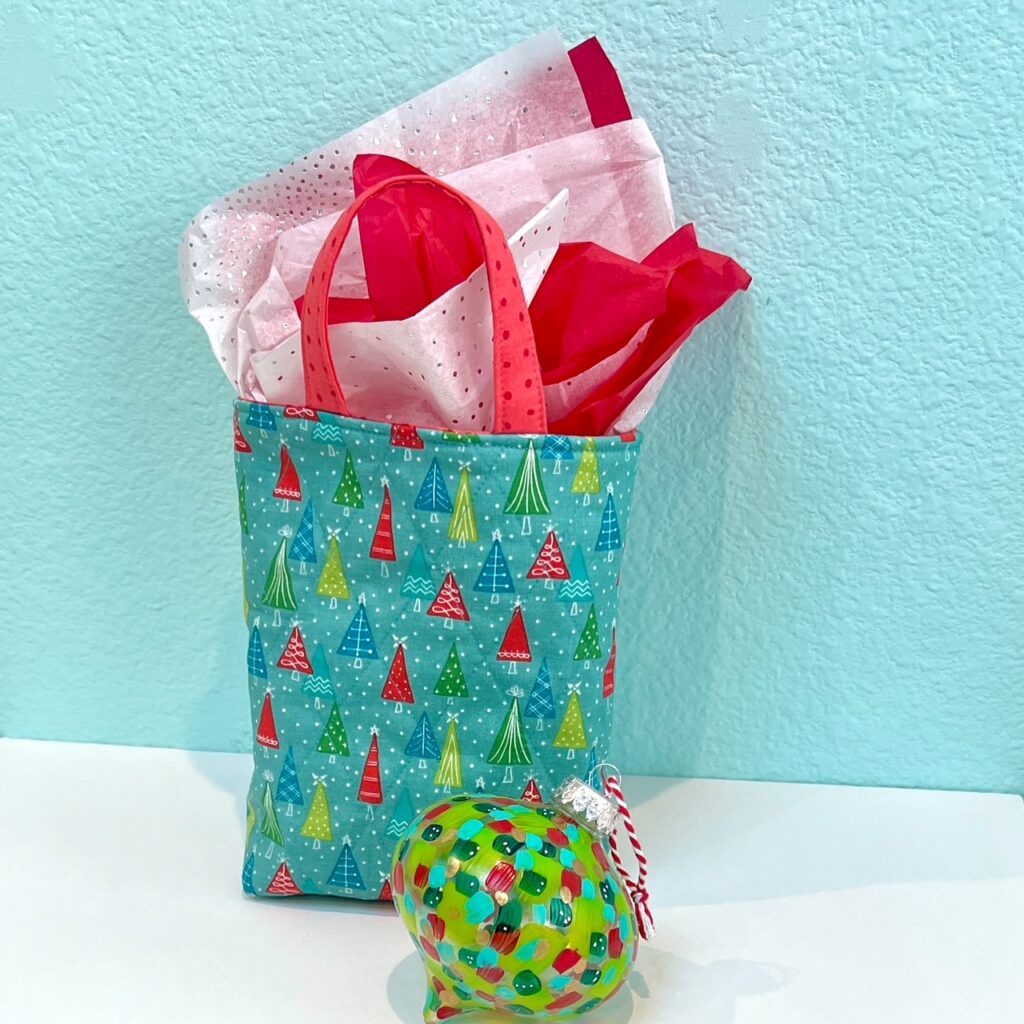
Hi everybody! Ellyn here, popping in with a fun tutorial for a fabric-sewn gift bag to contain your most important holiday gifts. This cute little bag is 6” wide, 7” tall and 3” deep. It’s the perfect size to hold a special ornament, a couple of pairs of socks, or all kinds of small to medium-sized gifts.
Here’s what you’ll need to sew one gift bag:
Outside bag: Fabric 9”x20”
(If your print is directional – see mine in the photo below – cut 2 pieces, 9”x10 1/2”. Use a half-inch seam to sew the bottom edges together, so the print is right side up on front and back.)
Lining: contrasting fabric 9”x20”
2 straps: fabric 2 pieces 9”x3”
Lightweight quilt batting: 10”x21” for the bag, 2 pieces 3/4”x9 for straps
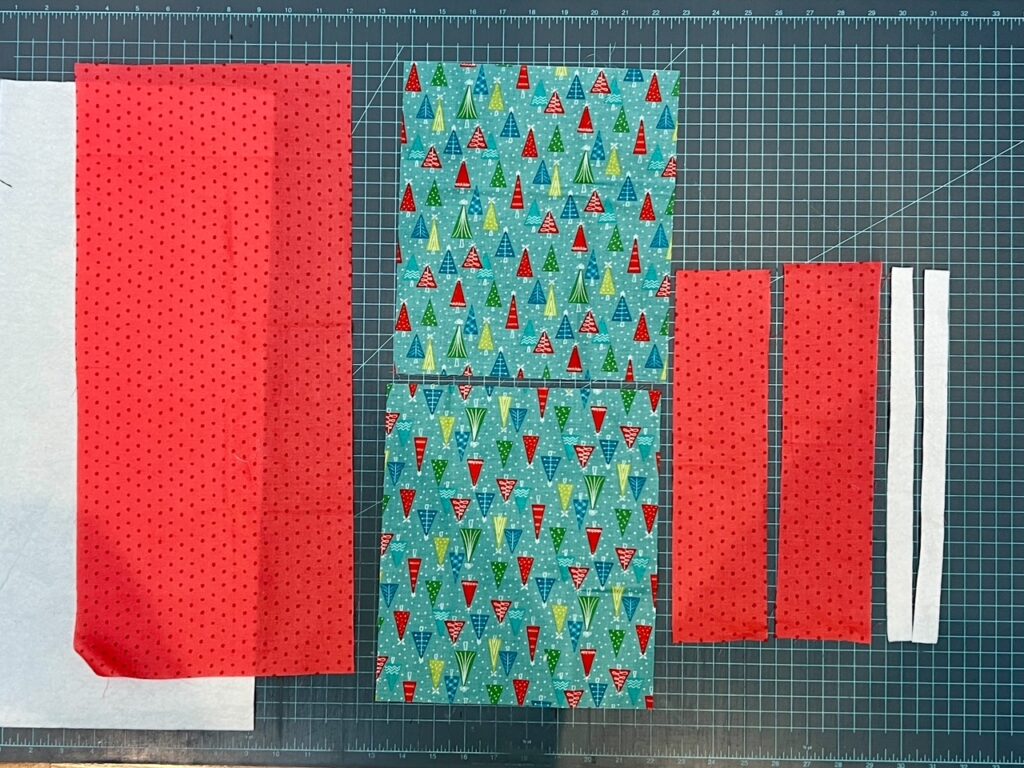
You’ll also need a sewing machine, thread, scissors, ruler, and other basic sewing notions. A walking foot is desirable for stitching your quilt batting to the fabric, but not absolutely necessary.
How To Make Your DIY Fabric Bag
Sewing the Bag Body and Lining
Layer the batting on the wrong side of your outside bag piece and quilt the batting to the fabric. No need to go crazy with the quilting (unless you just want to) a few simple lines of quilting or cross-hatching will do. If you have one, a walking foot can be very helpful for this step.
Trim the quilted piece to 9”x20”. Fold the quilted piece in half with the fold at the bottom of the bag. Cut a rectangle from each corner, 1 1/4” up from the bottom, and 1 1/2” in from the side edge. Do the same with your lining piece.
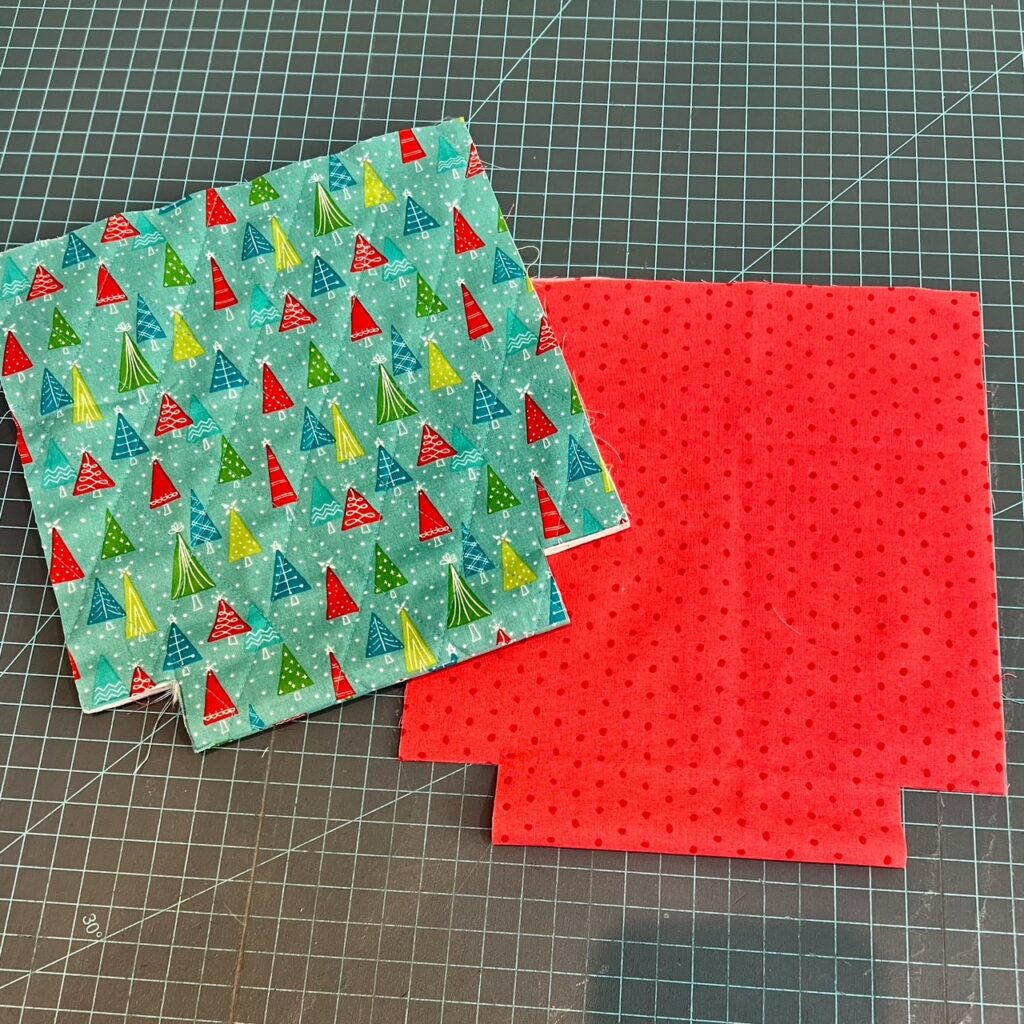
Fold the quilted piece in half with the right sides together. Sew the side seams with a 1/4” seam. (Don’t sew the corner cutouts, just the side seams.)
Repeat with your lining piece, leaving a 3” gap in your stitching on one side seam. This will be used for turning your bag right side out in the end.
Pull out the unstitched corners of the outer bag body, pinching the opposite sides together and centering the fabric on the side seam (see photo below). Stitch across the raw edges of the fabric, creating boxed corners. Repeat with the lining fabric.
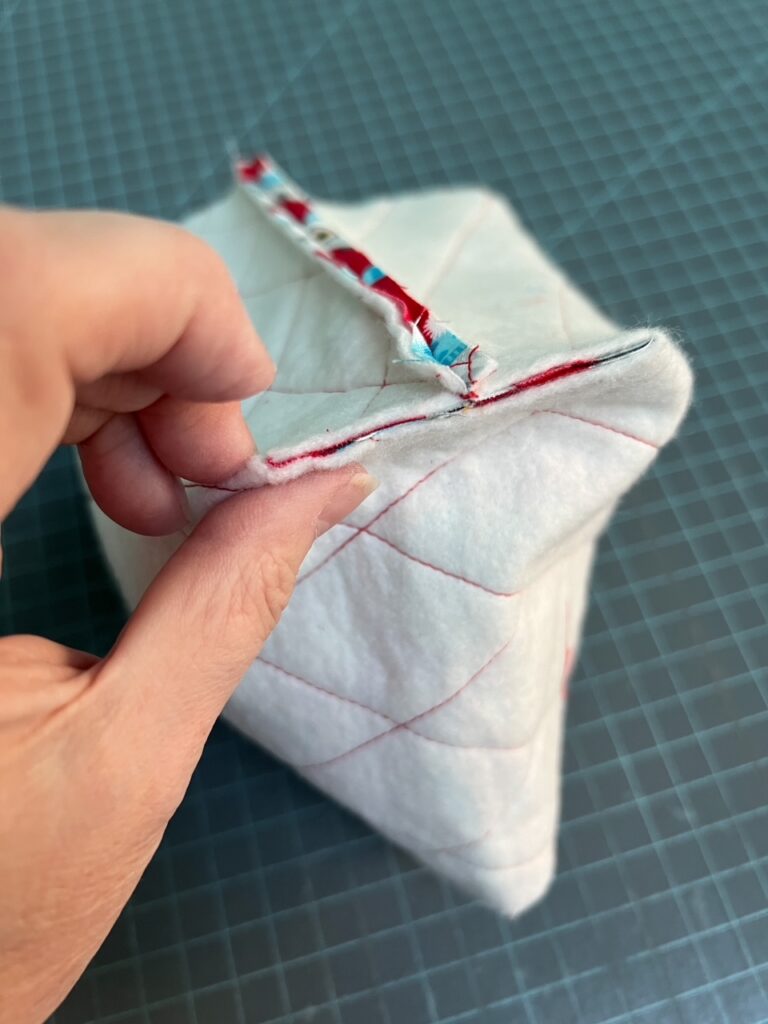
Set the bag body and lining aside while you make the straps.
Sewing and Attaching the Straps
Fold each strap piece in half lengthwise and press, creating a folded center line.
Press each long edge in toward the folded center line and press.
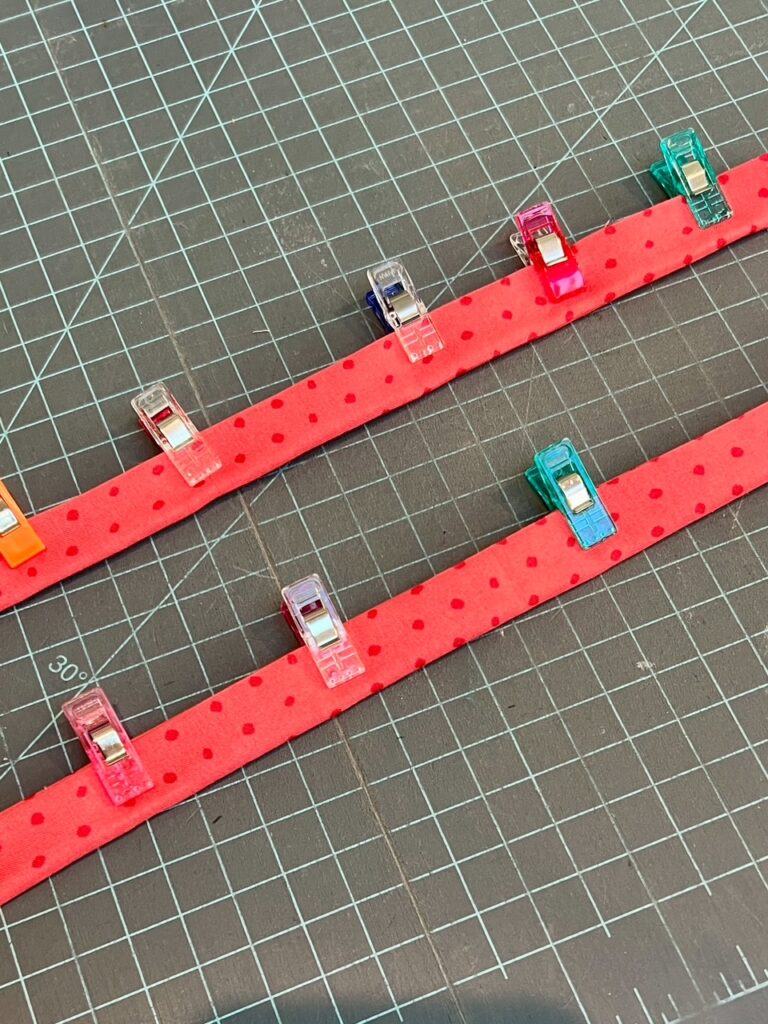
Insert a batting strip under one side of each strap, enclosing the entire piece inside one of the folds. Edge stitch the open edge closed. Add another row of edge stitching along the folded edge.
Lay the top of your bag flat and pin strap piece on the front and the back.
The edges of your strap should be at the 3” and 5 1/2” mark (see photo below). Make sure your straps are not twisted! Baste the straps to the top of the bag.
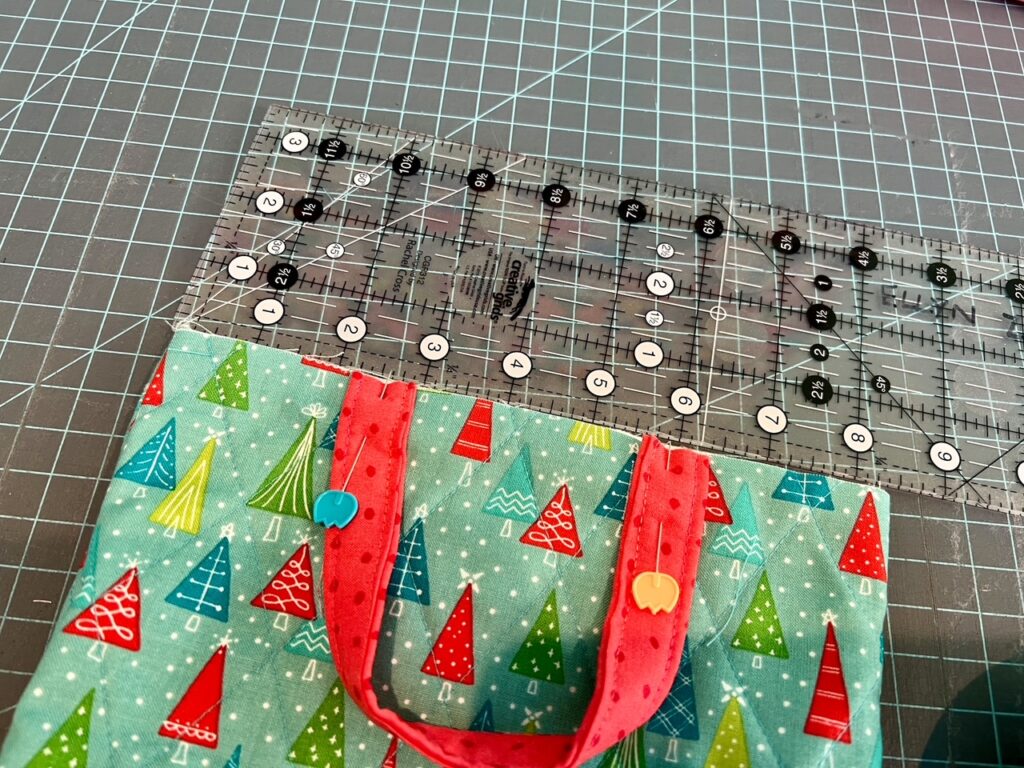
With the lining inside out and the bag body right side out, slide the bag inside the lining. Pin or clip around the top edge, matching side seams. The loop part of your straps will be tucked down between the two layers.
Stitch around the top of the bag using a 1/2” seam.
Turn your bag right side out through the gap in the lining side. Stitch the gap closed and tuck the lining inside the bag. Press the top of your bag.
Edgestitch around the top of the bag leaving the strap loops free.
Look at that! You have a beautiful gift bag for your holiday gift. Woo-hoo!

I even made a second bag piecing stripes into my outside piece. You can use up all of your holiday scraps this way!
Ready to Go! Your DIY Fabric Giftbag
If you decide to make a gift bag, I hope you’ll share your finished projects with me. You can find me on Instagram as @ellynz. You can also visit my blog at www.ellynsplace.blogspot.com.
Thanks to Marie for inviting me to share with you today. I hope your holidays are filled with joy!


