This post may contain affiliate links. Full disclosure policy

Looking for a handmade gift? This DIY Chef’s Apron takes only one yard of fabric and a couple of hours to make. Makes a great gift for your favorite home chef or grill master. A perfect Mother’s Day present!
Handmade Gifts Are Special, Including this DIY Chef’s Apron
If you’ve followed my blog for a while, you’re probably aware that gift giving is one of my love languages.
You also probably know that, as far as I’m concerned, handmade gifts are the best gifts. The time, effort, love, and creativity that goes into crafting a present with your own hands makes it truly priceless.
However, when I go to the trouble to make a gift for someone I love, I want to make sure it’s something they will actually use.
Over the years, I’ve shared lots of tutorials for DIY sewing projects and other handmade items that make good gifts and are actually useful. My DIY Jar Openers fit the bill, and so do my One Hour Tote Bags.
In fact, the tote bags served as the jumping off point for the DIY Chef’s Apron. I had some leftover lightweight canvas leftover from that project that I thought would make super cute aprons.
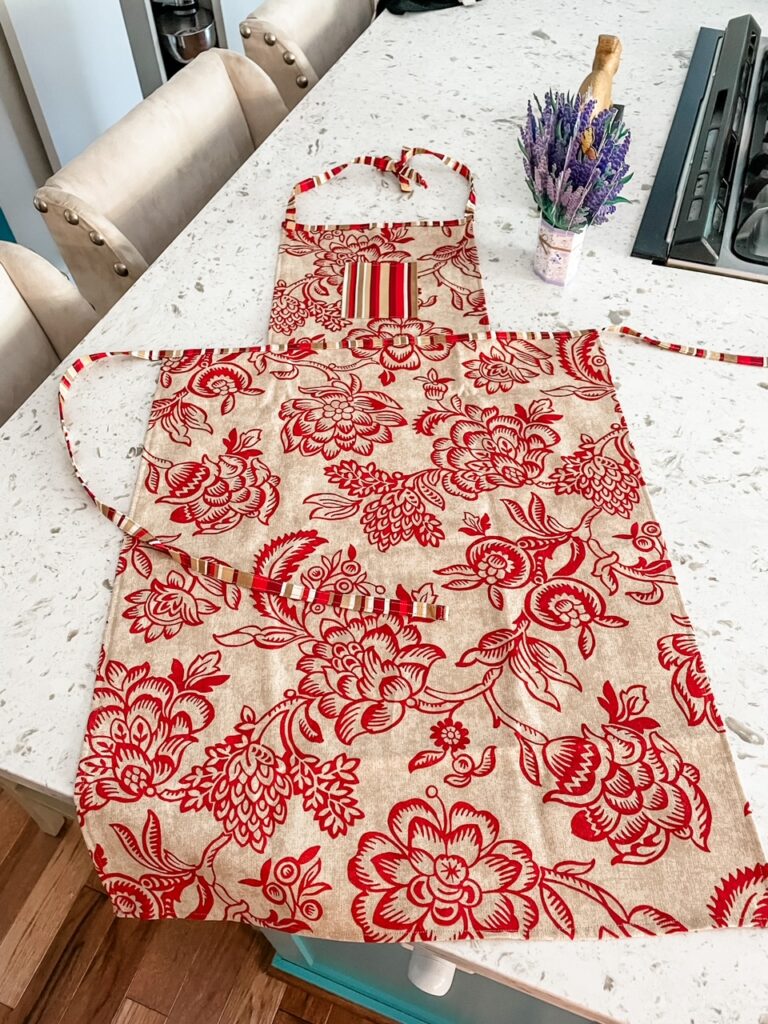
I was right!
Not only are is this DIY Chef’s Apron adorable as all get out, it’s fairly simple to make. This isn’t a project for an absolute beginner, if you’ve got a sewing machine and know how to use it, you should have no trouble making these aprons in two hours or even less.
So let’s get to it!
Handmade Gifts: DIY Chef’s Apron – Fabrics, Notions, And Tools
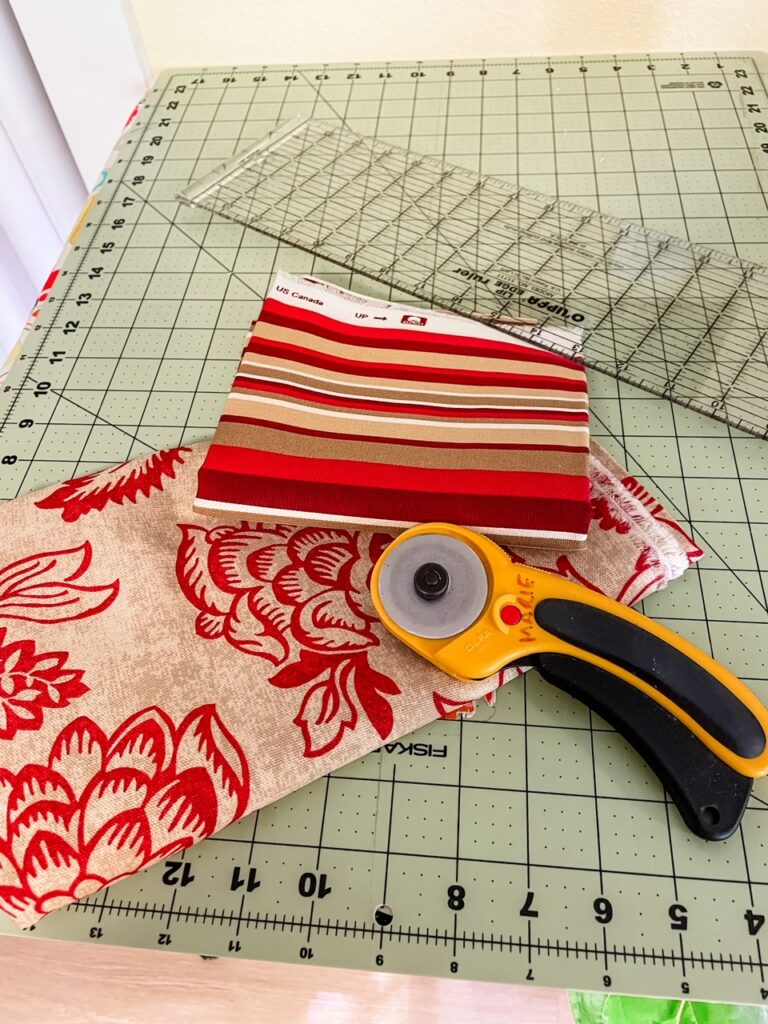
Here’s what you’ll need to make your apron. If you sew, you probably have everything you need already on hand, apart from the fabric. You can find easily find lightweight canvas fabric in lots of pretty patterns and prints at local or national fabric and crafting stores. I got mine at Michael’s.
- ¾ yard lightweight canvas fabric for apron body
- ¼ yard contrasting lightweight fabric for apron trim and pocket
- Thread
- Hand sewing needle
- Rotary cutter, cutting mat, and ruler
- Iron
- Ironing board
Cutting Fabric for the DIY Chef’s Apron
From the ¾ yard apron body fabric cut…
- One 22×22 inch square
- One 12 x 12 inch square
From the ¼ yard contrast fabric cut…
One strip, 4 inches by WOF (Width of Fabric)
- Sub-cut this strip by cutting one 4×5 inch patch from one end (This pocket is optional)
- Cut the remaining strip in half lengthwise, creating two 2-inch strips, approximately 38 inches in length.
One strip, 2 inches by WOF (Width of Fabric)
- Sub-cut this strip into one 2 x 11 strip and two 2 x 15 strips
Making the DIY Chef’s Apron for a special Handmade Gift
Once the fabrics are cut out, you’ll be ready to start sewing your apron!
Take note that all seams are ½ inch unless otherwise indicated. There is a lot of top-stitching in this project. Top stitching means sewing very close along the outer edge on the top side of the fabric in a smooth and even line.
This apron really is fairly easy to make. Just be sure to read the directions carefully, take things one step at a time, refer to the photographs, and remember – handmade gifts are worth the effort it takes to make them!
Step One: Making the trim and ties
Place the two 2-inch x 38-inch strips right sides together and sew the short ends together, creating a single strip, two inches by approximately 75 inches.
Fold the short ends of the each of ALL four 2-inch strips toward the wrong side of the fabric approximately ¼ inch and press with a hot iron.
Fold each of the strips in half lengthwise, wrong sides together, and press, creating a crease down the center of each strip. Working one at a time, lay each strip on the ironing board with the wrong side up.
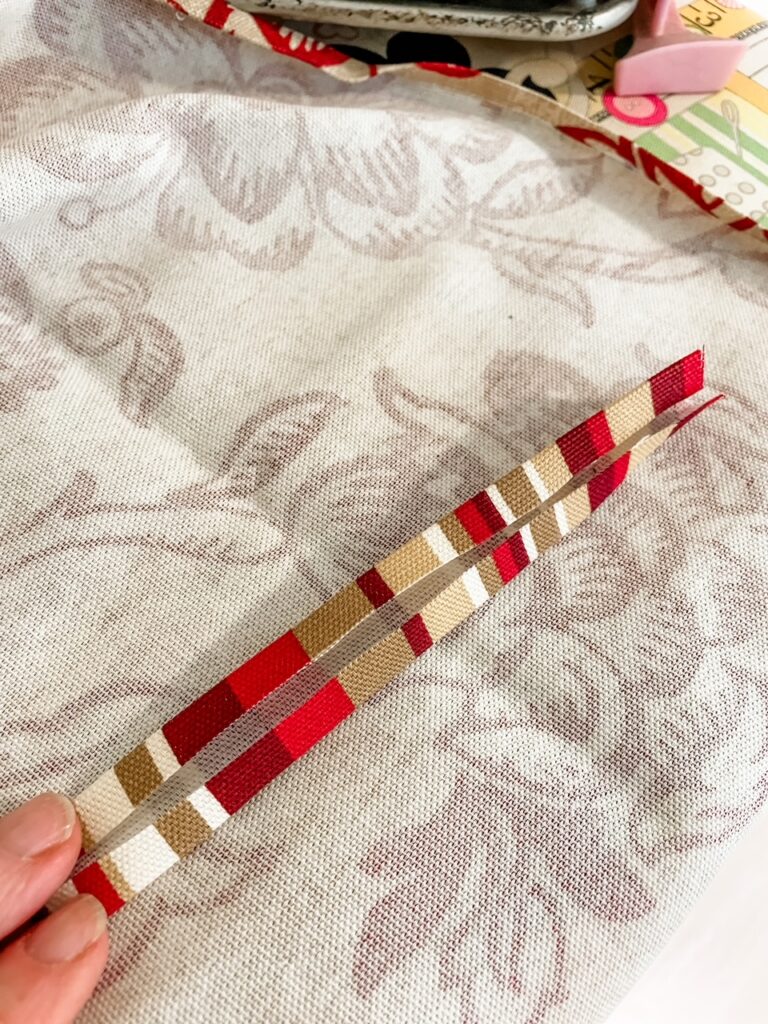
Fold the unfolded, raw edges of each side toward the center crease and press, creating a double-folded strip (similar to folded bias tape). With the side and end edges folded under, press along the center fold once again, using steam to set the seams. Do this with all four strips.
Take the 2×15 inch strips. Topstitch along the long, double folded edges. These are the upper ties of the apron. Set them aside for now.
Do not sew the other strips at this time.
Step Two: Making the lower part of the apron
Fold the left and right side of the 22-inch square under approximately a quarter of an inch and press. Fold over once again and, so the raw edge of the fabric is hidden.
Topstitch along the folded left and right sides of the apron body.
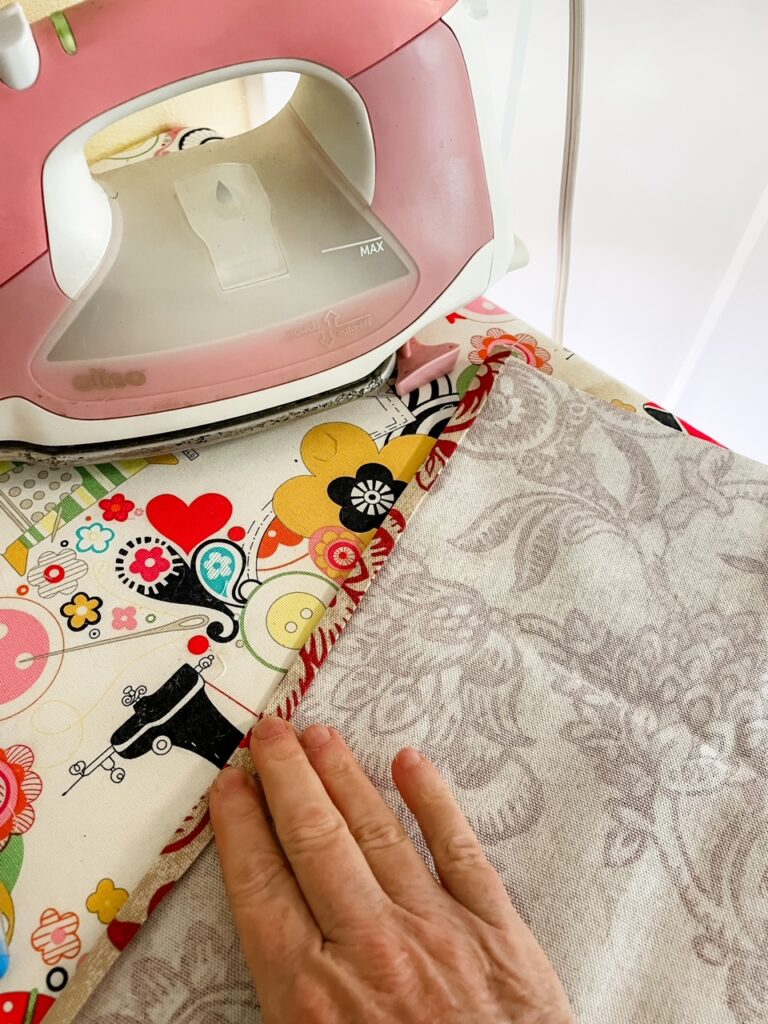
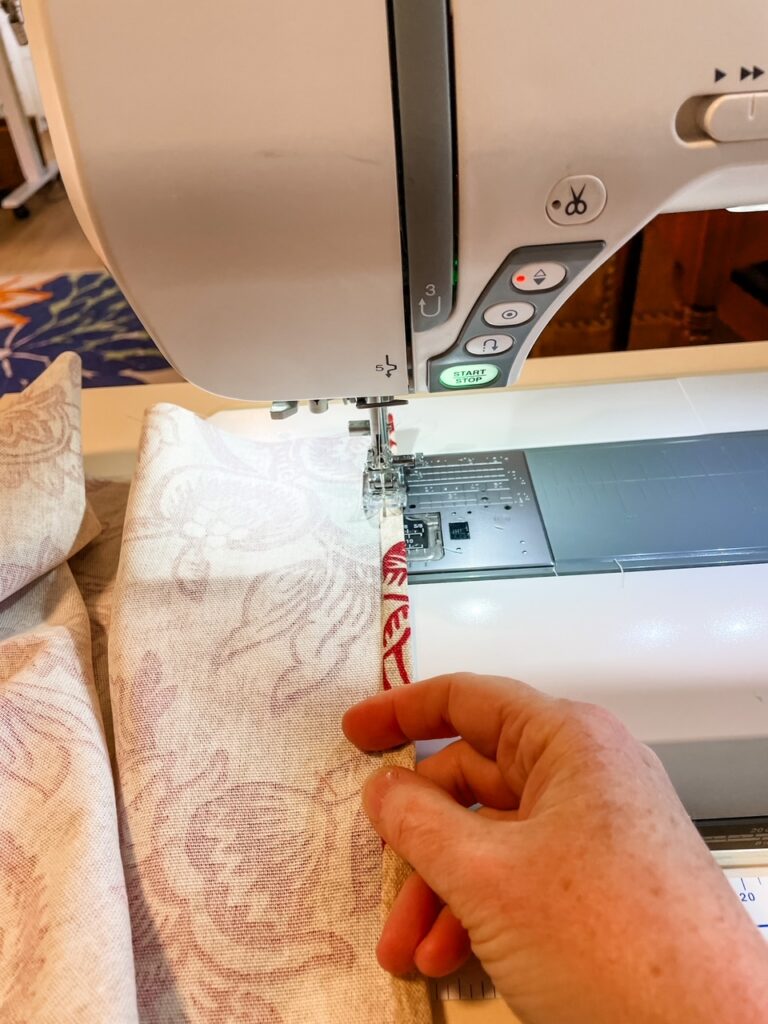
As you did for the above, double fold, press, and top stitch the bottom edge of the apron.
Take the long, 75-inch piece of double-folded trim. This will serve as both a decorative trim and the ties at the waist, so the apron body will be pinned in the middle of the strip, so the ties extend equally on both sides of the apron. To do so…
Unfold the trim and place the top, unsewn edge of the apron inside the folded strip along the crease and matching the mid-point of the apron with the center seam that joined the two strips. Fold the trim over and pin the trim to the apron body, so the raw edge of the fabric is concealed inside the fold. (The unpinned sections of trim will extend approximately 27 inches from both sides of the apron.)
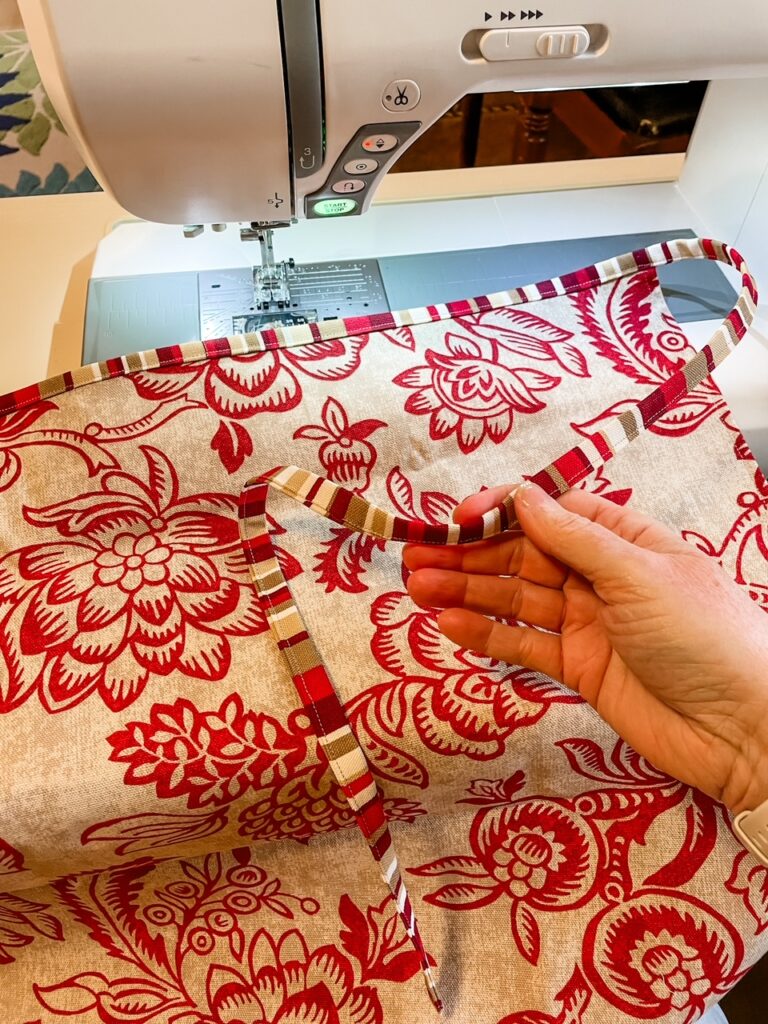
Top stitch the trim along the bottom, double-folded trim edge in a single seam, creating two ties on either end and a decorative trim along the edge of the apron.
Step Three: Making the apron bib
As you did for the lower apron section, double fold, press, and top stitch the 12×12 apron bib square on the left and right sides.
Take the 11-inch double folded piece of contrasting trim. As you did for the trim on the apron body, place the top edge of the apron bib inside the folded piece of trim. Pin so the raw edge of the fabric is concealed within the folded trim and the ends are even.
Topstitch along the folded edge of the trim, making sure to catch sew through all the fabric layers — both double folds of the trim and the apron bib layer). The end edges will be bulky. Sew slowly and coax the fabric along. (At the beginning, you may even need to lift the presser foot and scoot the fabric along a bit before lowering it and taking another stitch.)
Fold the bottom edge of the apron bib under a HALF inch and press, the fold and press again (This fold is wider so it will be easier to attach to the apron body). Do not sew the bottom edge at this time.
If adding the optional pocket to your apron, fold all four edges of the 4×5 square under a quarter inch and press. Top stitch ONLY the upper edge of the pocket at this time.
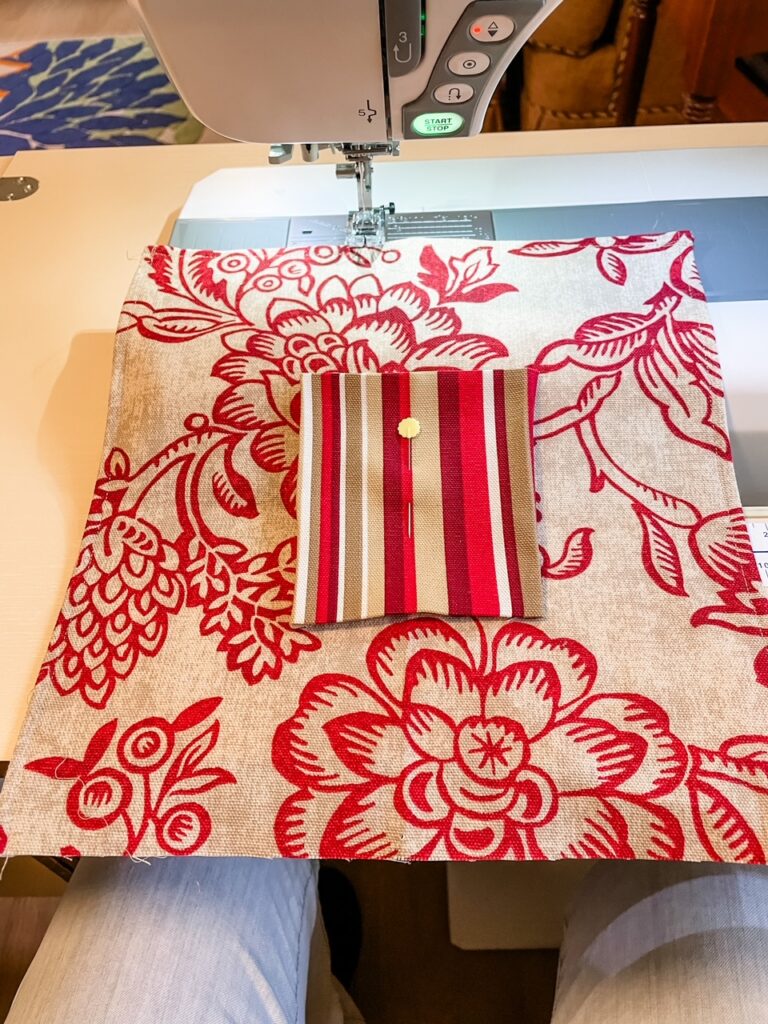
Position the pocket in the center of the apron bib and pin into place. With the edges folded under, top stitch around three sides of the pocket, leaving the previously stitched upper edge open.
Step Four: Joining the bib and the apron
With right side of the bib facing the wrong side of the apron, center and pin the folded and still unsewn bottom bib edge to the apron, aligning it with the the trim. (See photo below. The bib will extend above the lower section of the apron.)
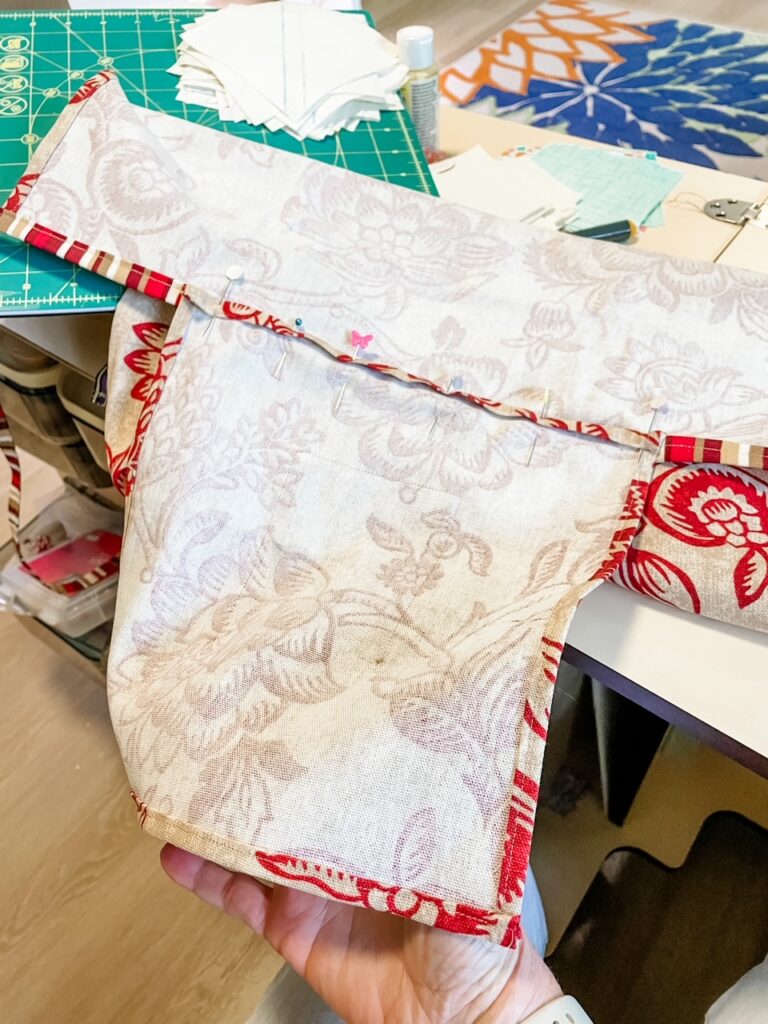
Top stitch the ties and trim once again, this time along the upper, single folded edge of the trim, joining the bib to the apron as you sew this second line of top stitching.
(Though it isn’t necessary for functionality, you can hand sew the bottom, folded edge of the bib to the inside section of the trim if you’d like. If you do so, make sure to only sew through the back fold of the trim, so the stitching can’t be seen from the front.)
Step Five: Attaching the upper ties
Hand-stitch one of the 15-inch upper ties to each upper corner of the apron bib. (The corners will be too bulky for most machines, so hand sewing is easier.
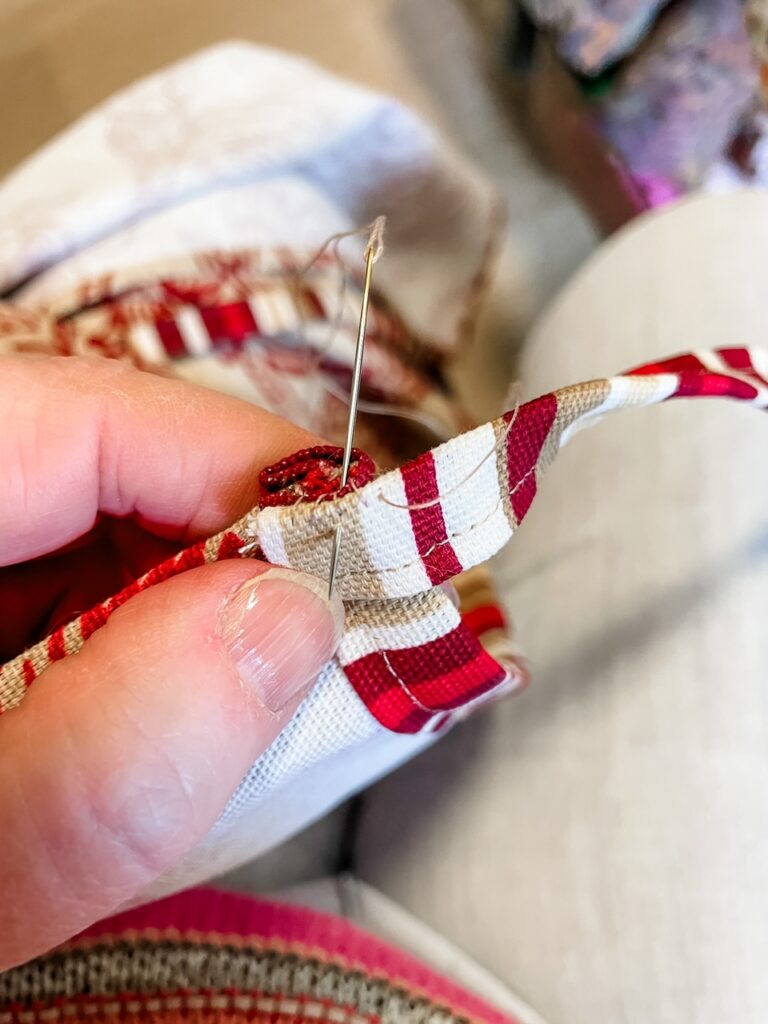
Sew through the back fold of the trim so the stitches won’t be visible from the front, and make sure your stitches are strong and secure.
You did it! Your DIY Chef’s Apron is all done and you now have yourself a handmade gift that anyone would love to receive. Good job!
Looking for other useful, easy to sew handmade gifts?
Check out my One Hour DIY Tote Bags or My DIY Jar Openers!


